
DIY Barbie dolls house, using cardboard and a glue gun
I have always been slightly obsessed with dolls houses, so when the eight year old told me a few weeks ago that she was sad because she missed her Barbie dolls house* I got inspired to make a whole new one.
This little beauty took three weeks from start to finish, and it was the most fun project I've done in a long time.
*she had given it away to a three year old friend in a clean out, six months previously. I had wondered if it was the right thing to do at the time, but I wasn't going to say 'no' to a kid who wanted to de-clutter.

What's the base?
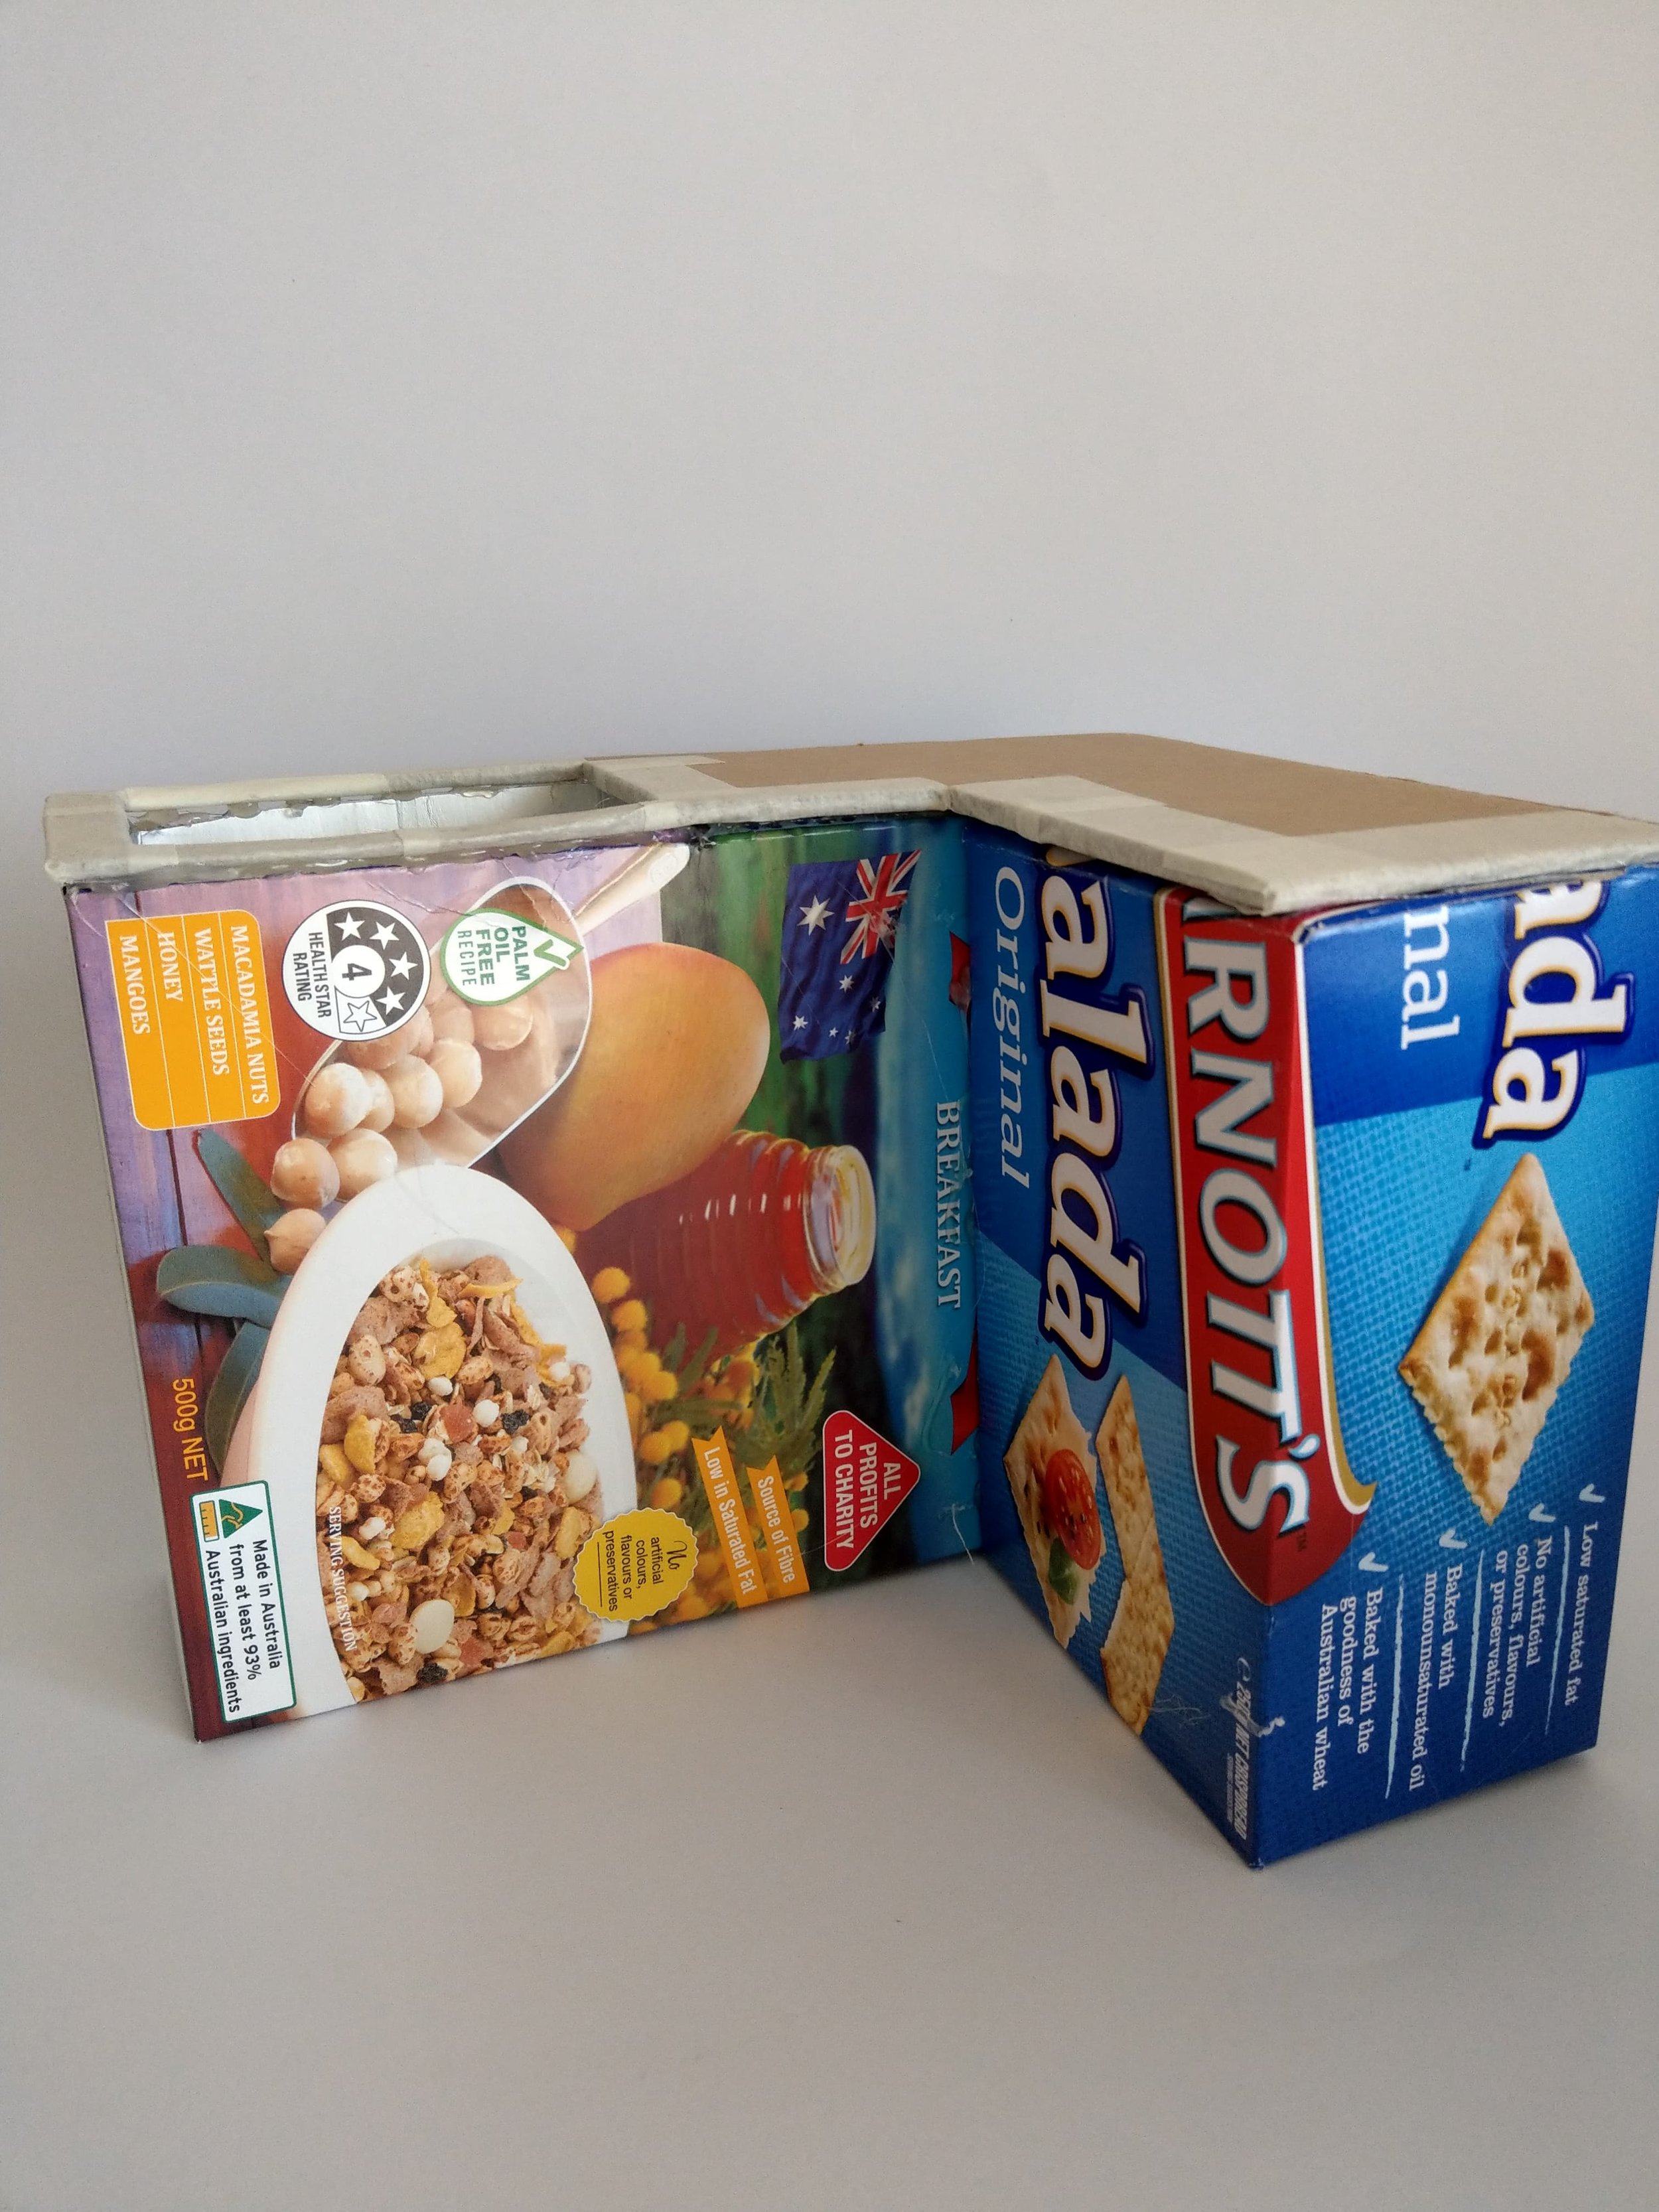
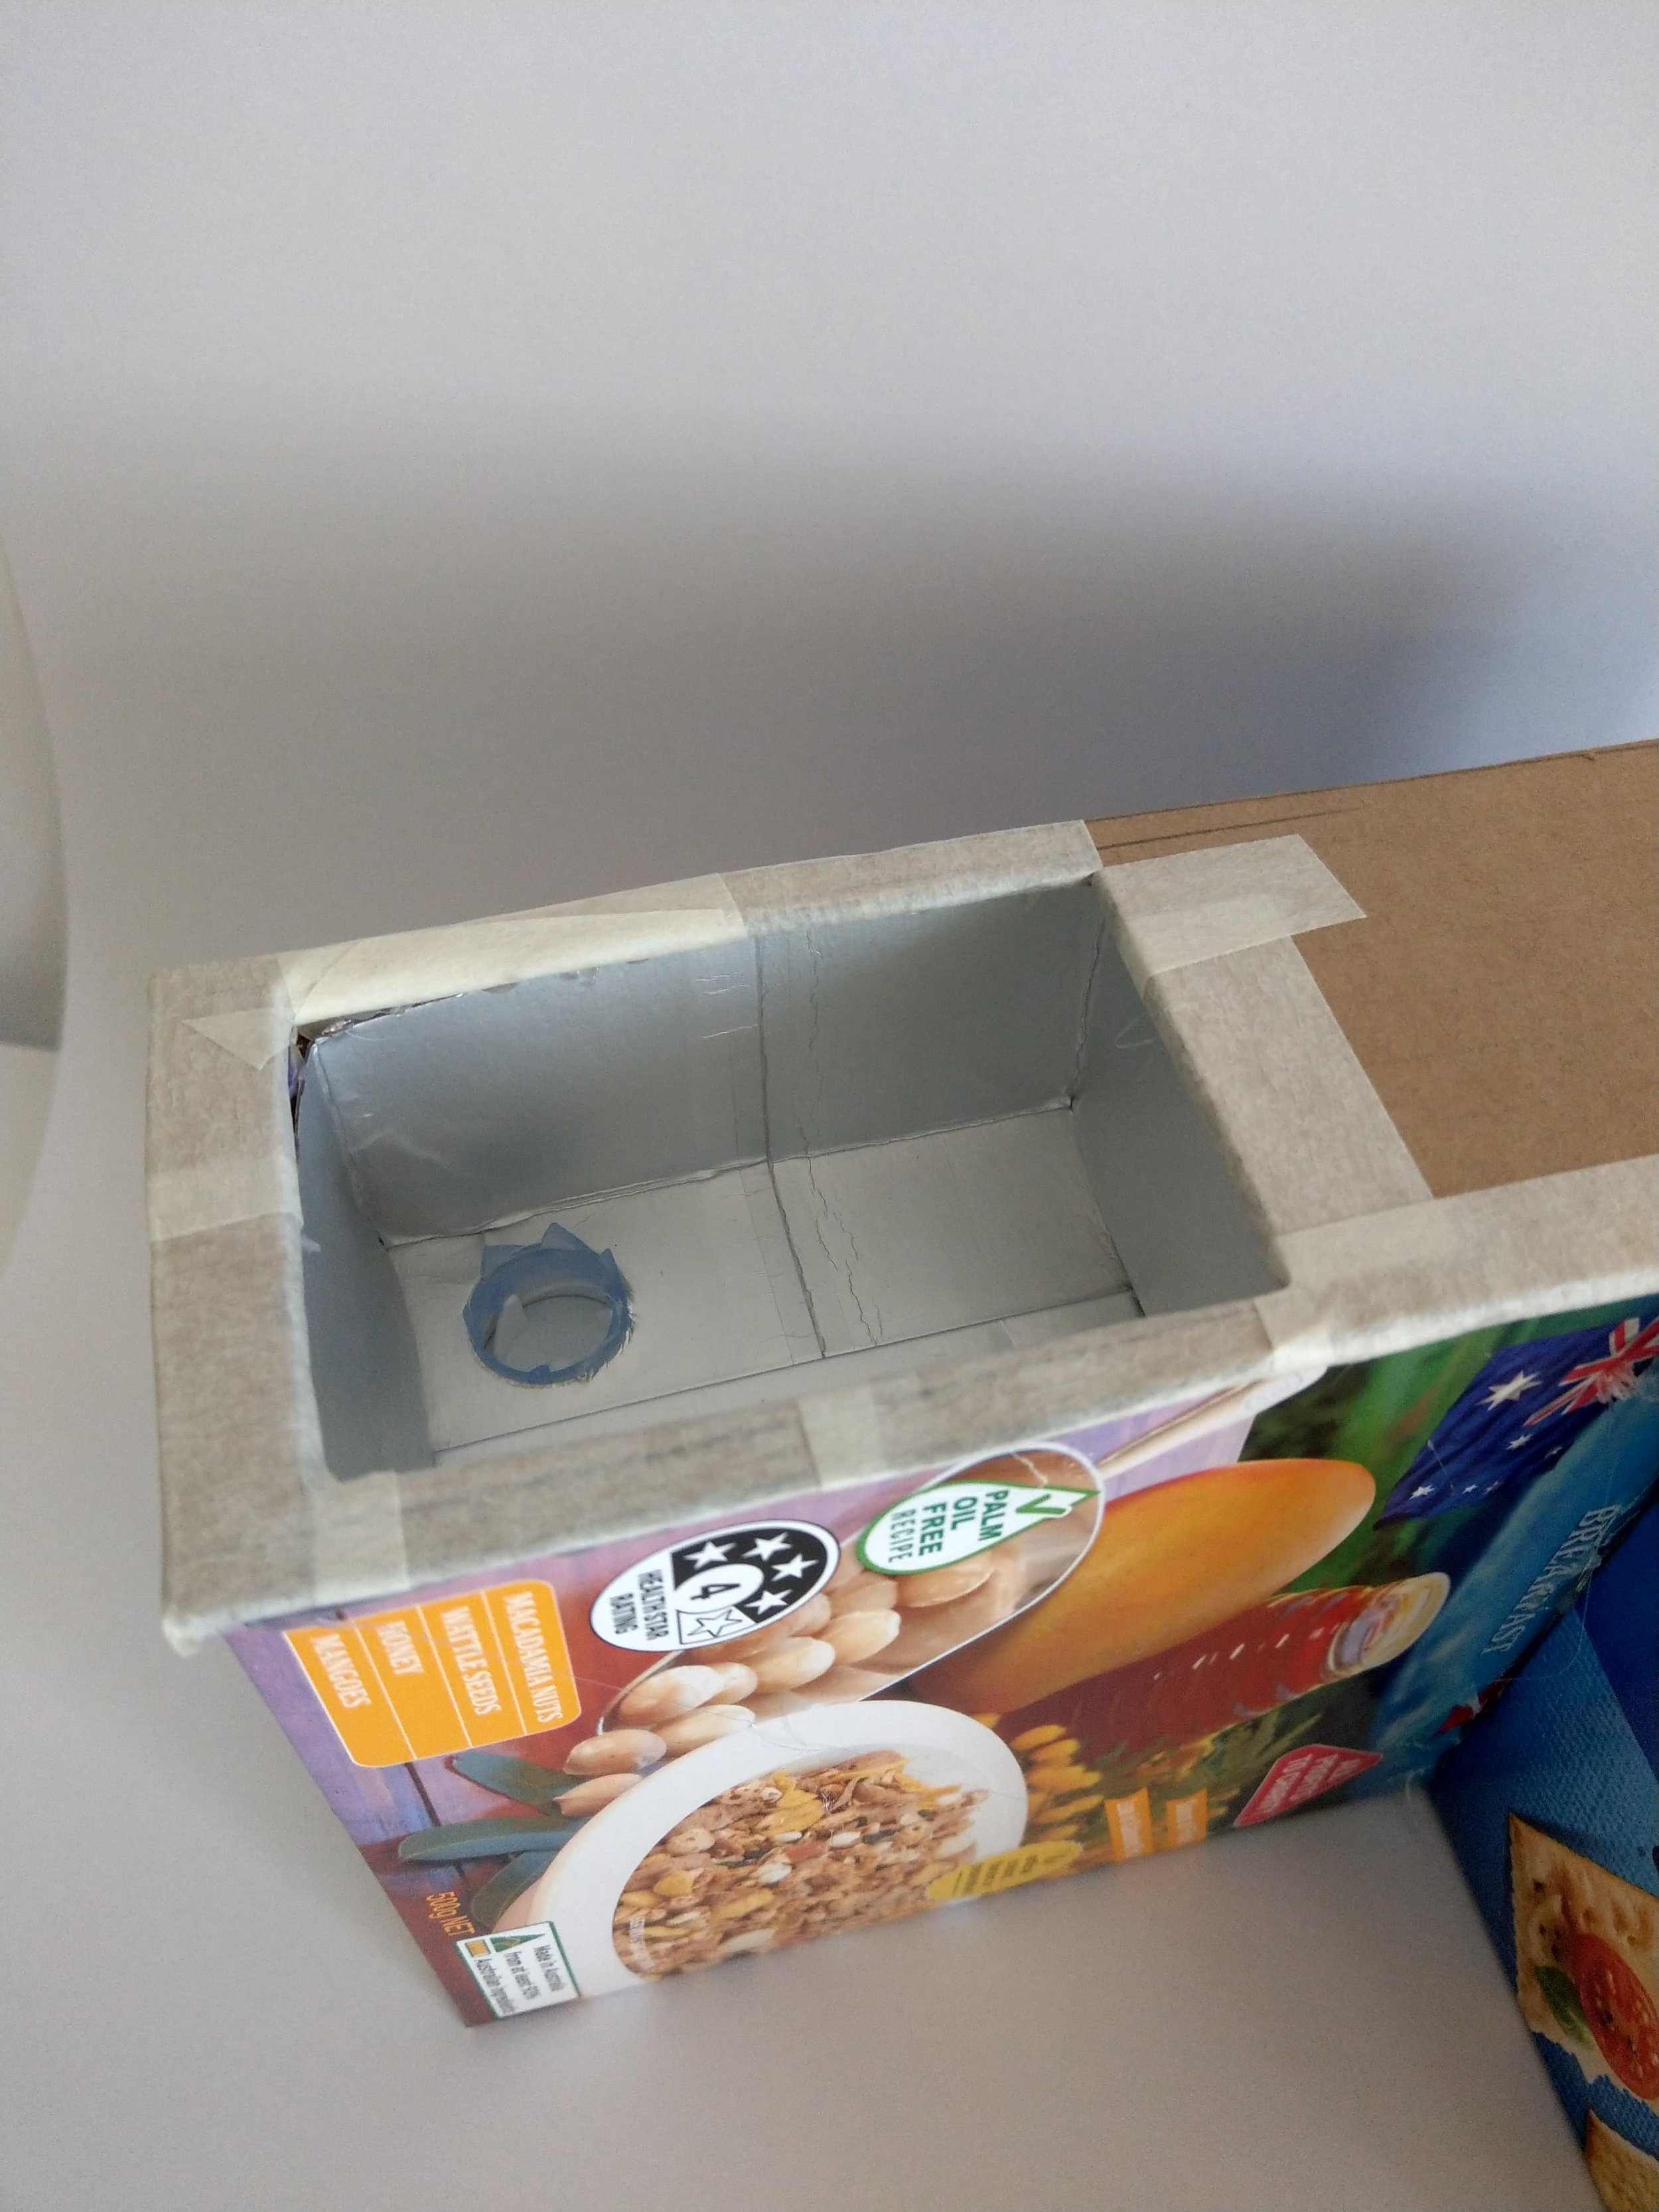
About a week before the 'I miss my dolls house' conversation, we had bought two new compost bins for our garden, which arrived in two identical large cardboard boxes. We had installed the compost bins but I hadn't yet recycled the boxes. "I might find something to do with them," I had said to my husband. Happily they were exactly the right dimensions to create a house out of.
The eight year old was pretty happy to help me paint the outsides of them, and lent a hand at various points throughout the project. By the end, she felt invested in it too, which was a lovely extra outcome for her.
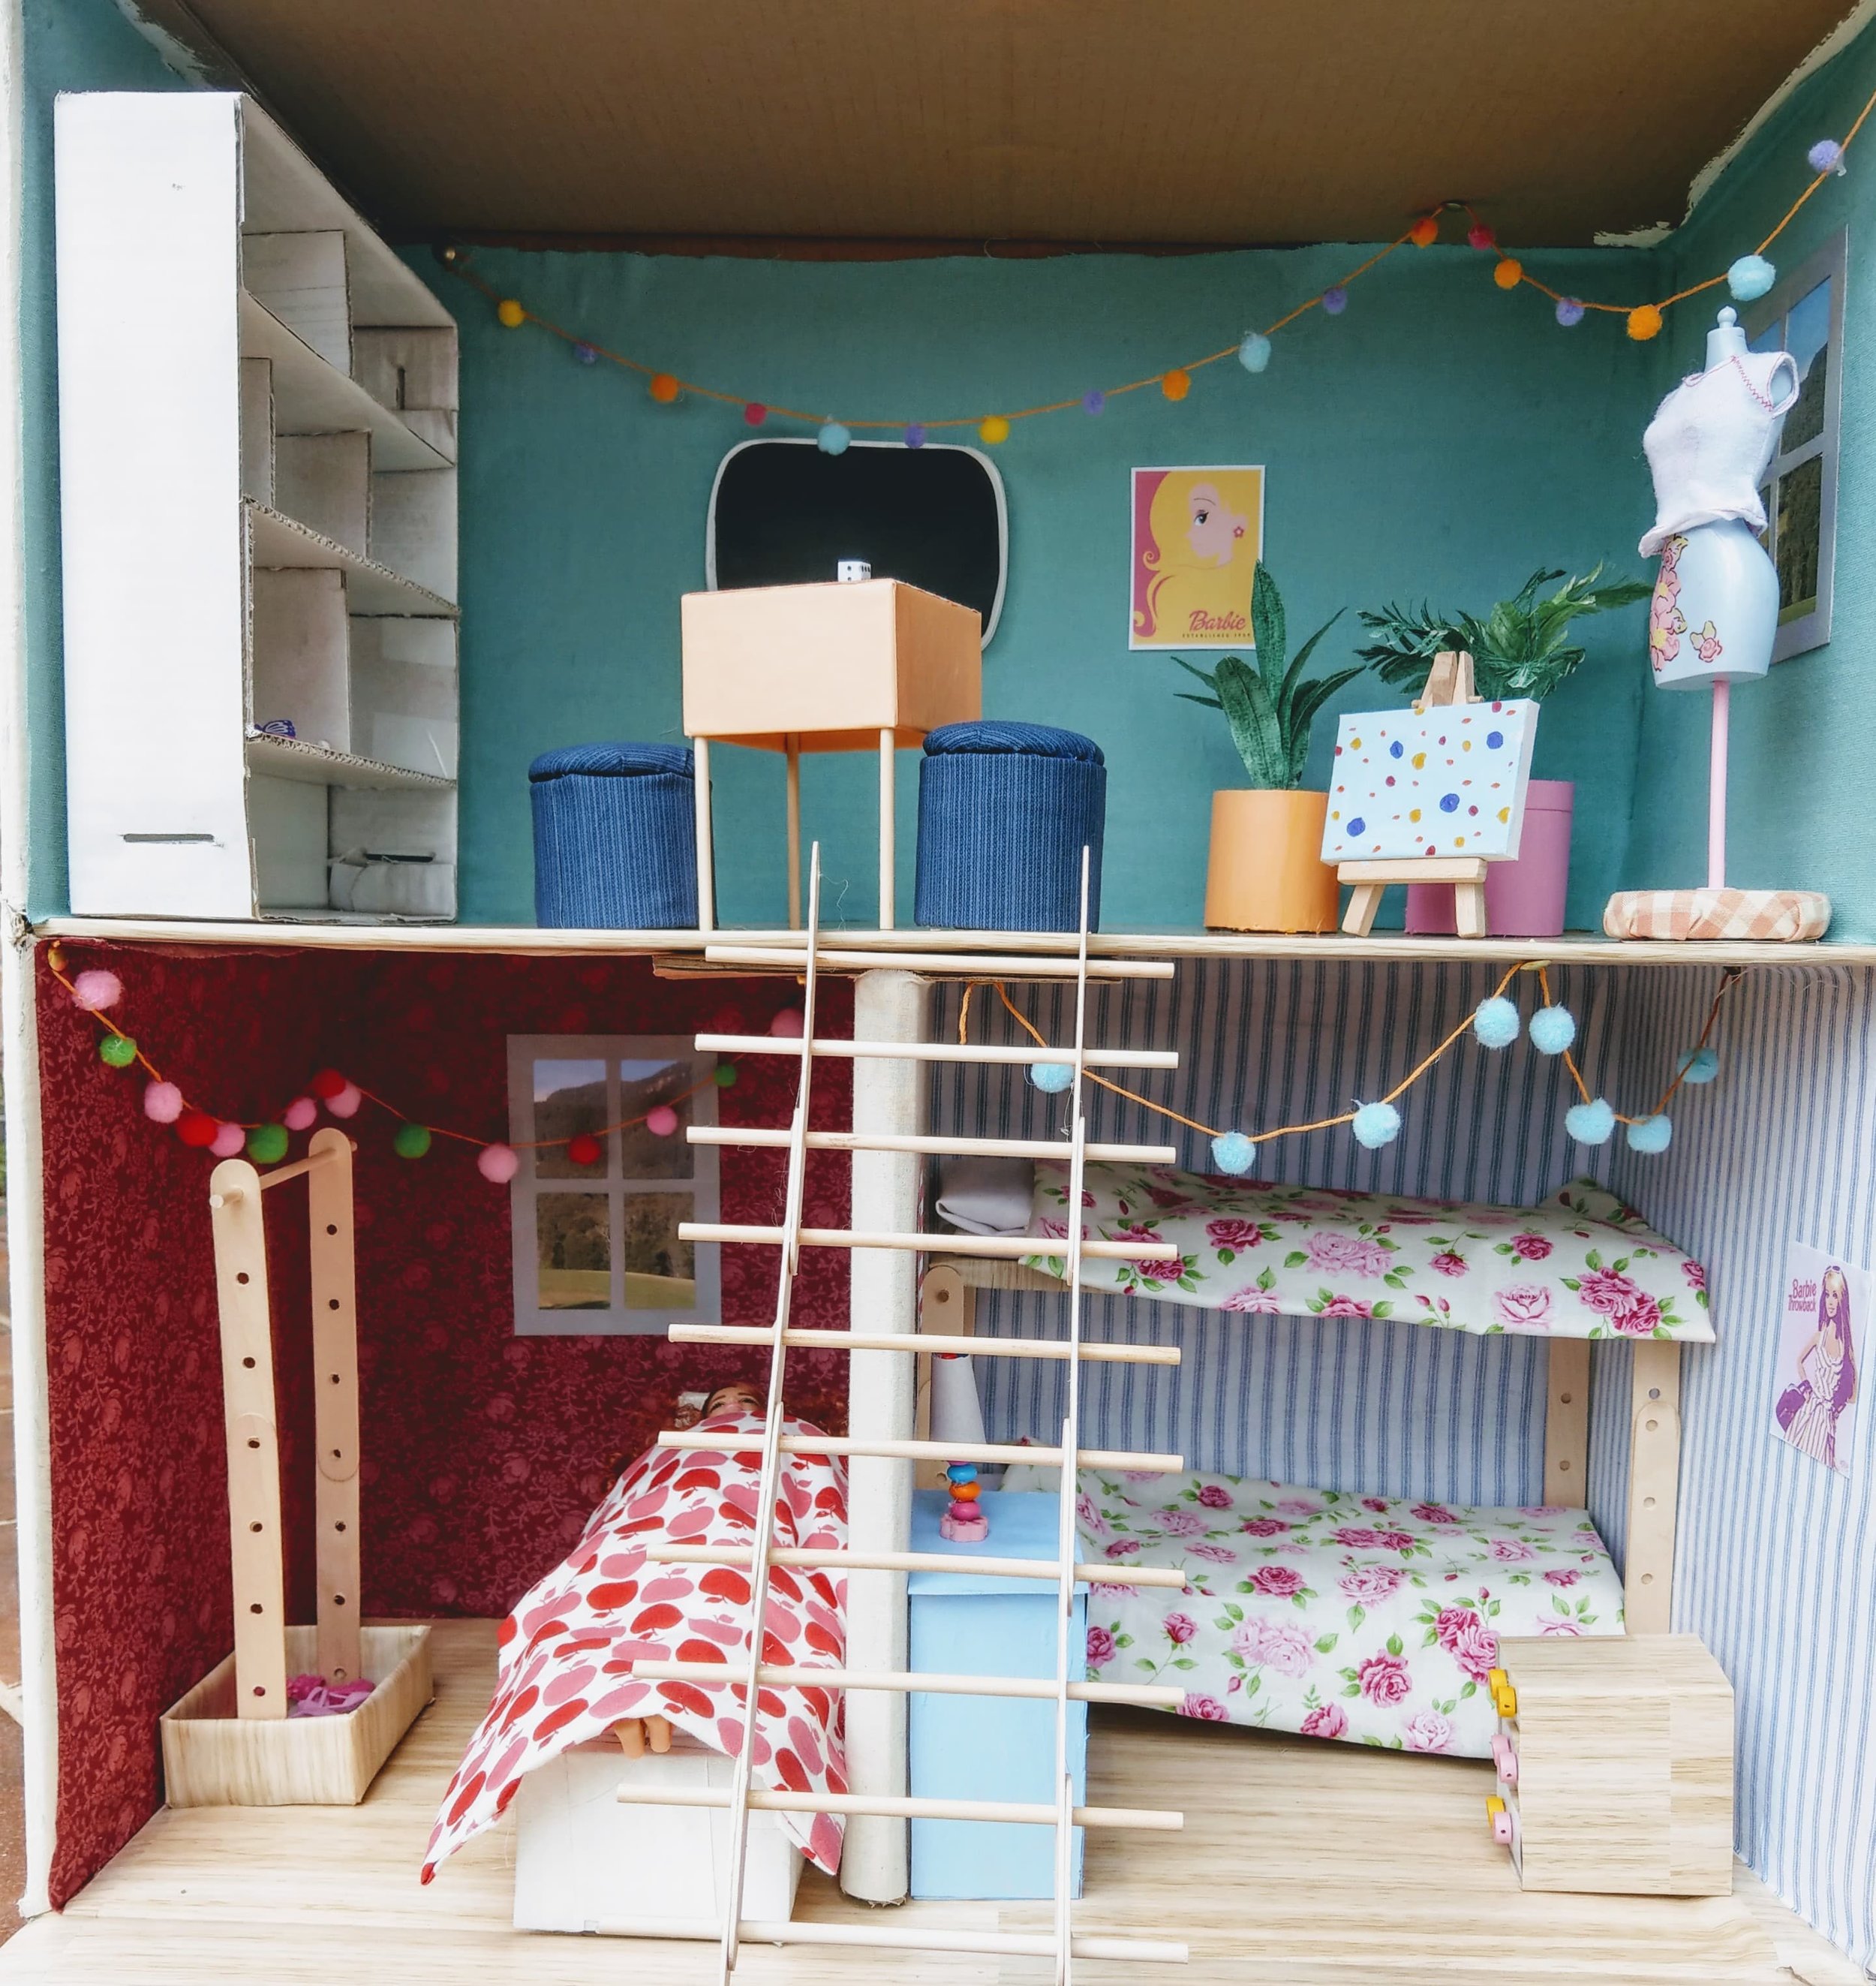
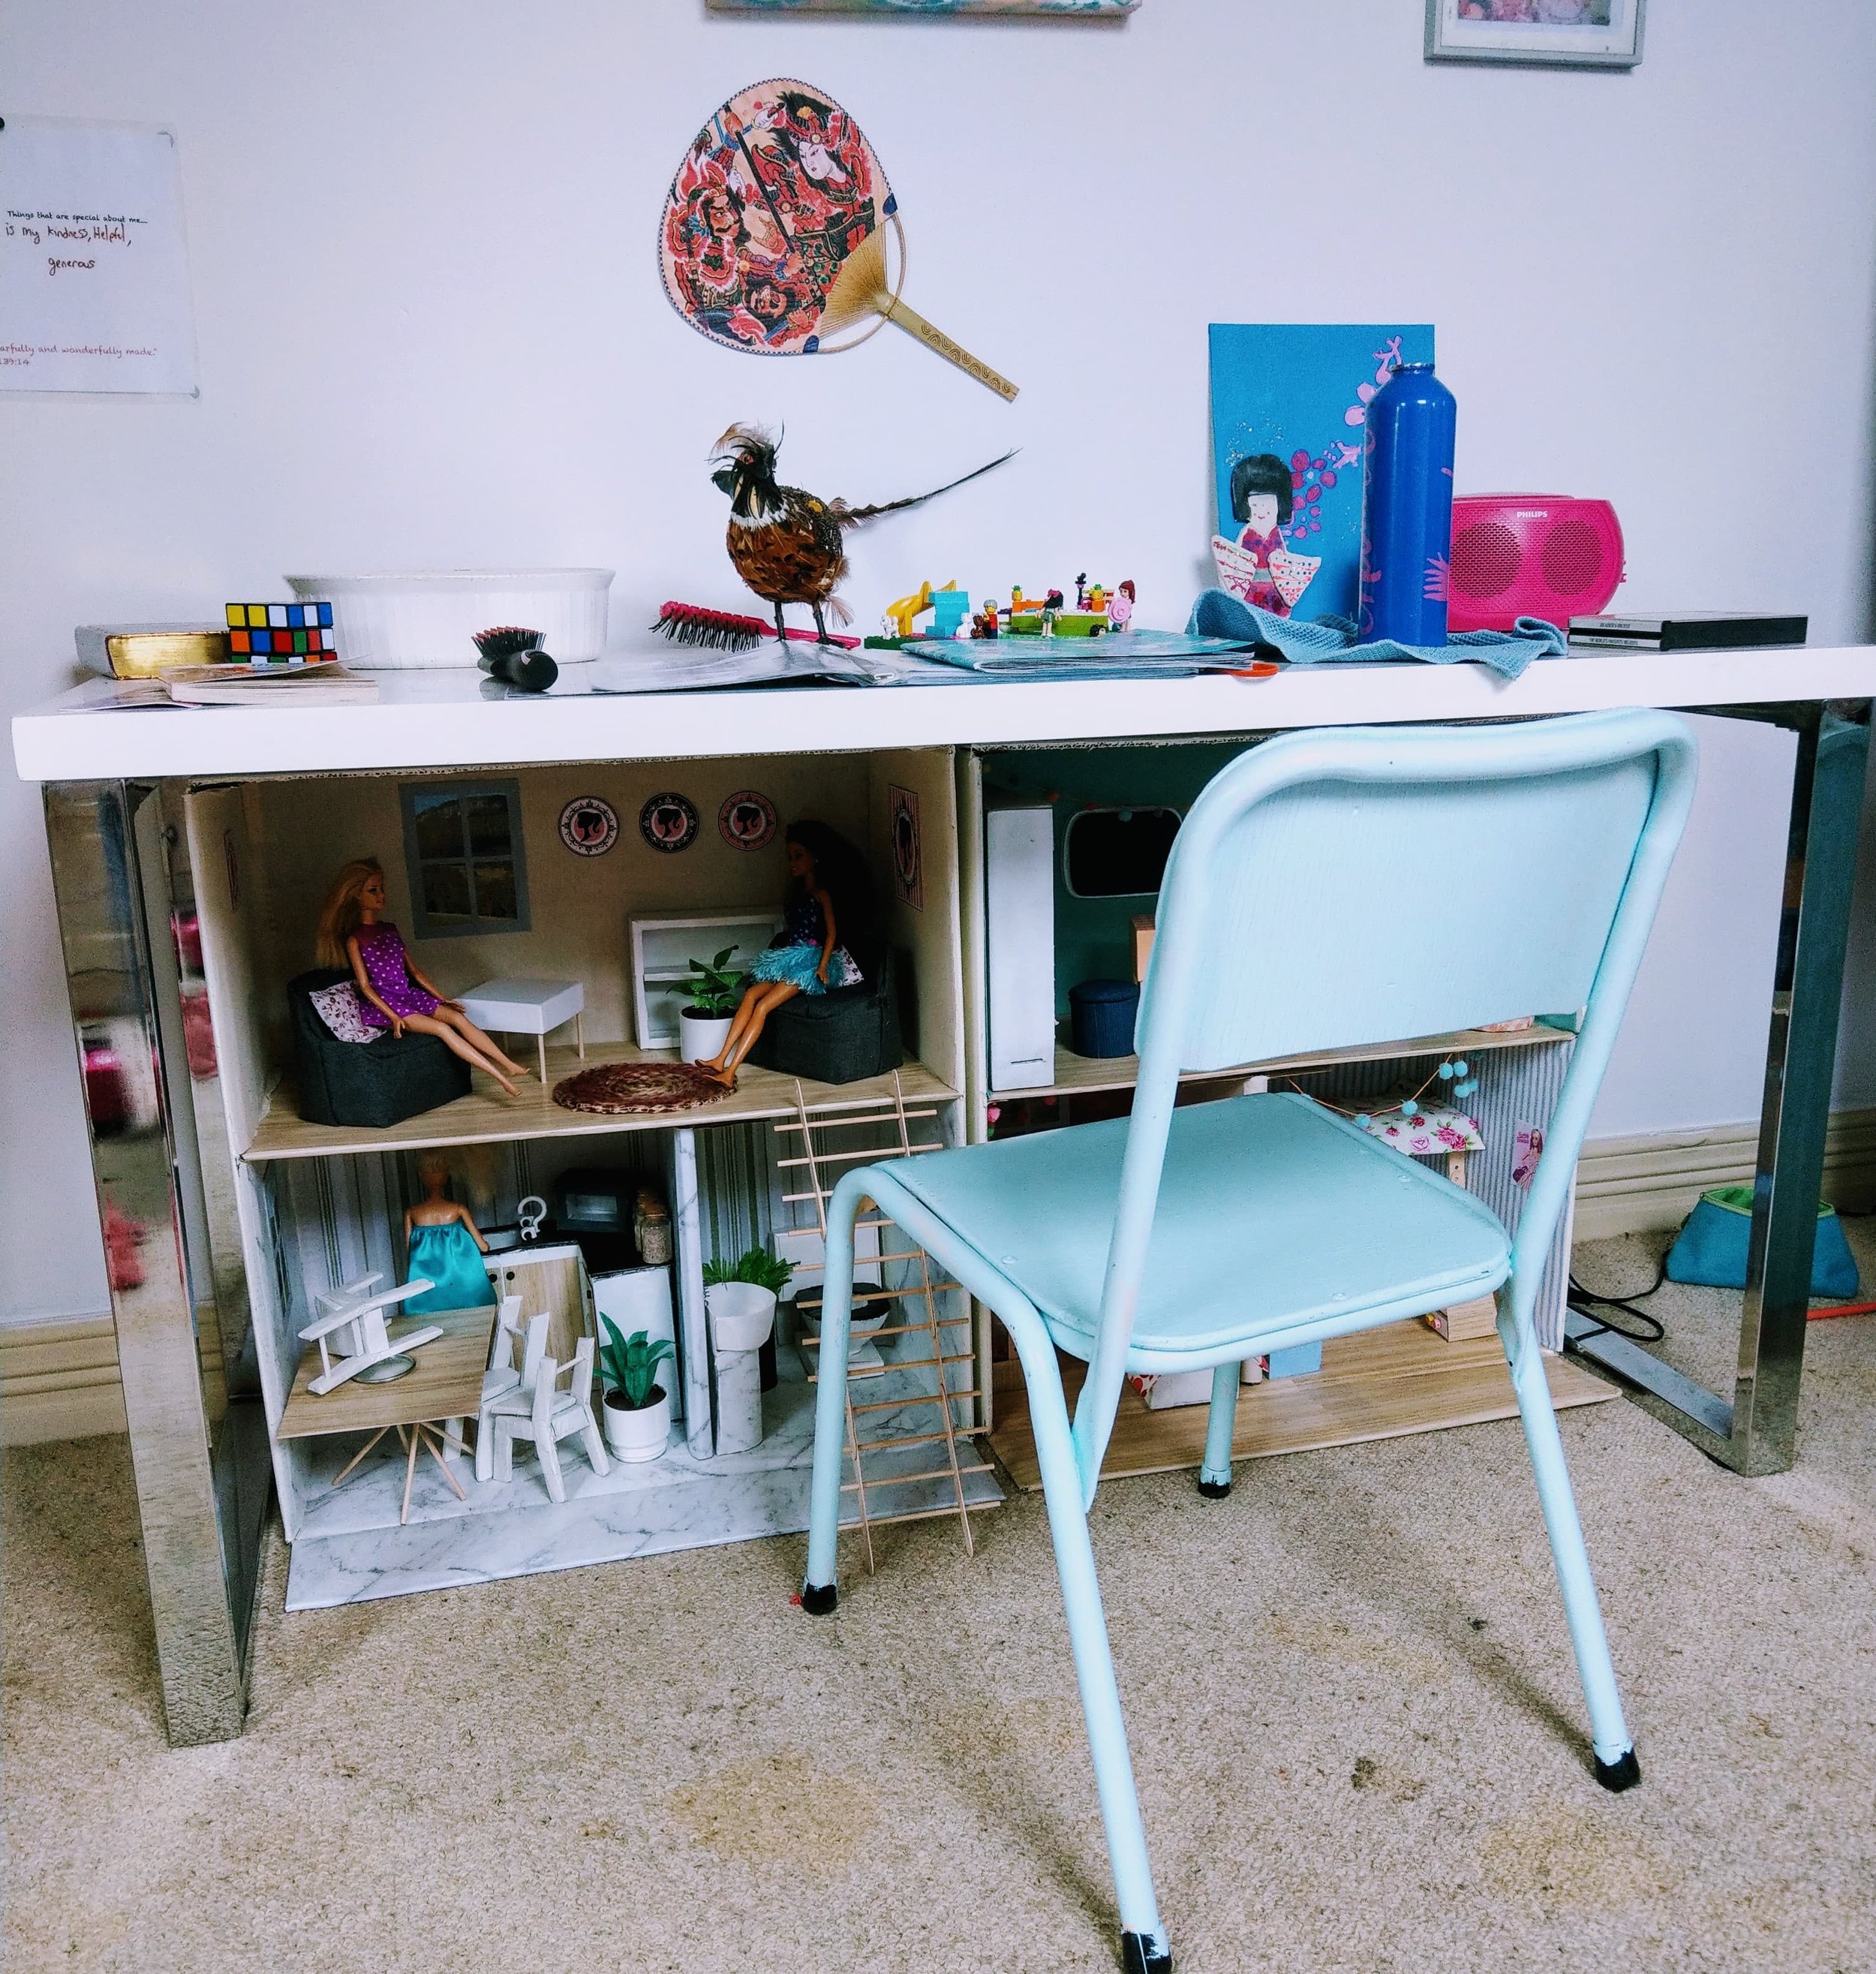
We made two double storey sections of the house. Box one made a lounge upstairs, plus kitchen and bathroom downstairs. Box two divided into two bedrooms downstairs with an activity room above.
When we started thinking about where it would go in her room, I was so excited to find out that both boxes fit side by side underneath her desk. It was almost as if they had been custom made for the space! The bonus of that is that the house doesn't take up space in her bedroom (because it is pretty big...) but there's still plenty of room to play.
What did it cost?
I spent about $70 in total - on glues, paint and a few bits and pieces like florist wire, masking tape, the contact cover for the floors and marble walls in the bathroom, some wood dowel and paddle pop sticks to make the ladder to the second storey, and the cute little glass jars in the kitchen. Everything else is made out of things I already had in the house: cardboard, fabric, and bits and pieces from my craft box, like the pom poms and string.
In comparison, when we were shopping last week I cast my eye over a Barbie house in a toy shop. It had less furniture, a smaller floor plan and it was dreadfully pink, all for the sum of $300. (Of course, it did have a slide and a spa, but, y'know...)


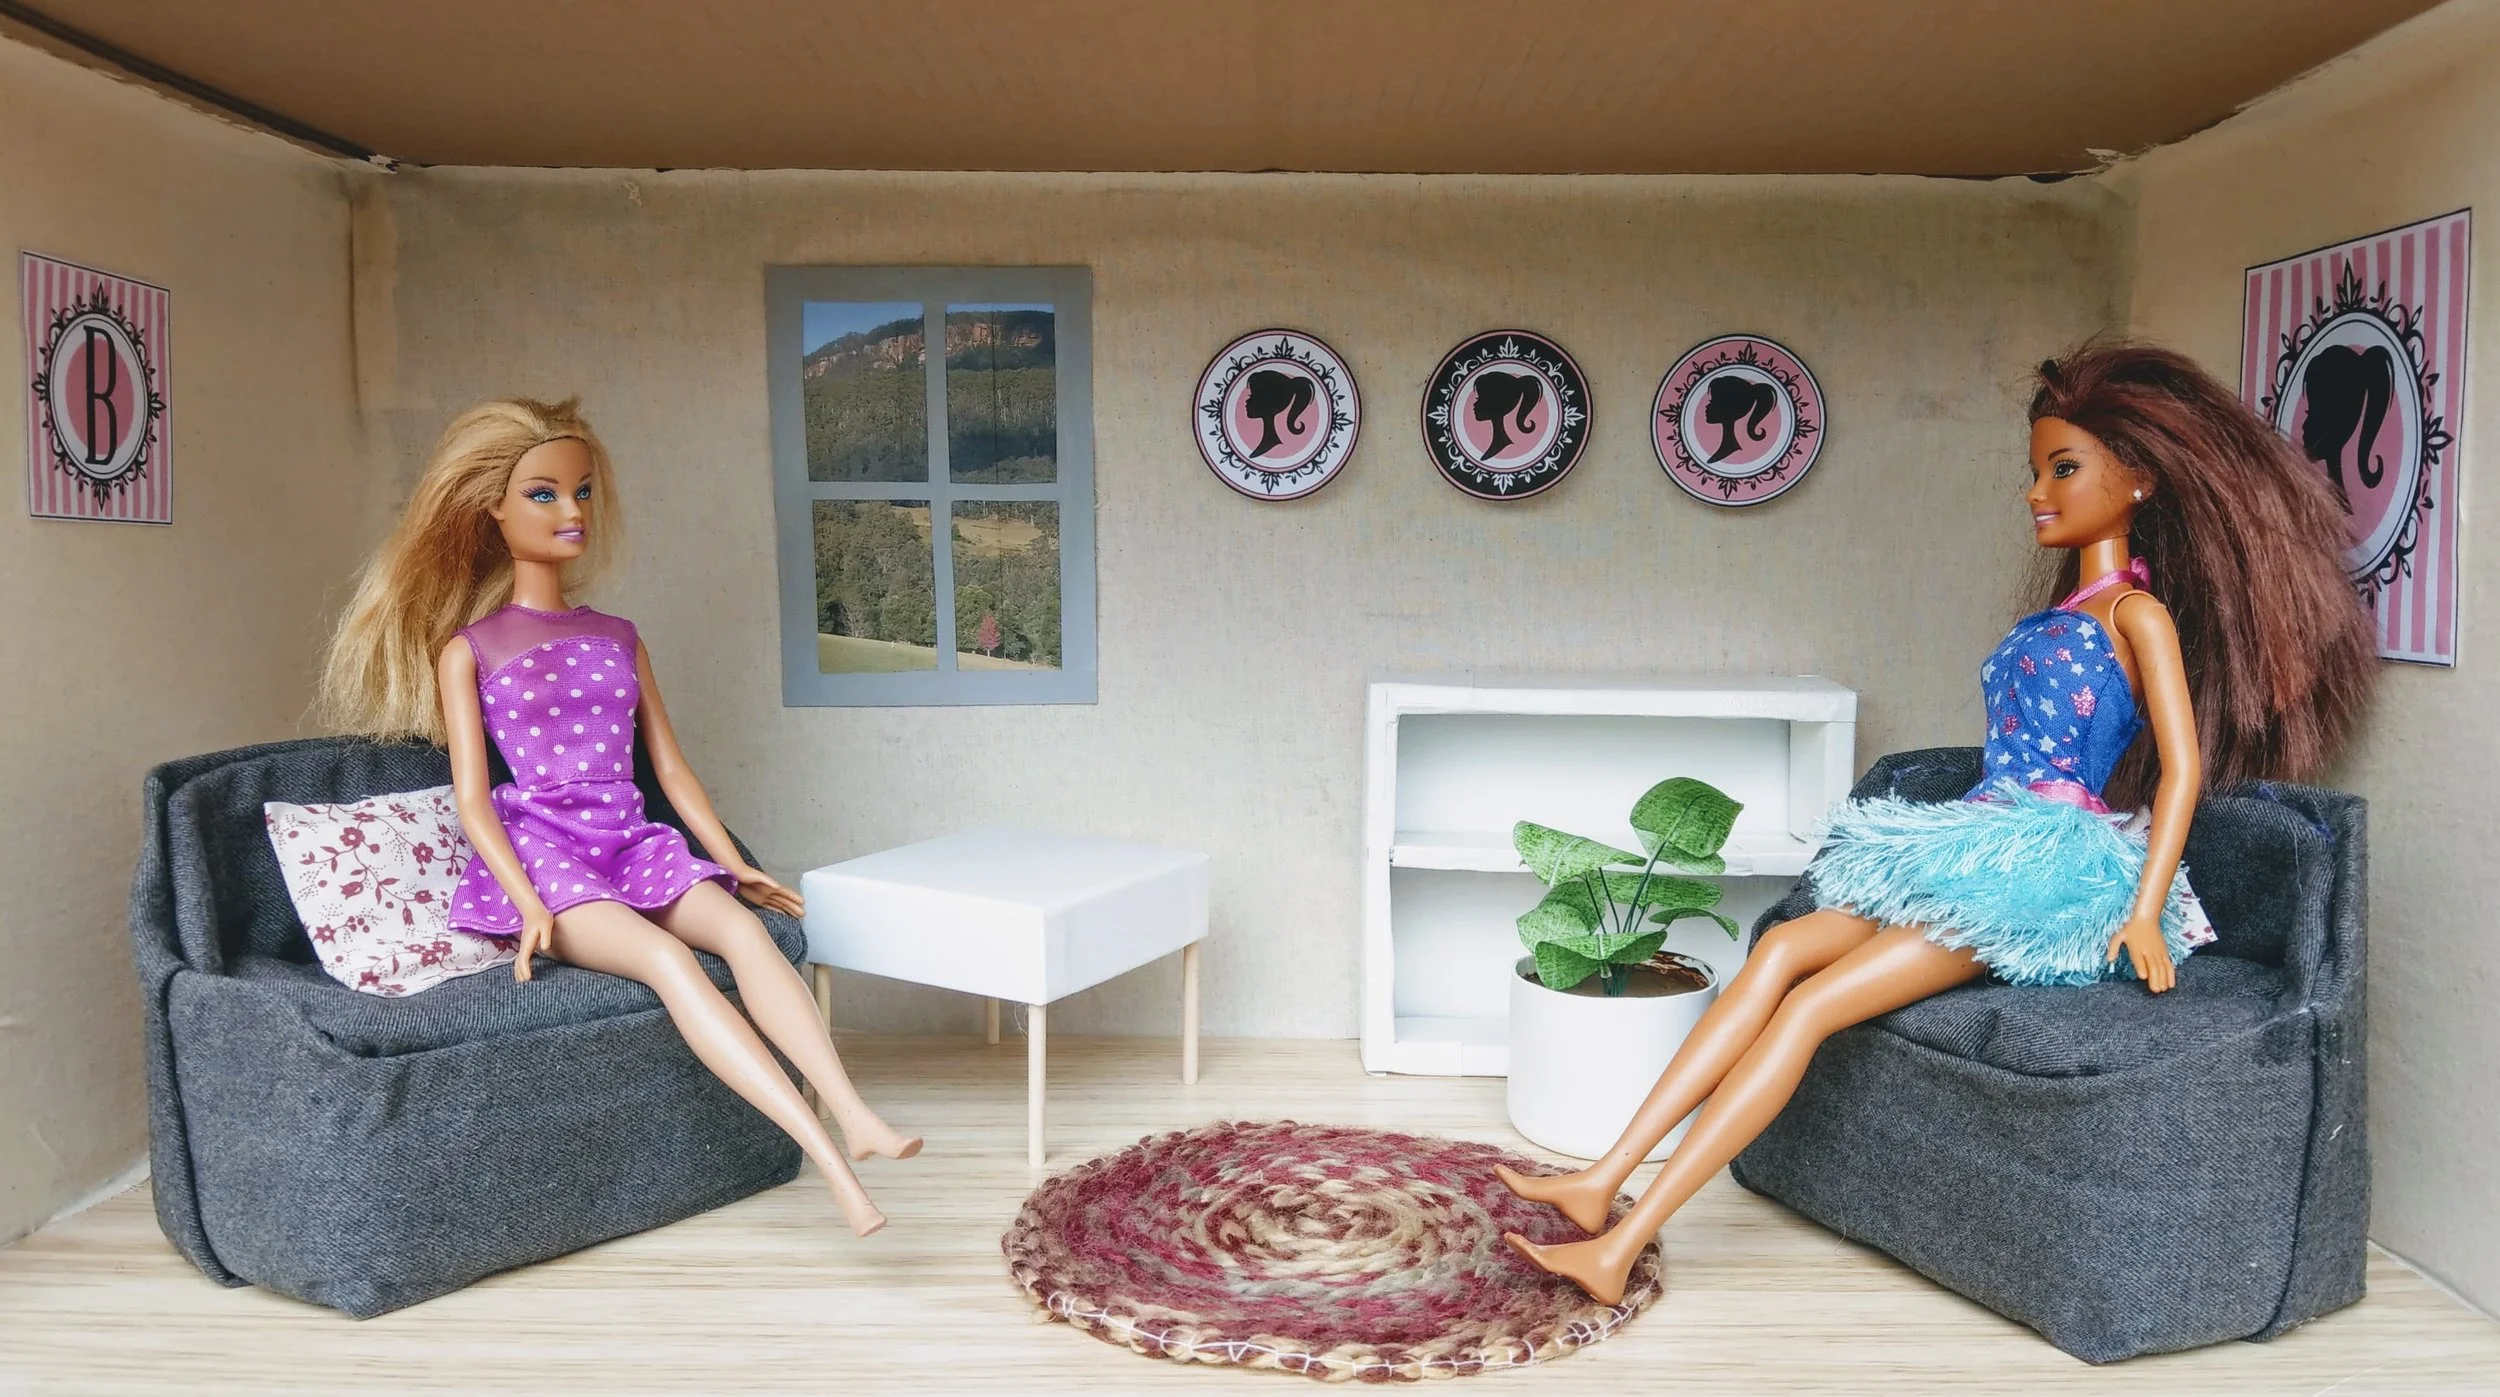
The lounge
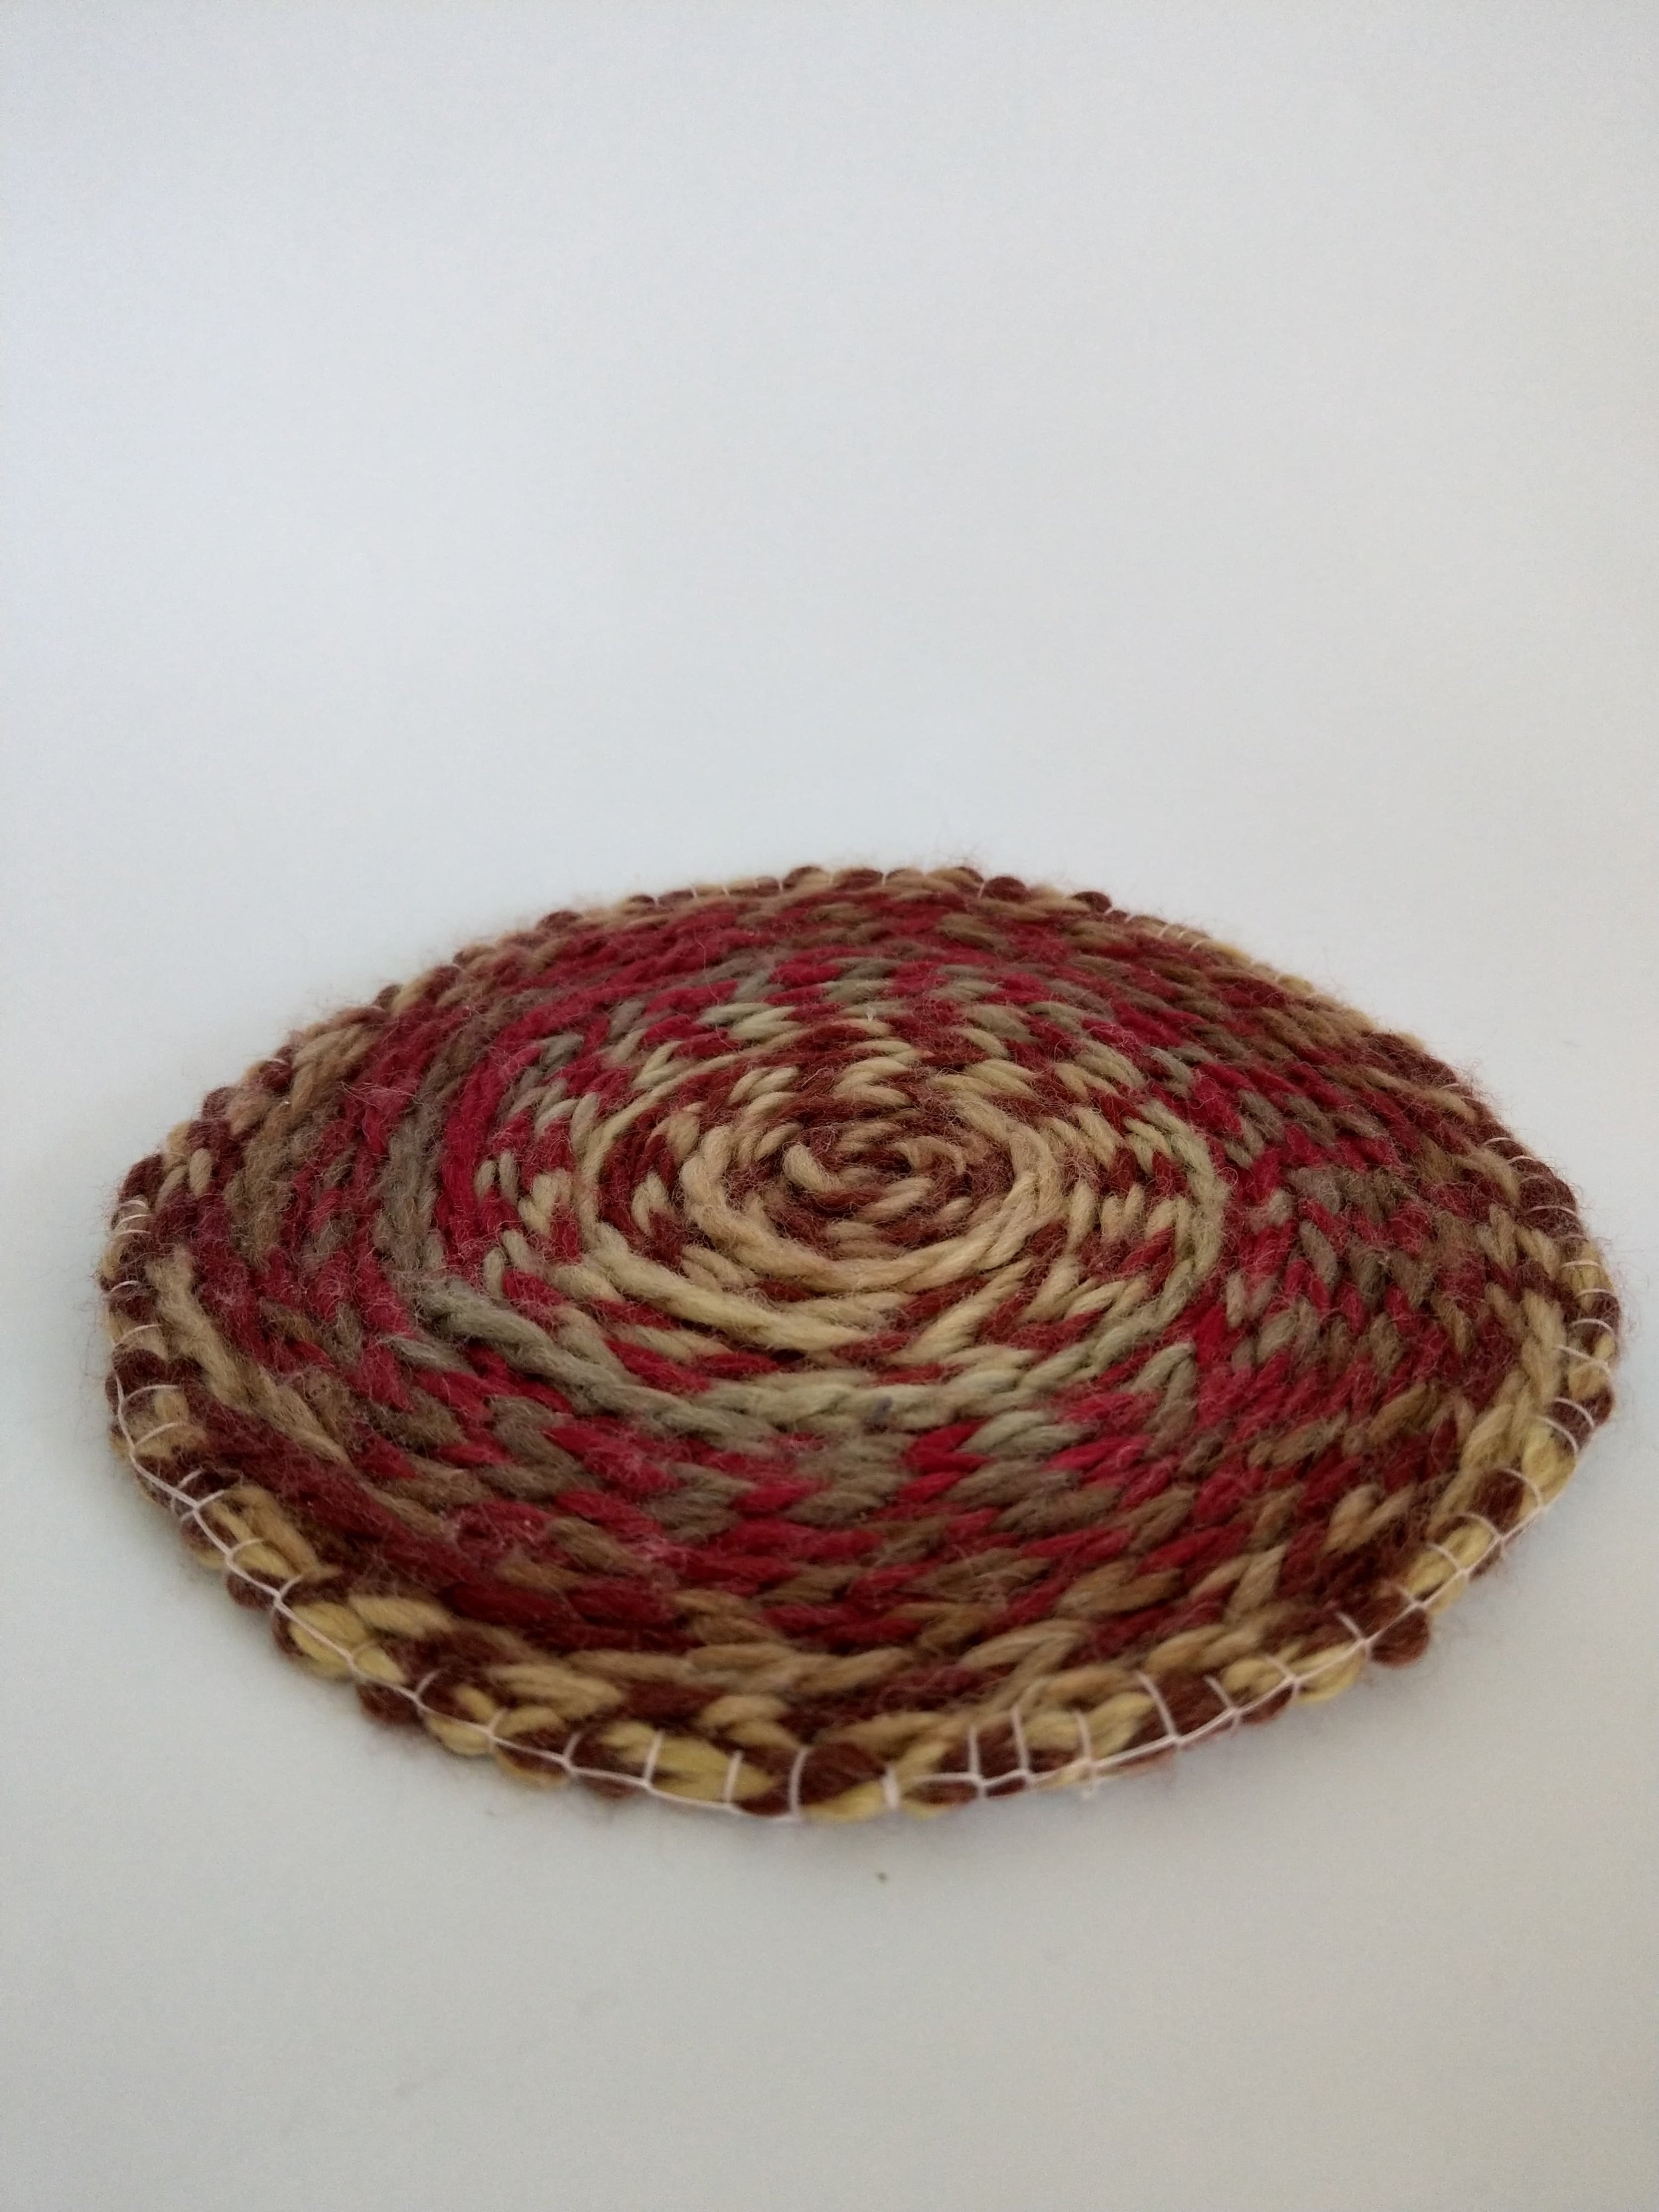
In the photos above are some of the things we made for the lounge room, including a cardboard backed circular rug made from a skein of variegated wool, glued in a spiral. I blanket stitched around the outside through the cardboard for extra strength.
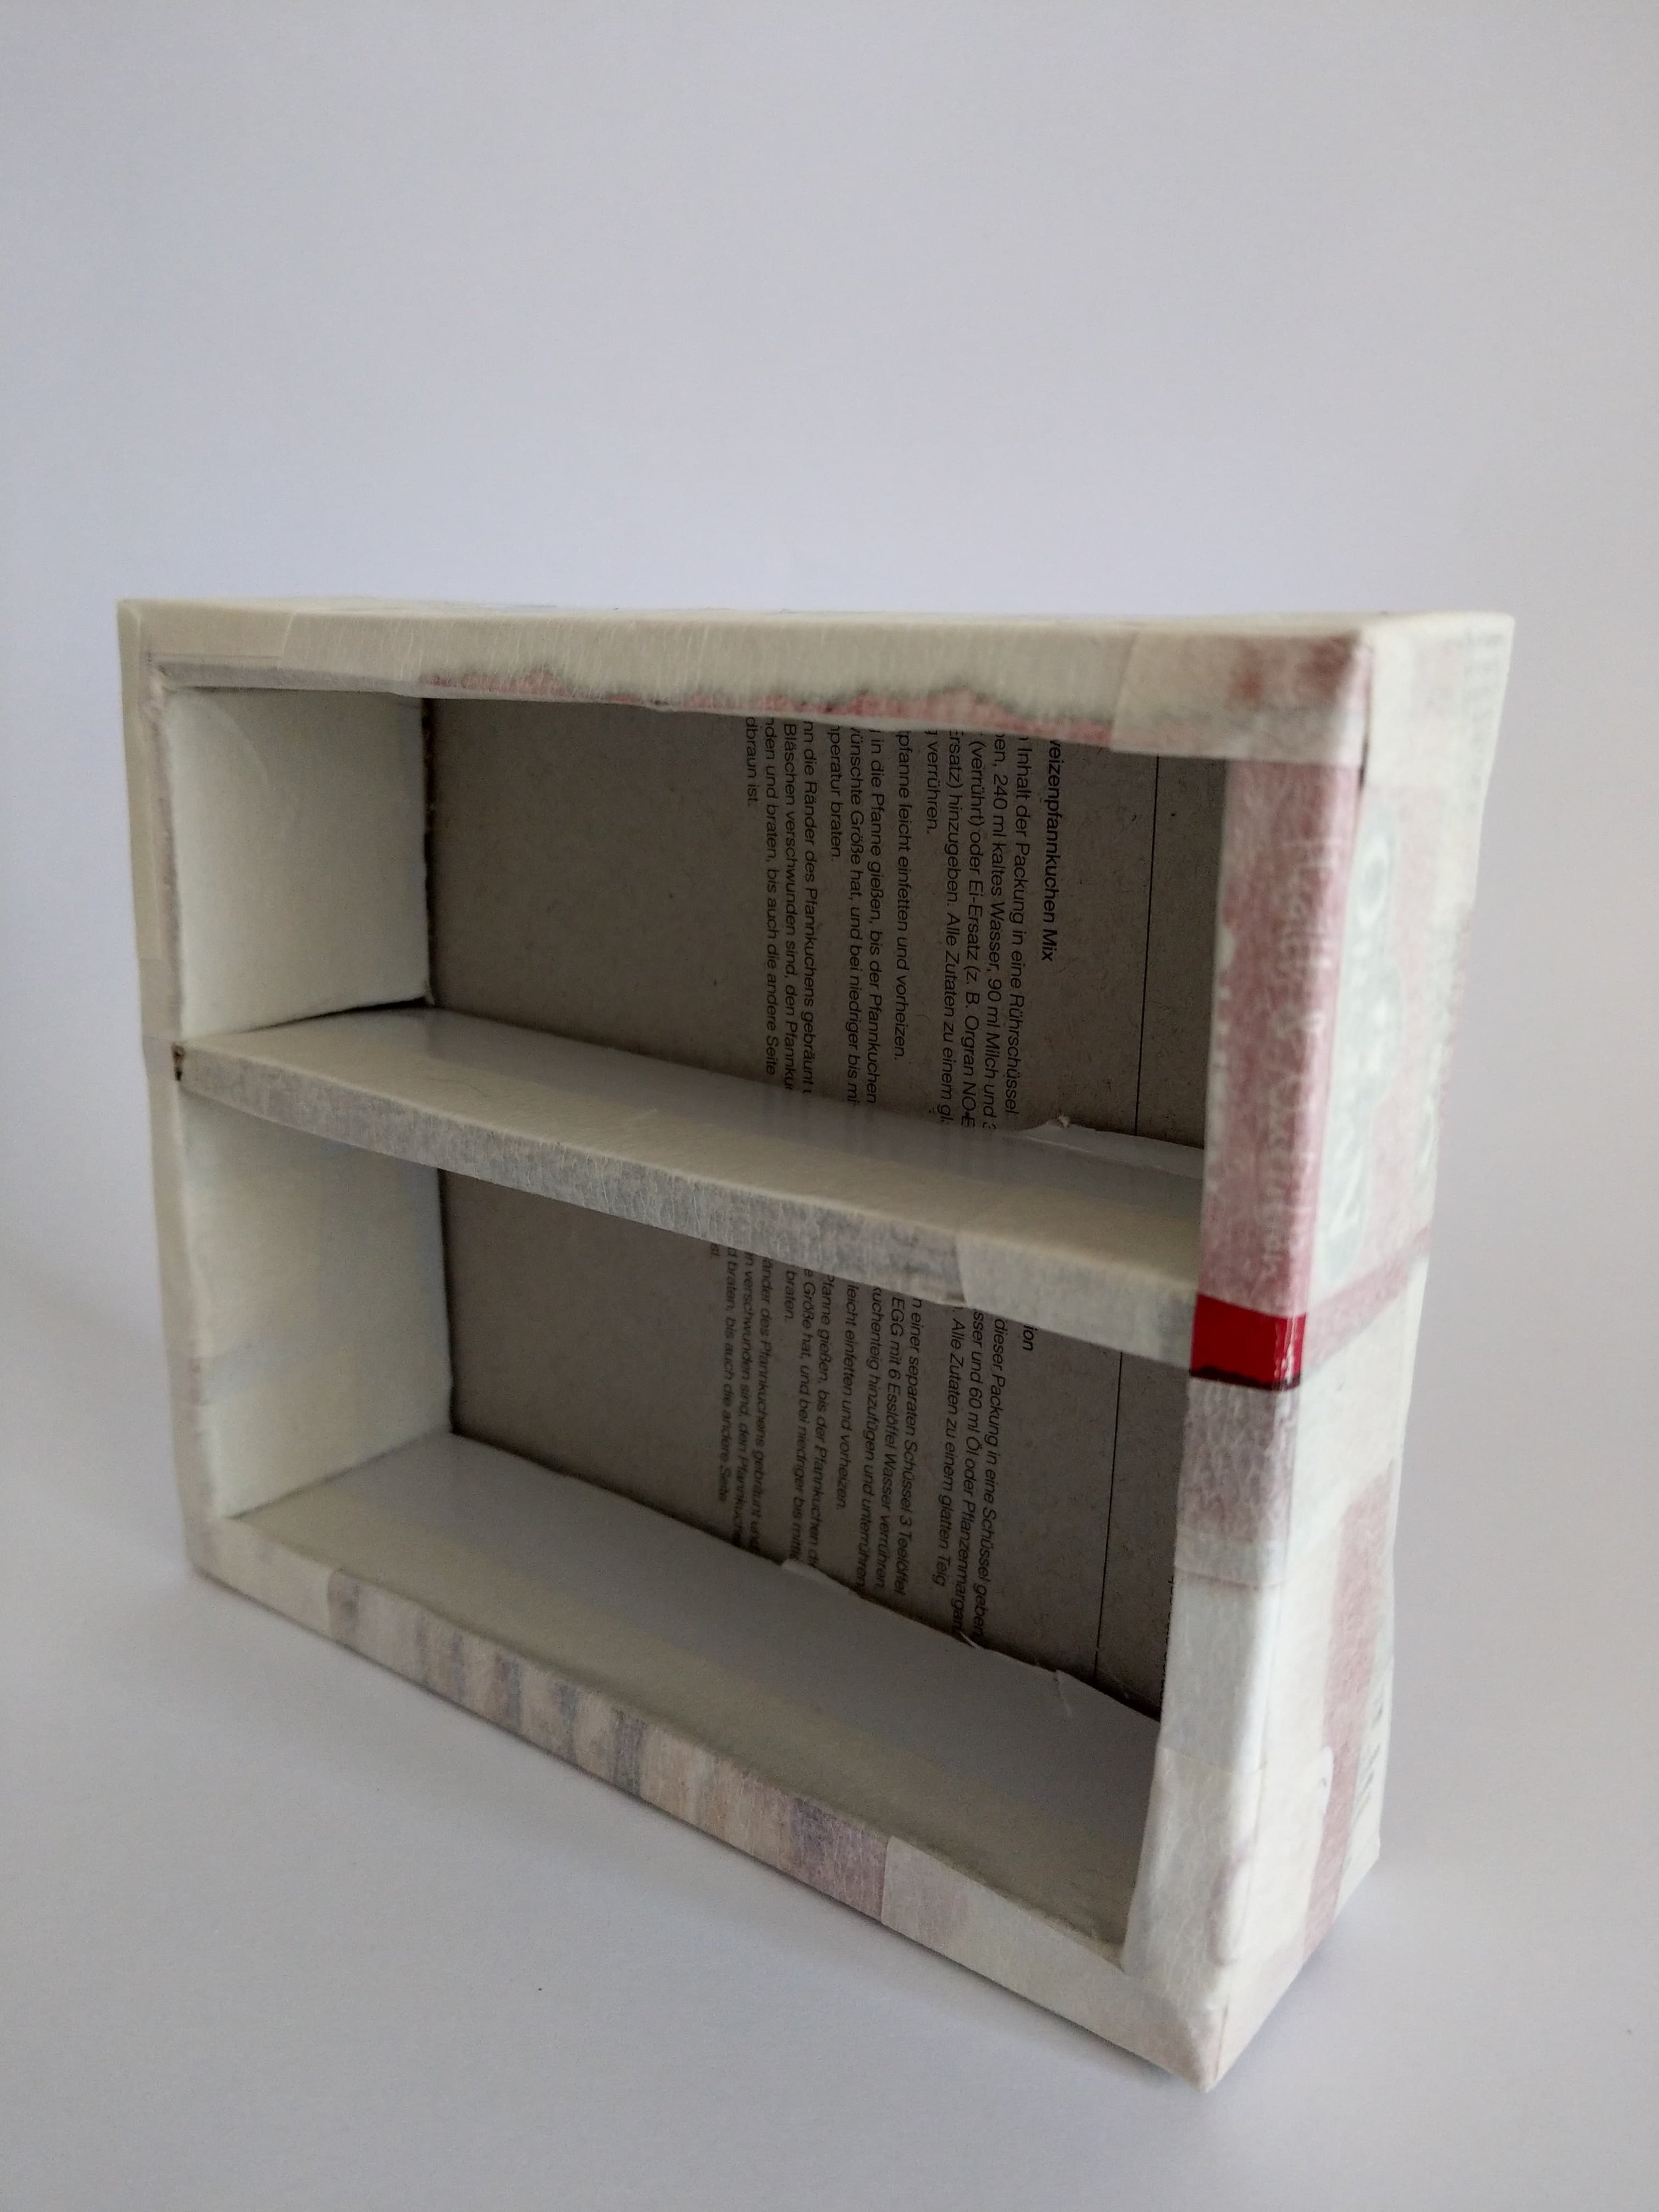
The bookshelf was created from a light cardboard box (originally gluten free flour) and lined inside with strips of heavier cardboard. I used masking tape to make sure the edges were smooth and spray painted it white.
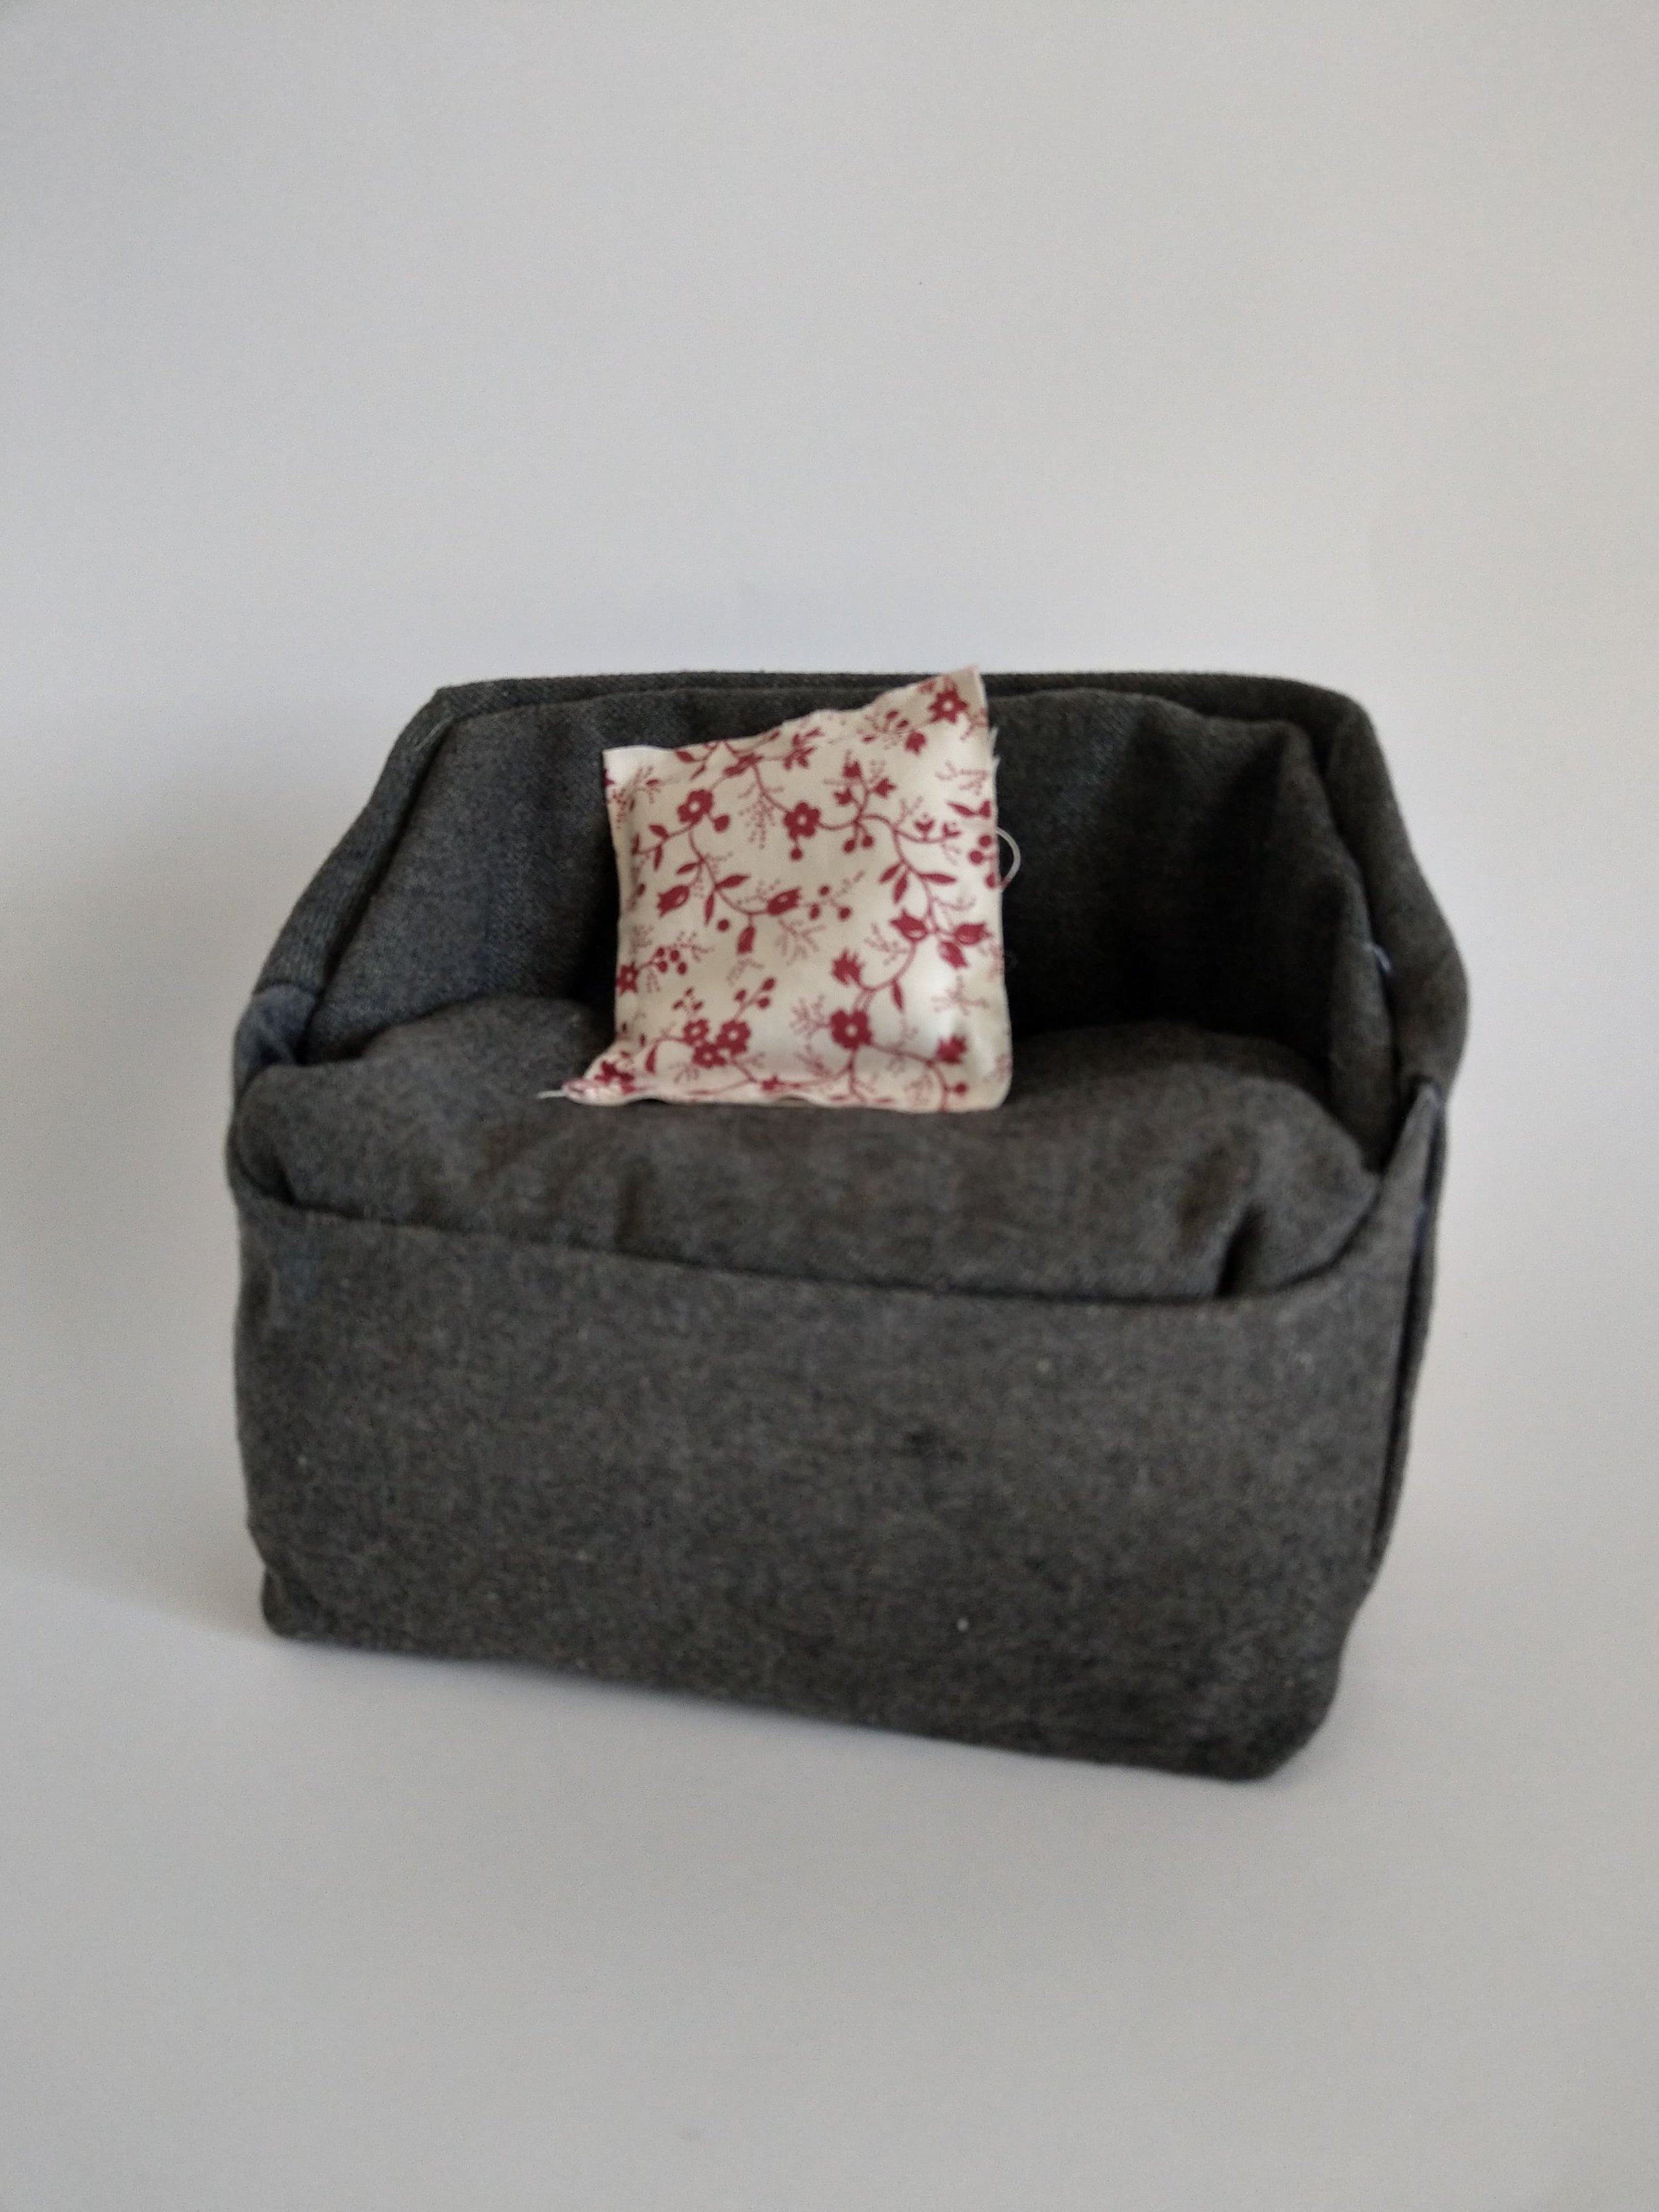
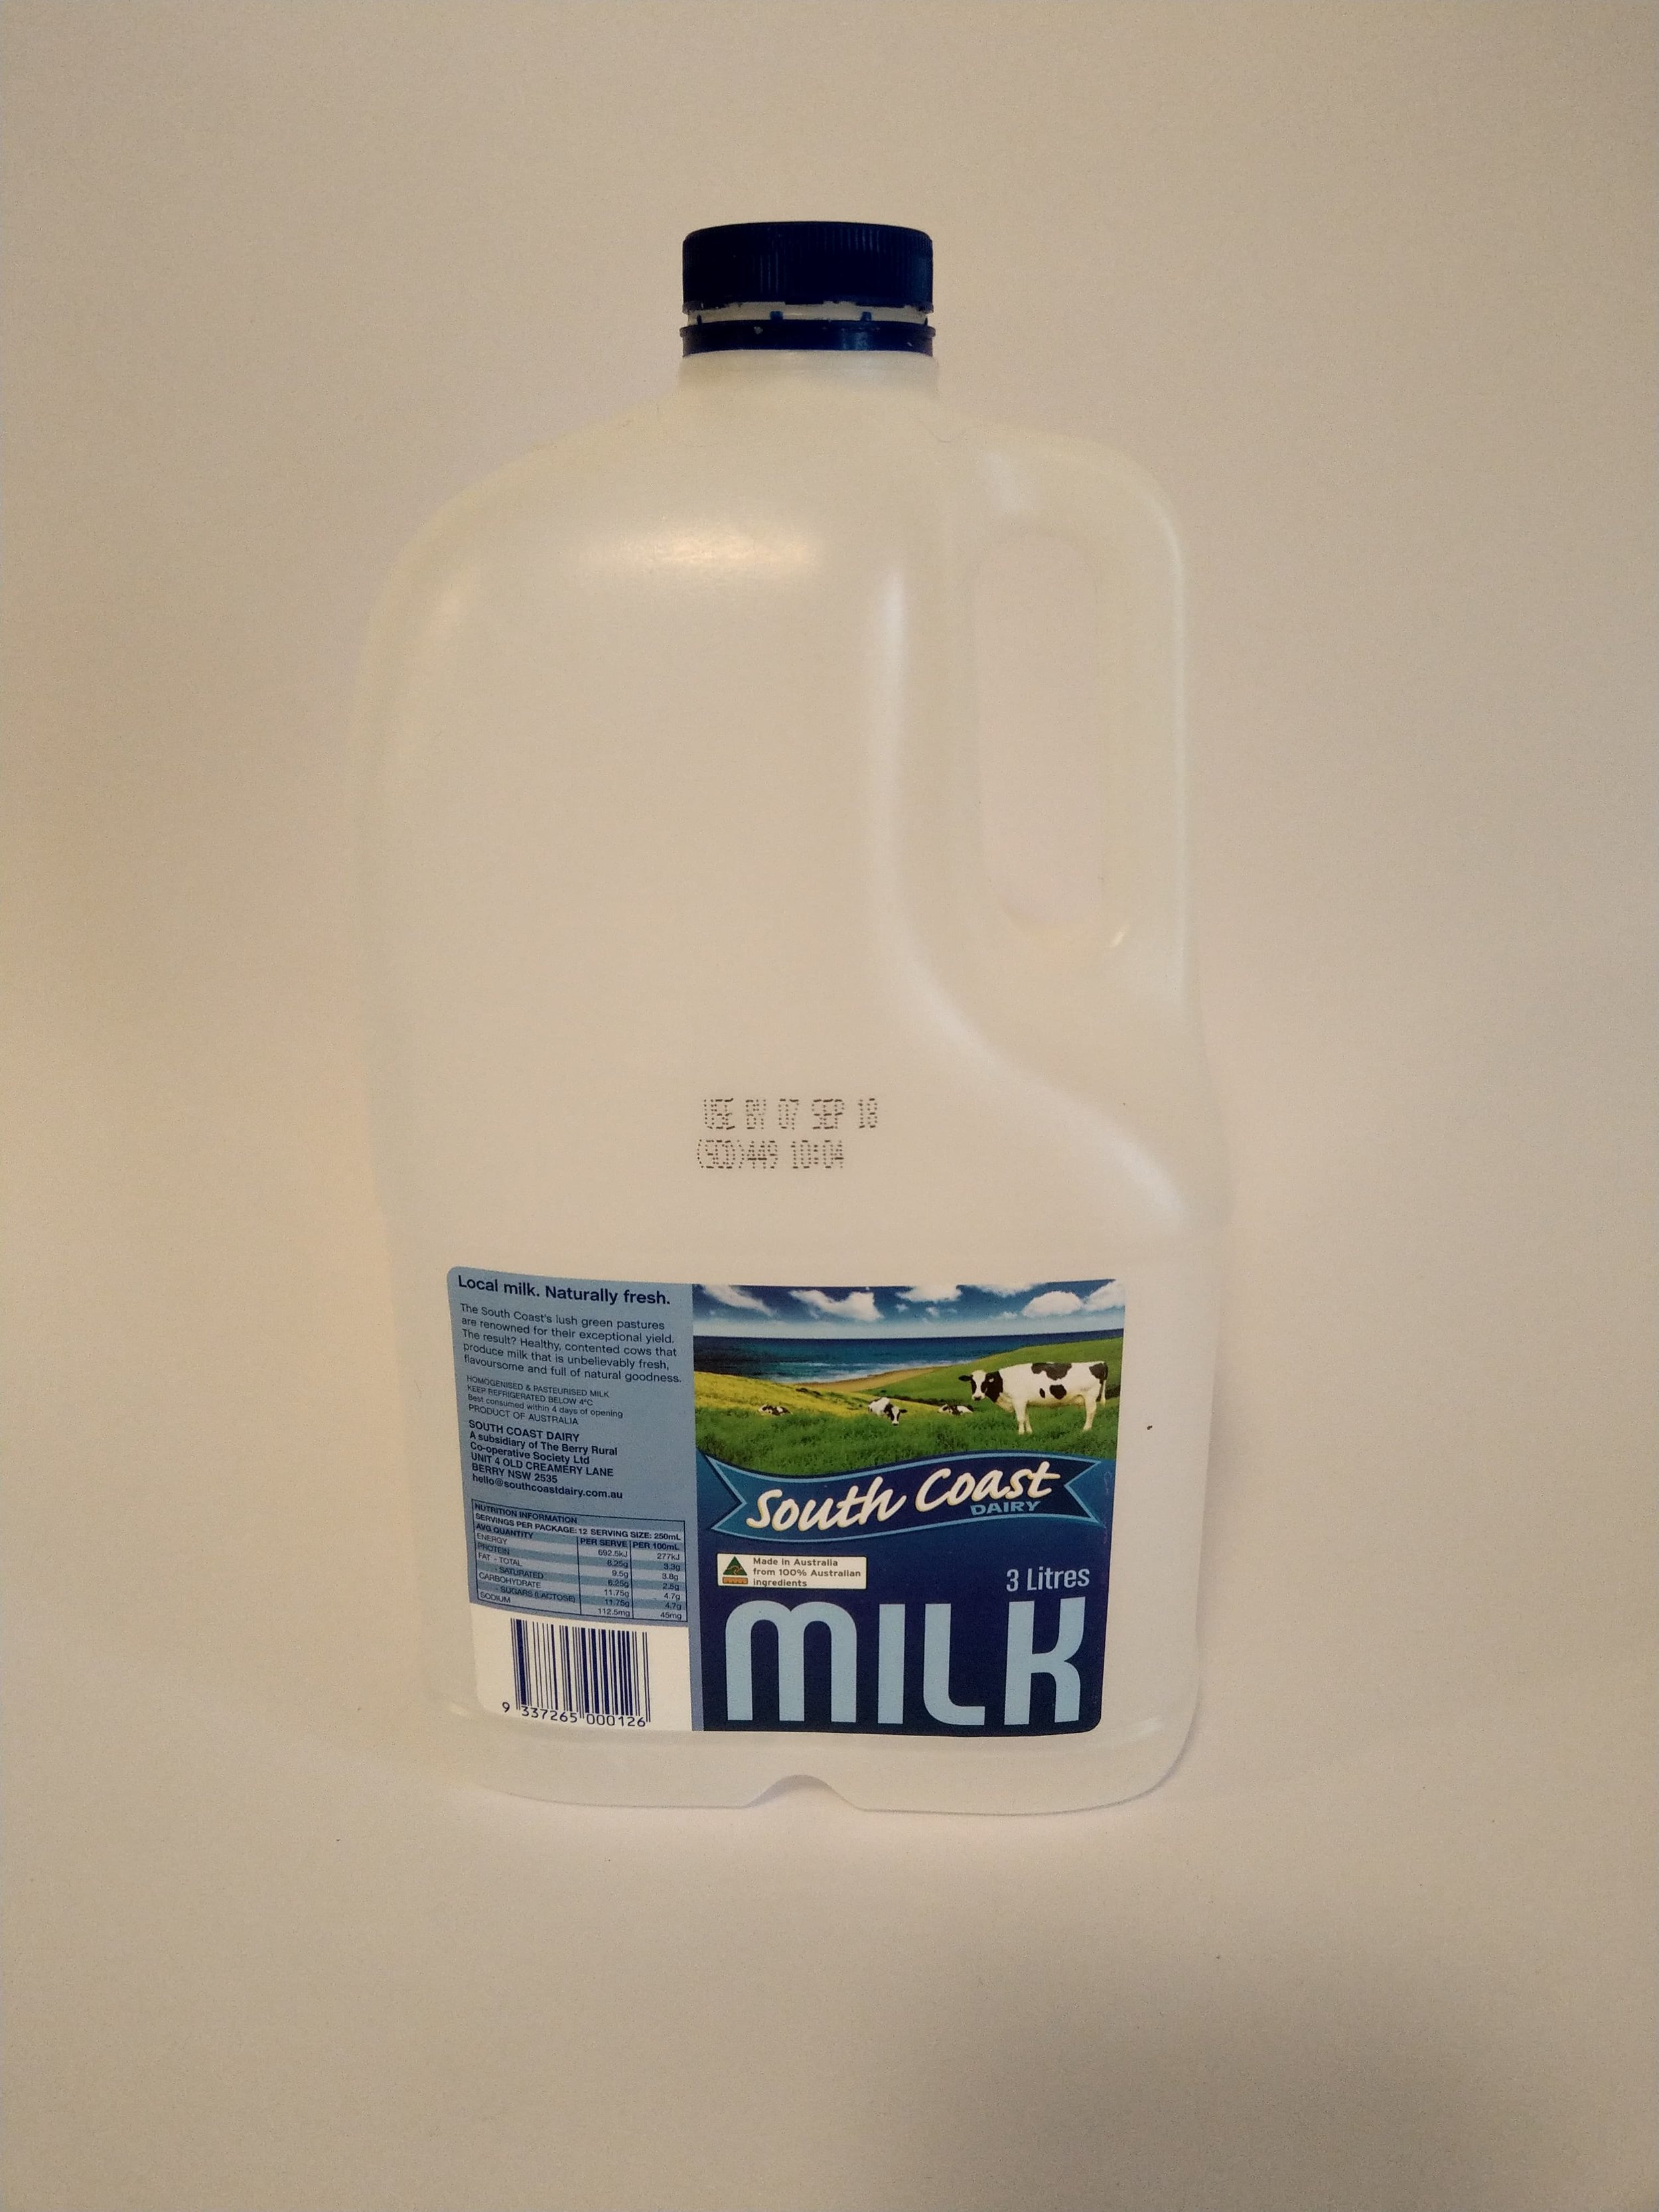
The grey sofa is the bottom half of a 3 litre milk bottle, filled with foam which was part of the packaging in some piece of sound equipment my husband bought. It is covered with fabric - an old pair of my son's grey school trousers, to be exact. Glue guns are fantastic things, and it was well used here.
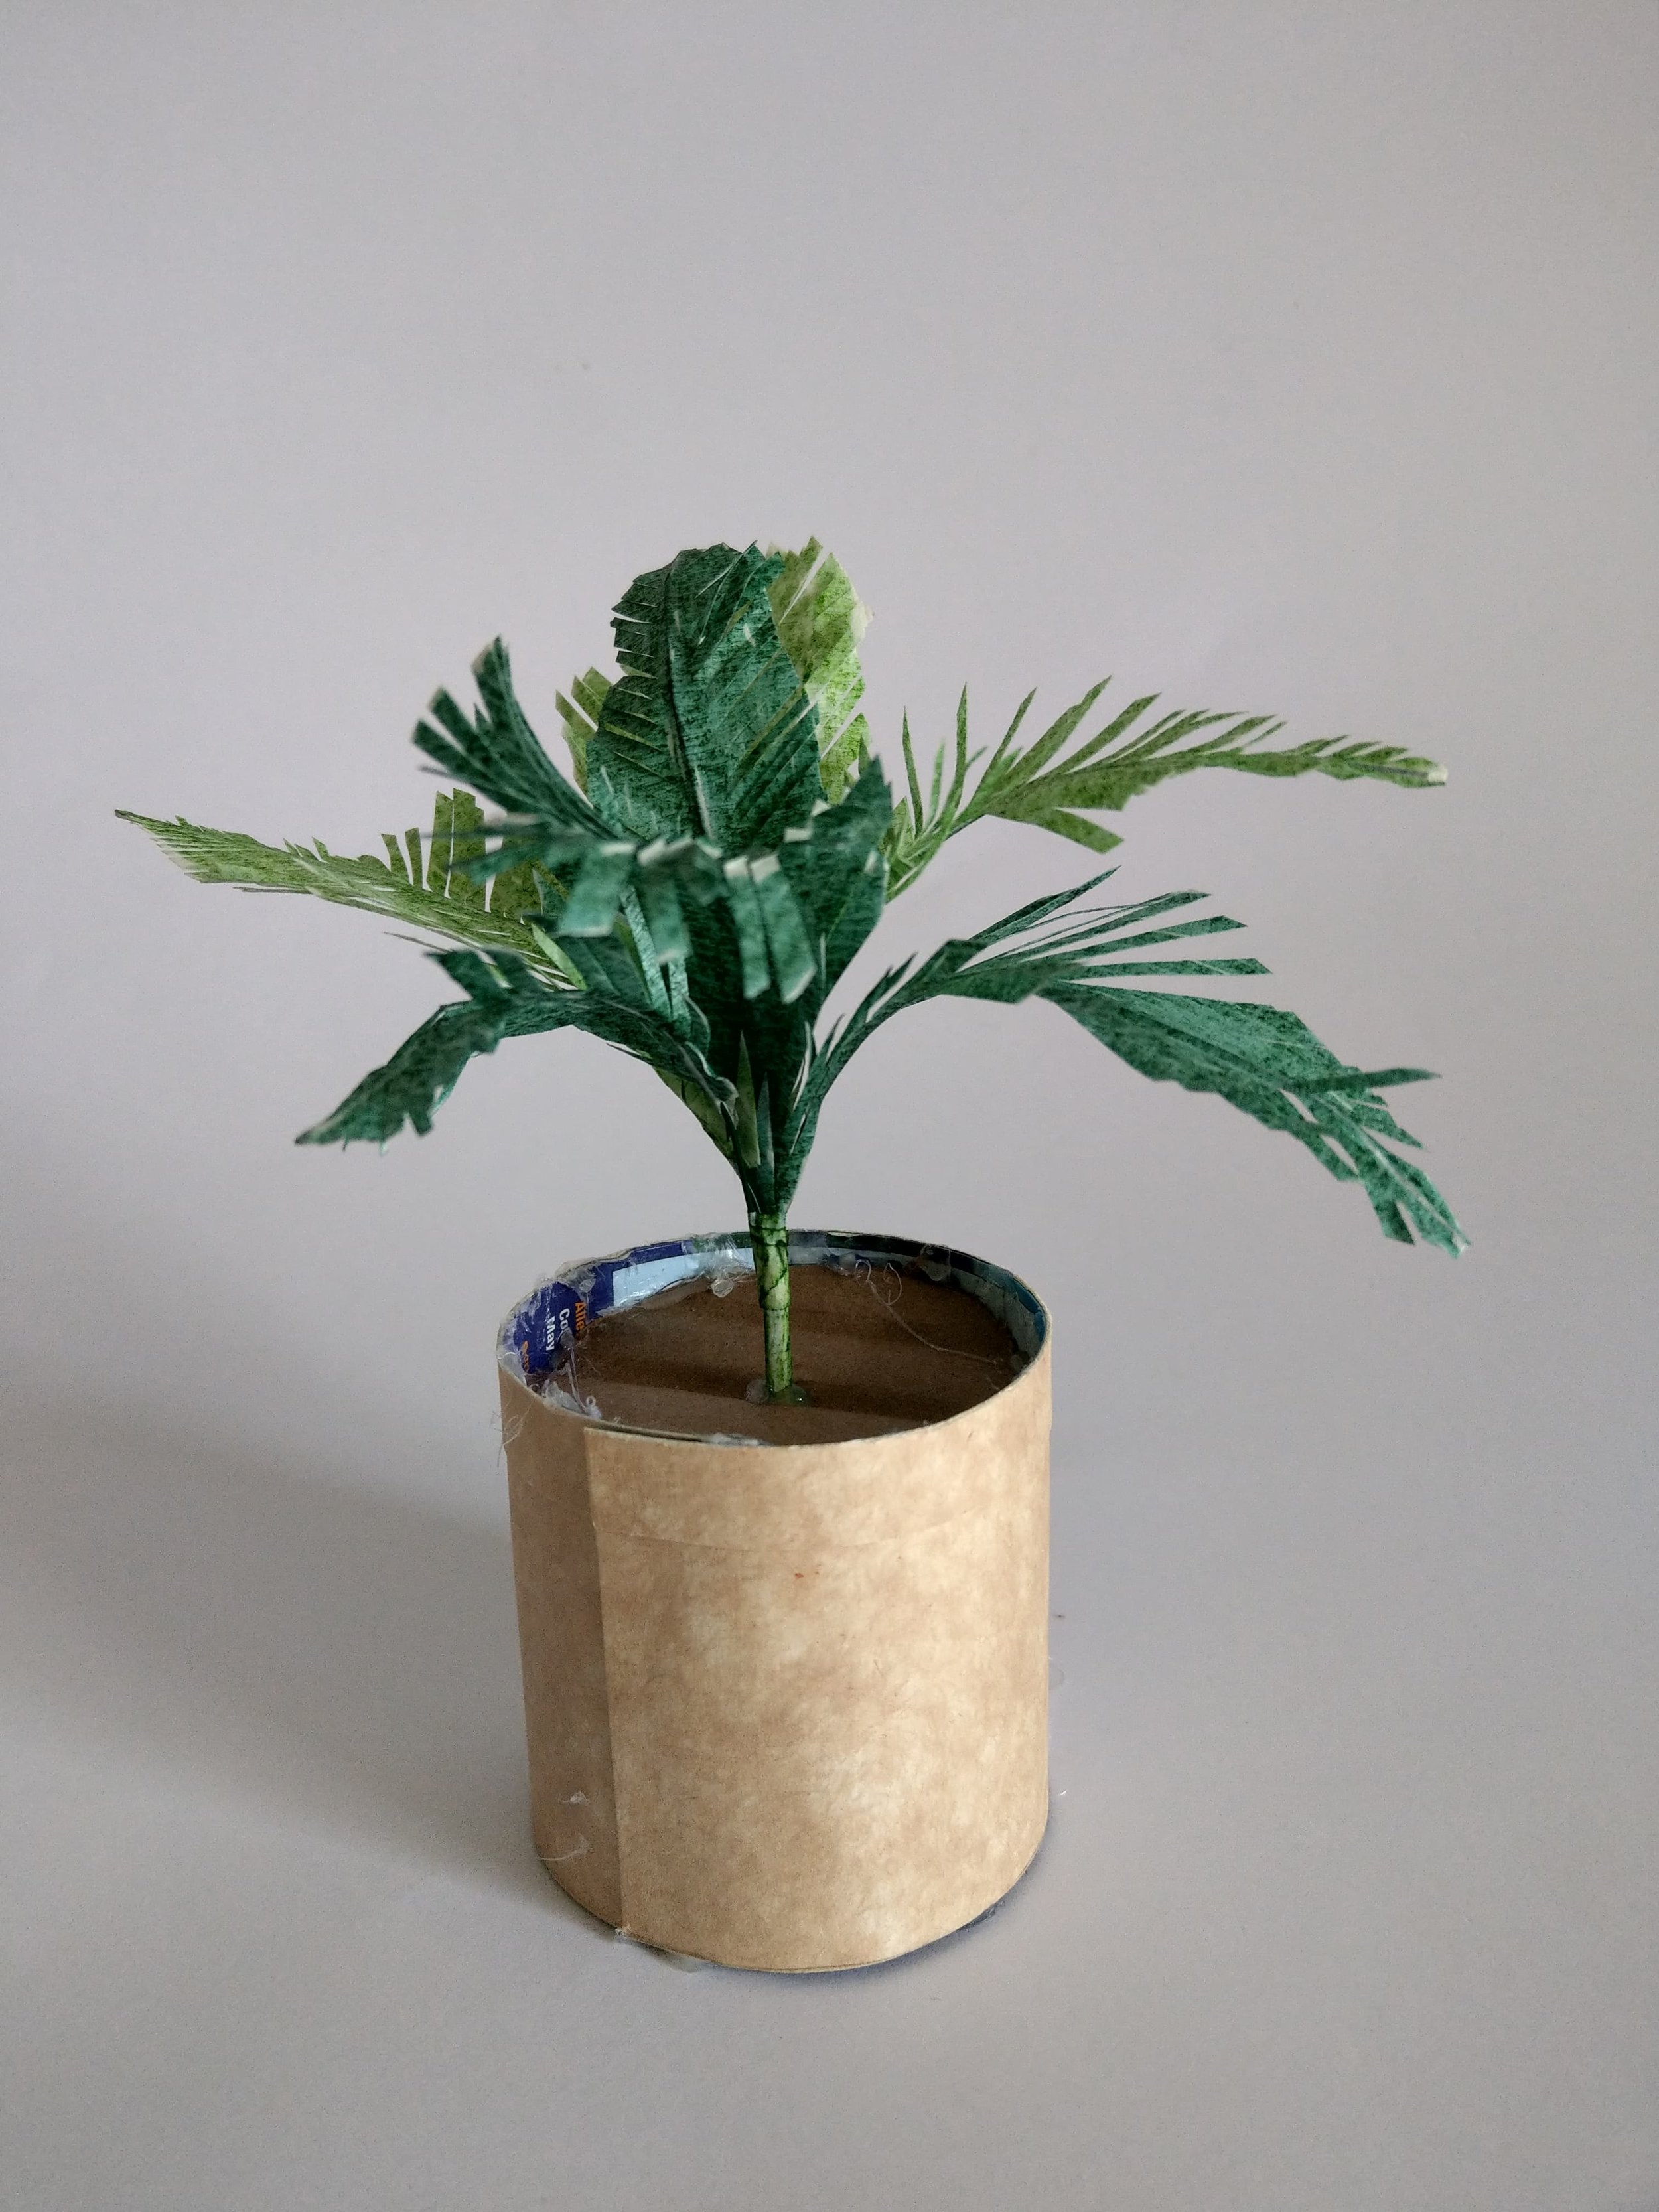
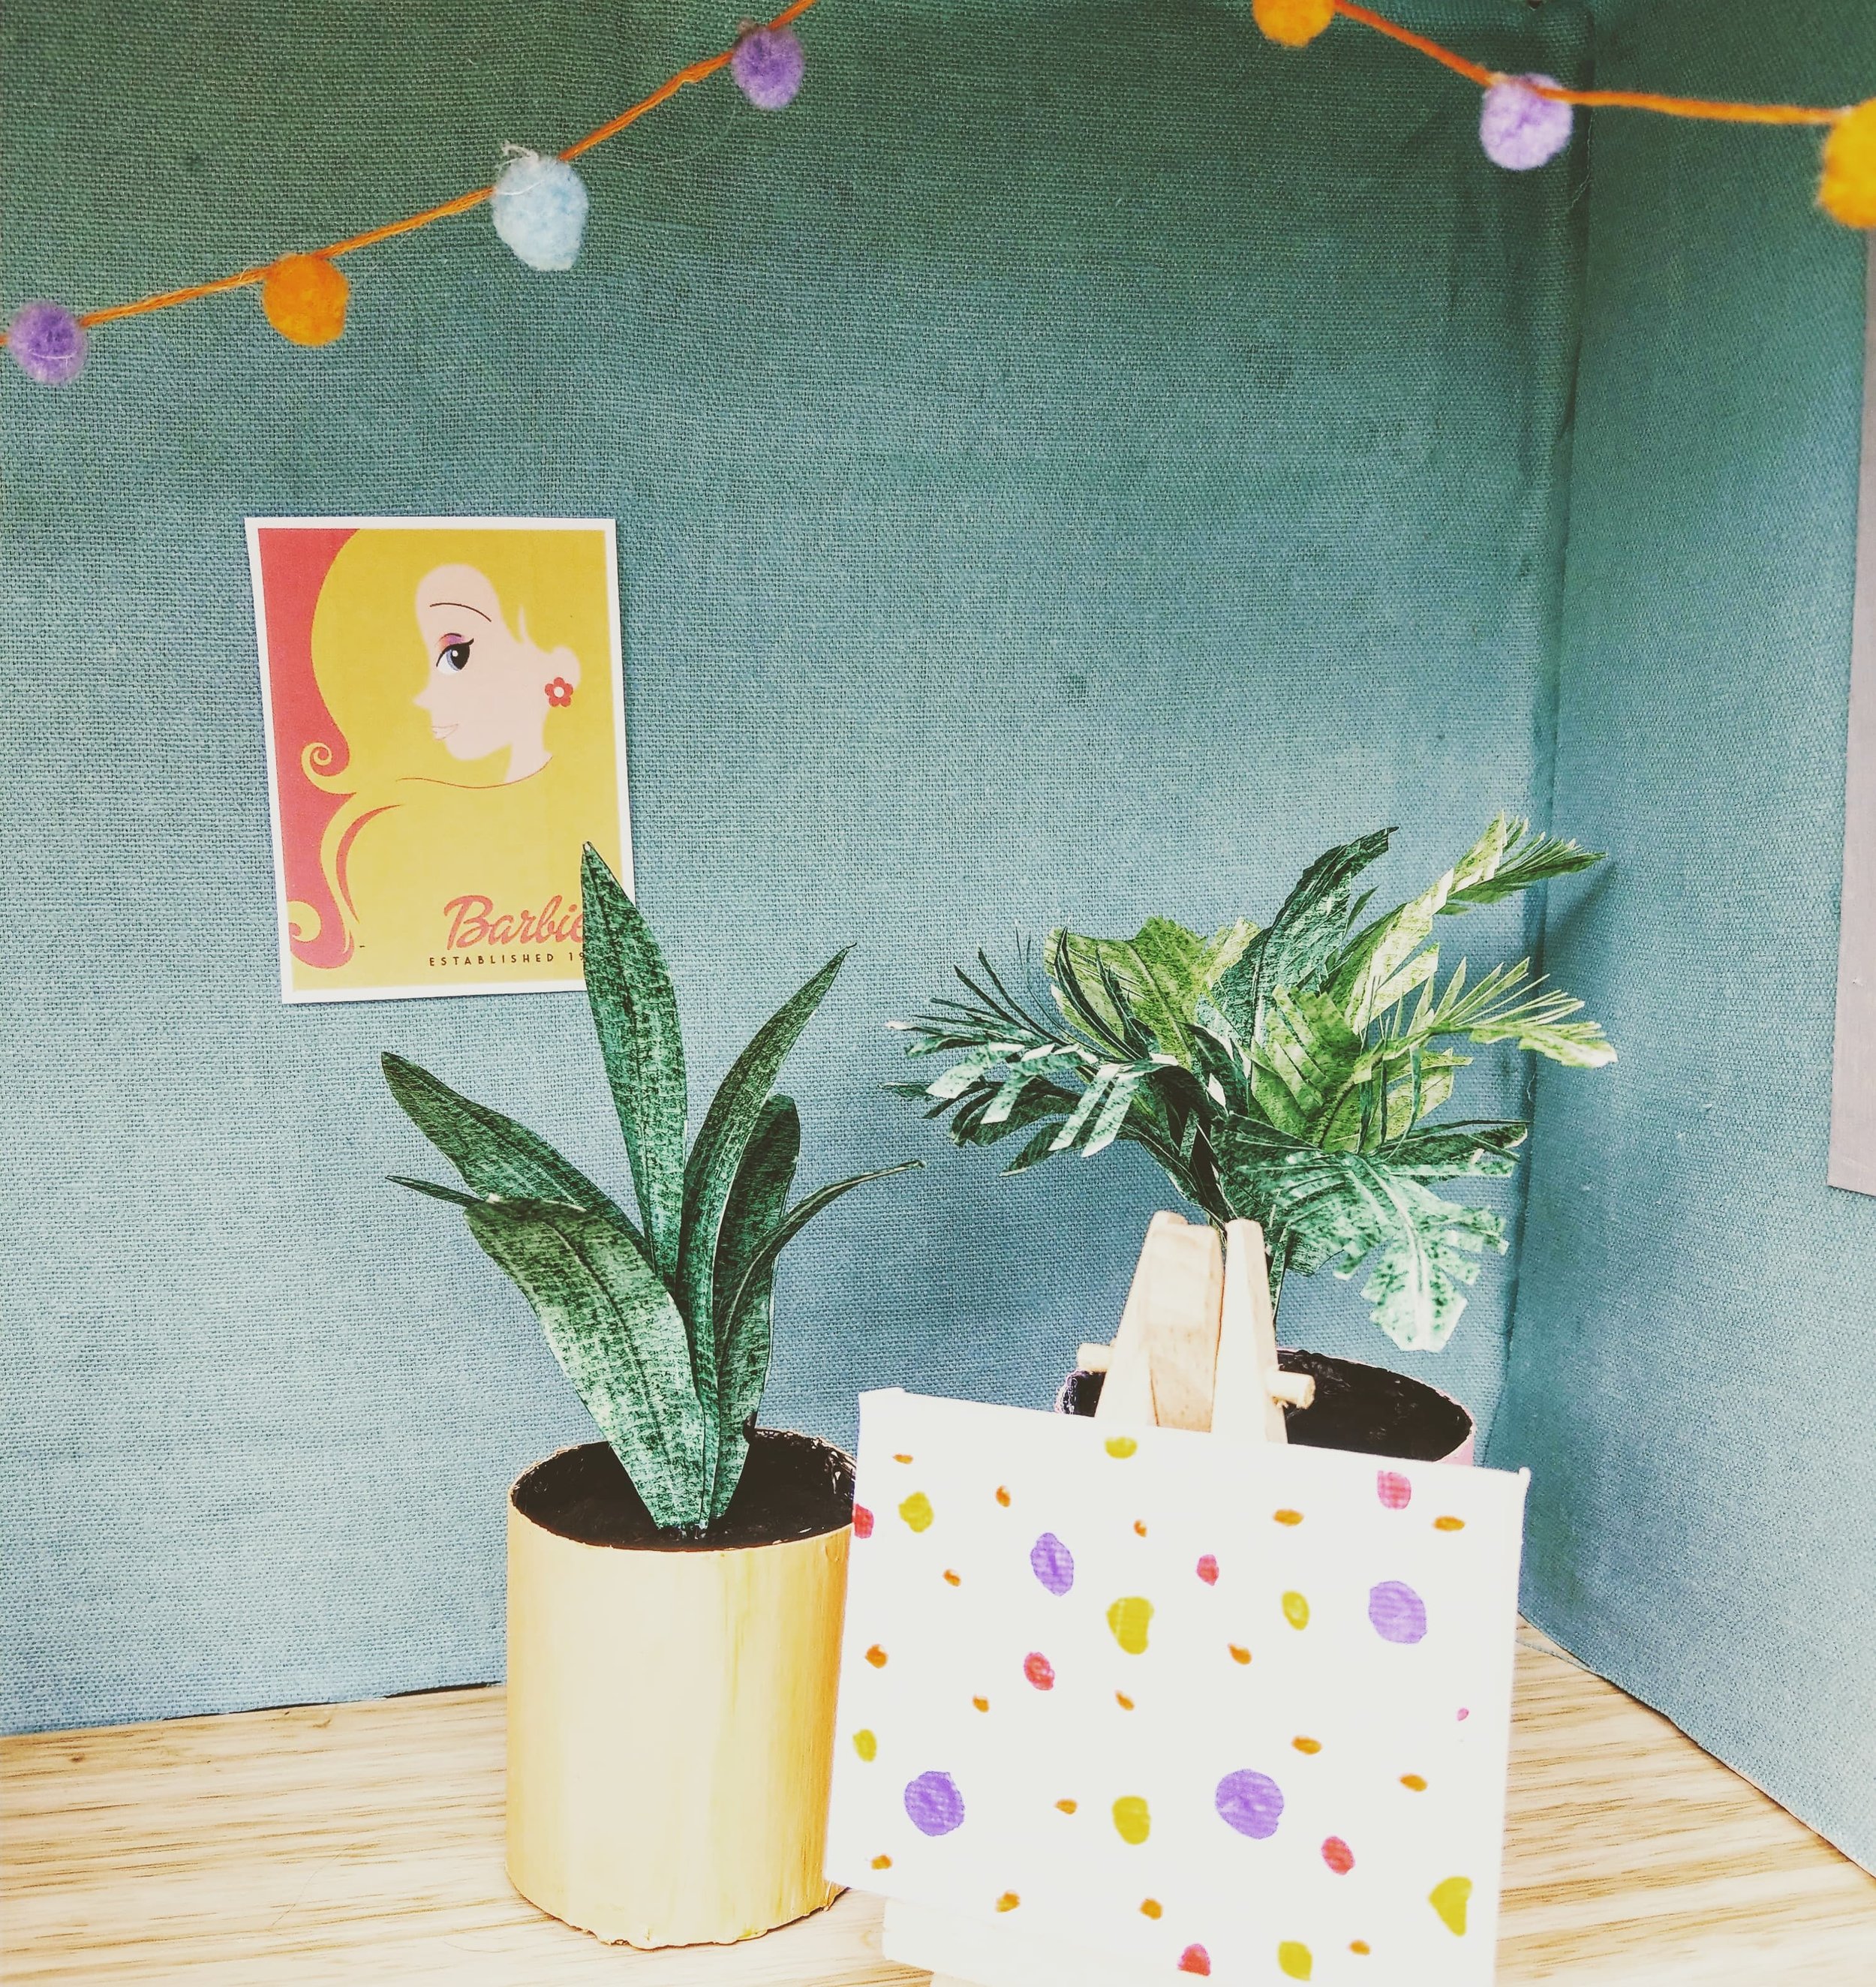
The pot plants are all hand-made. Masking tape leaves, coloured and cut to the right shape, are attached to florist wire. This pot was made from cardboard with a glue gun.
The side table was the lid of a special hand made soap box given to me, with wooden dowel legs from the $2 shop.
I found some Barbie printables on Pinterest, added a window (with a scene from our local area) and glue gunned two little cushions for the sofas to tie in with the red colour of the rug, and hey, presto, the lounge room was complete.
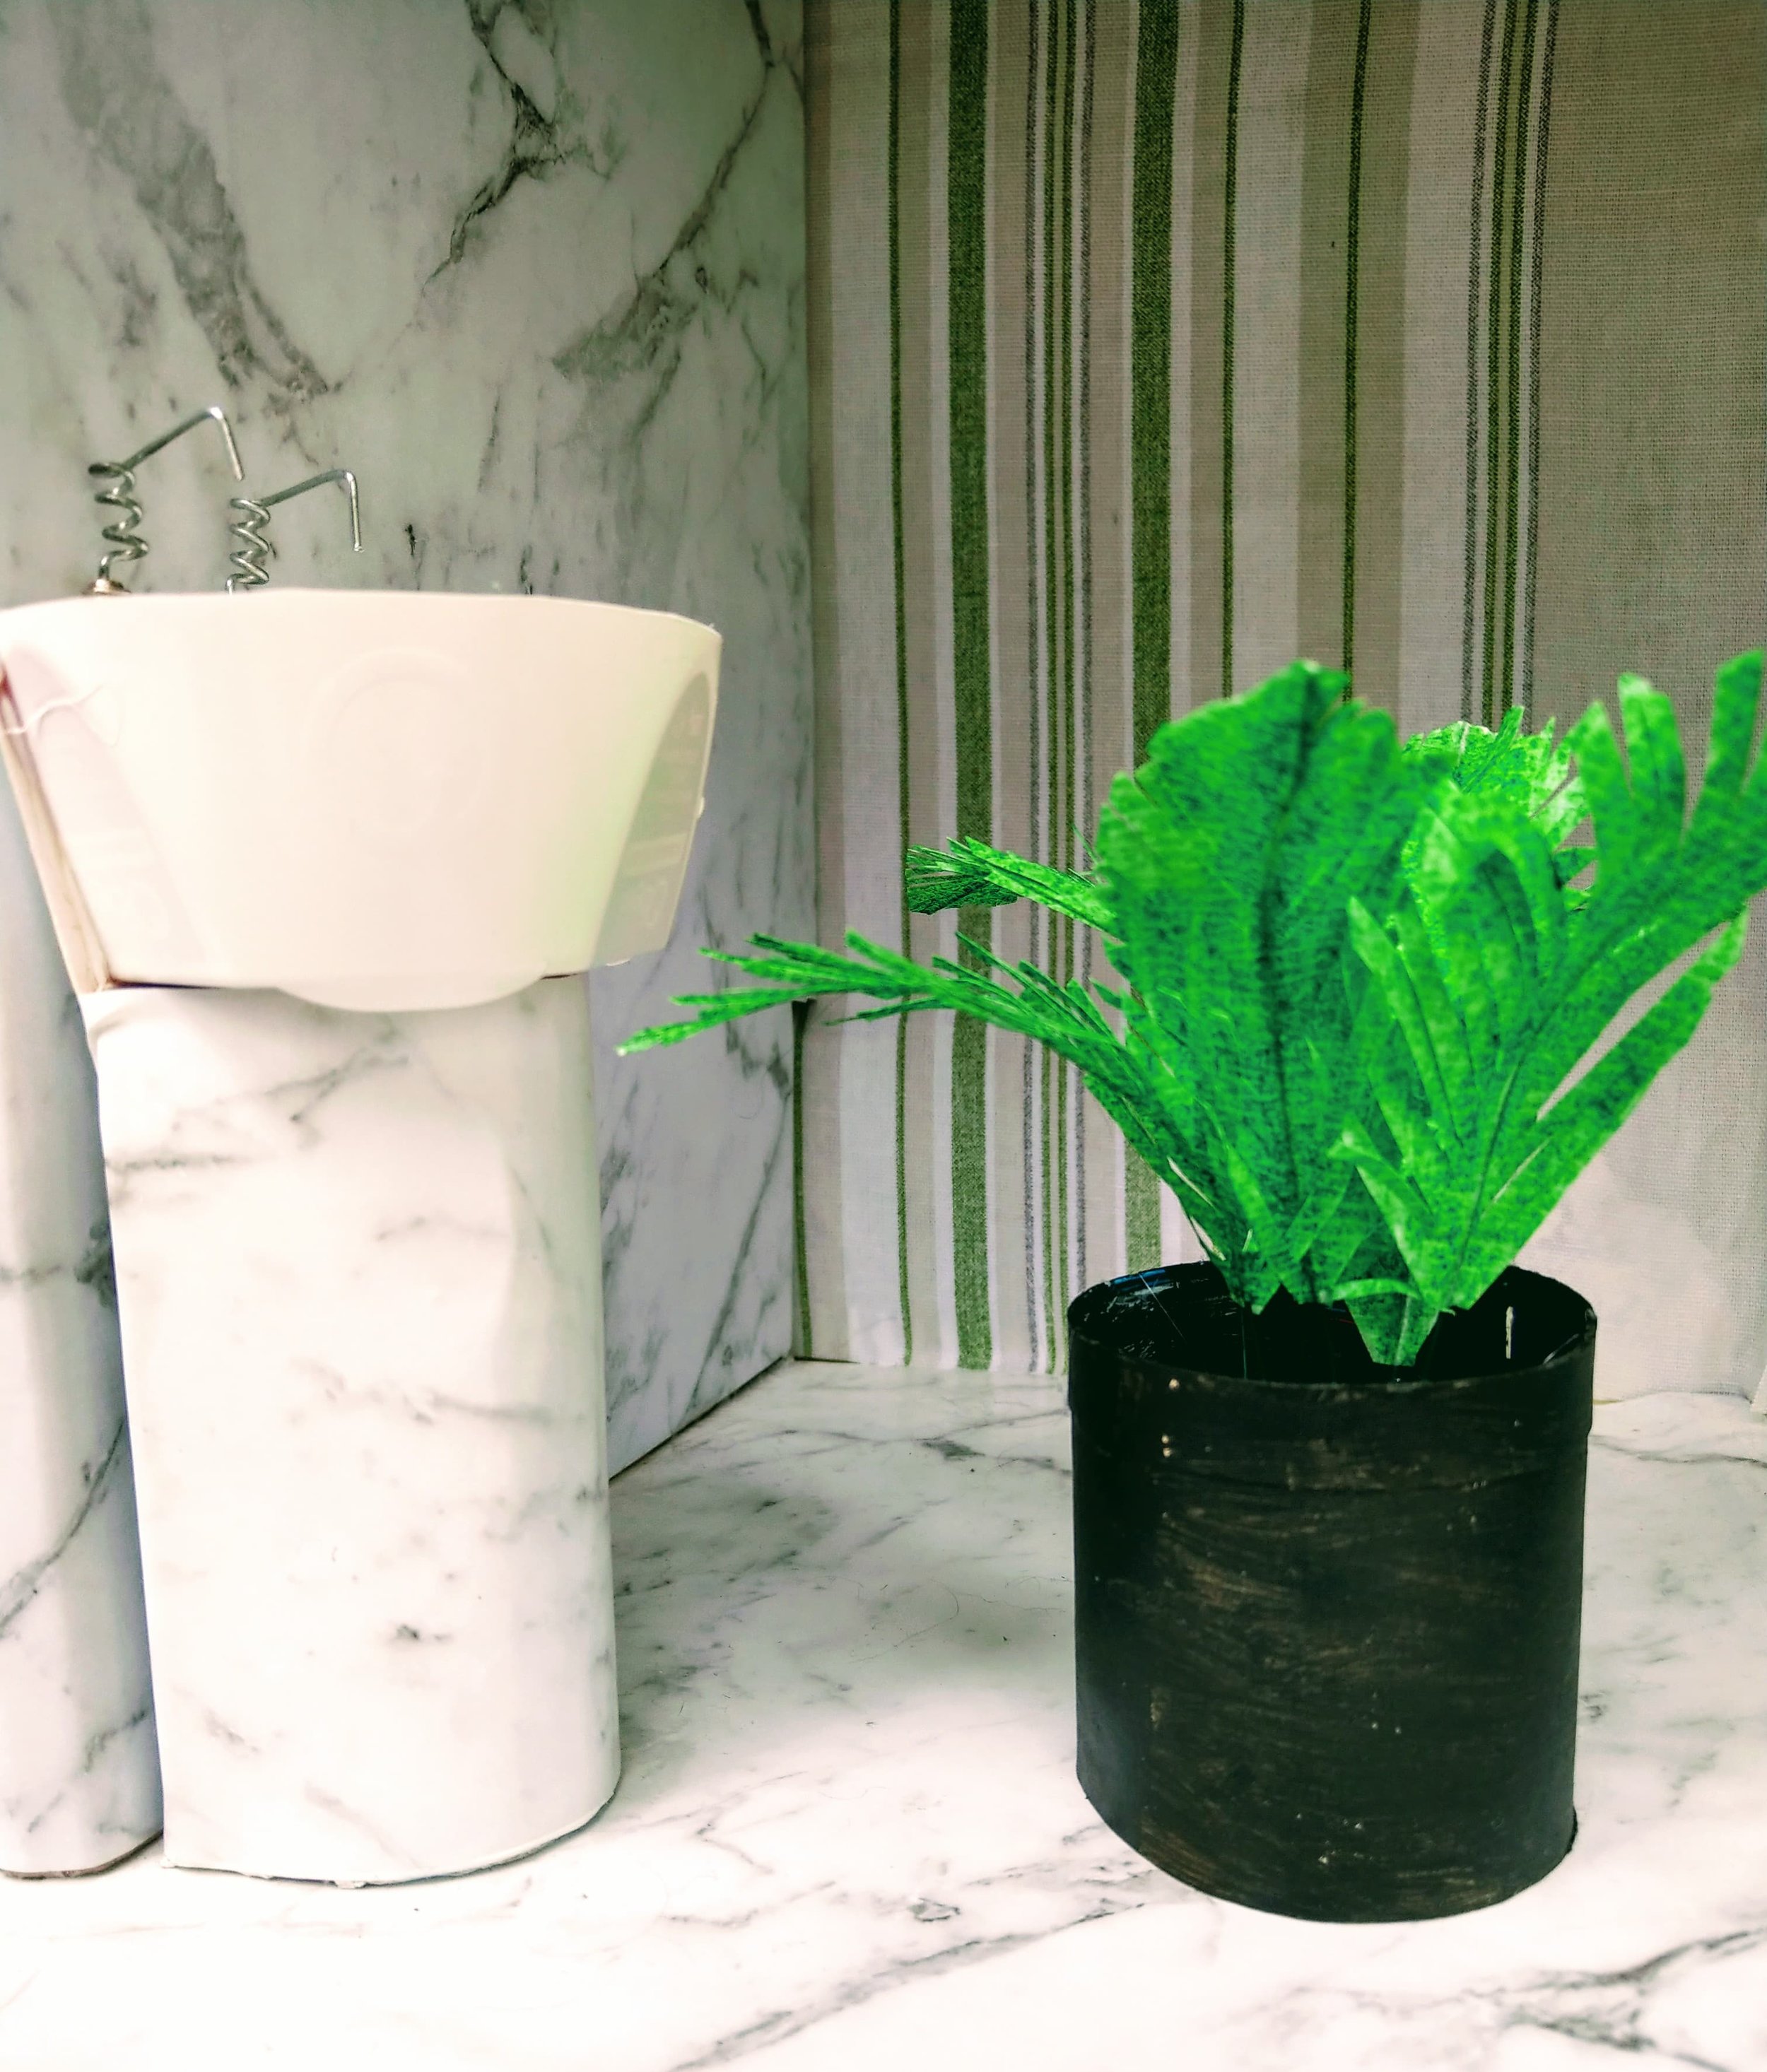

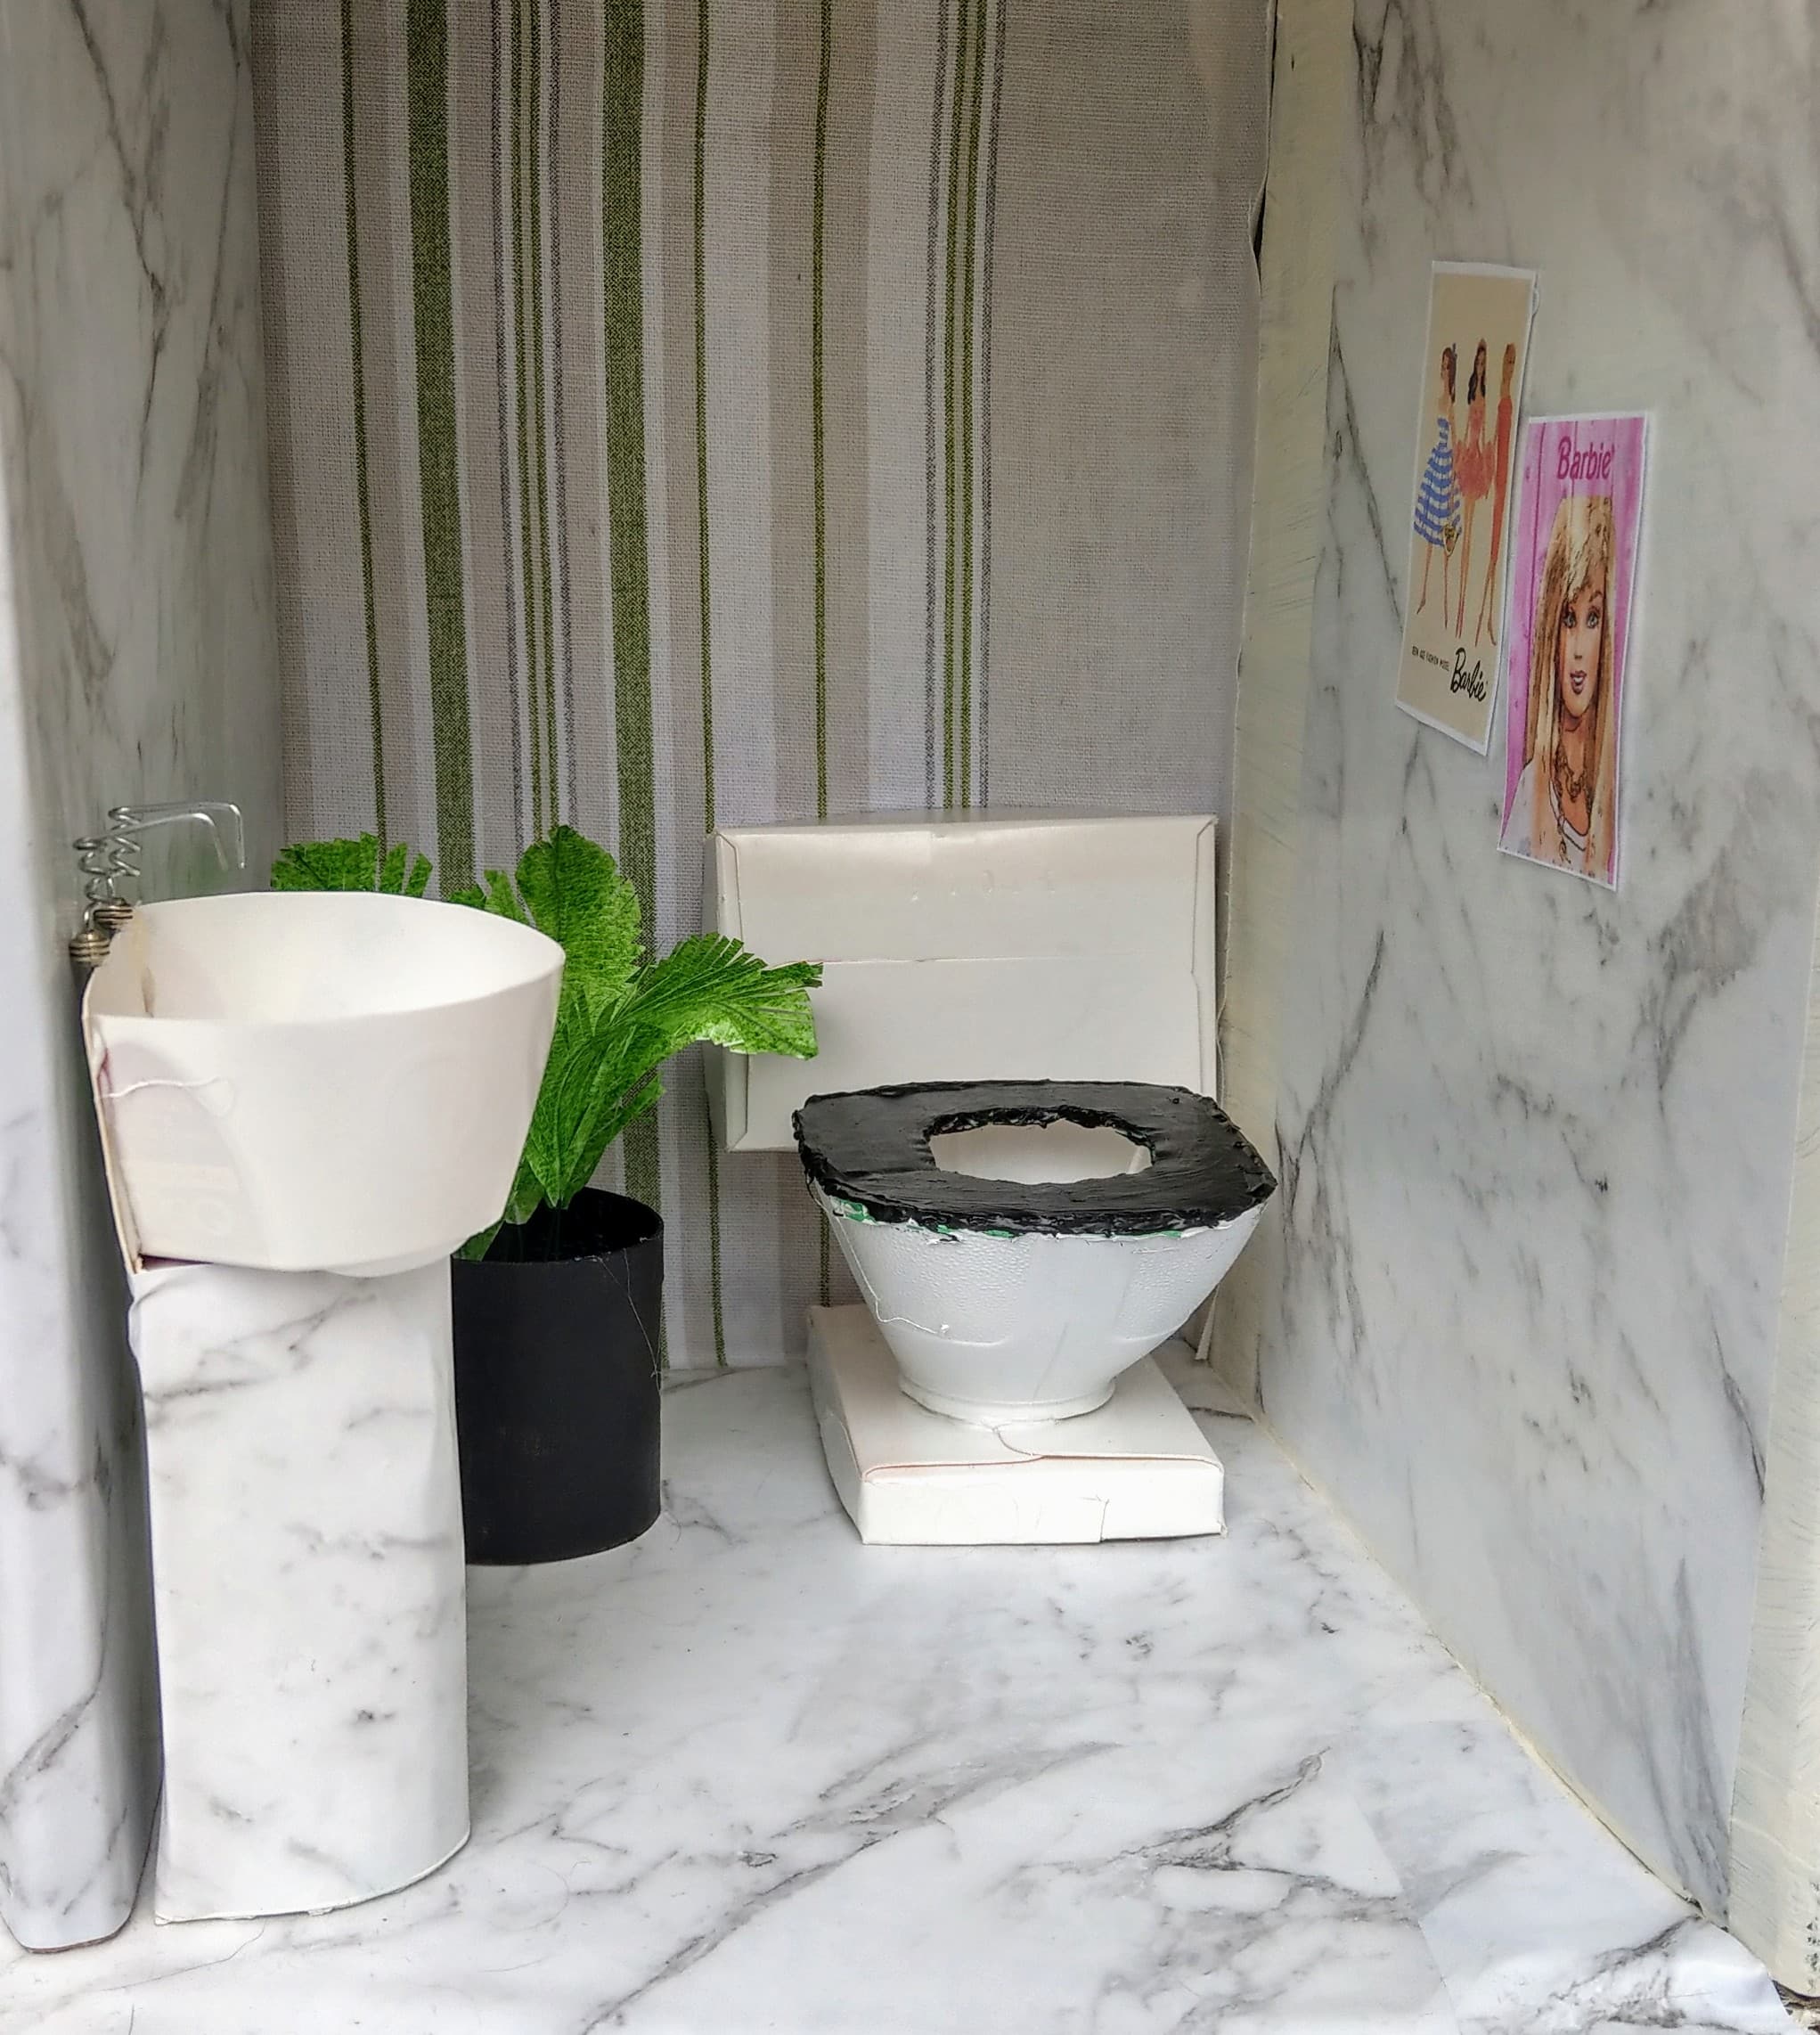
Bathroom
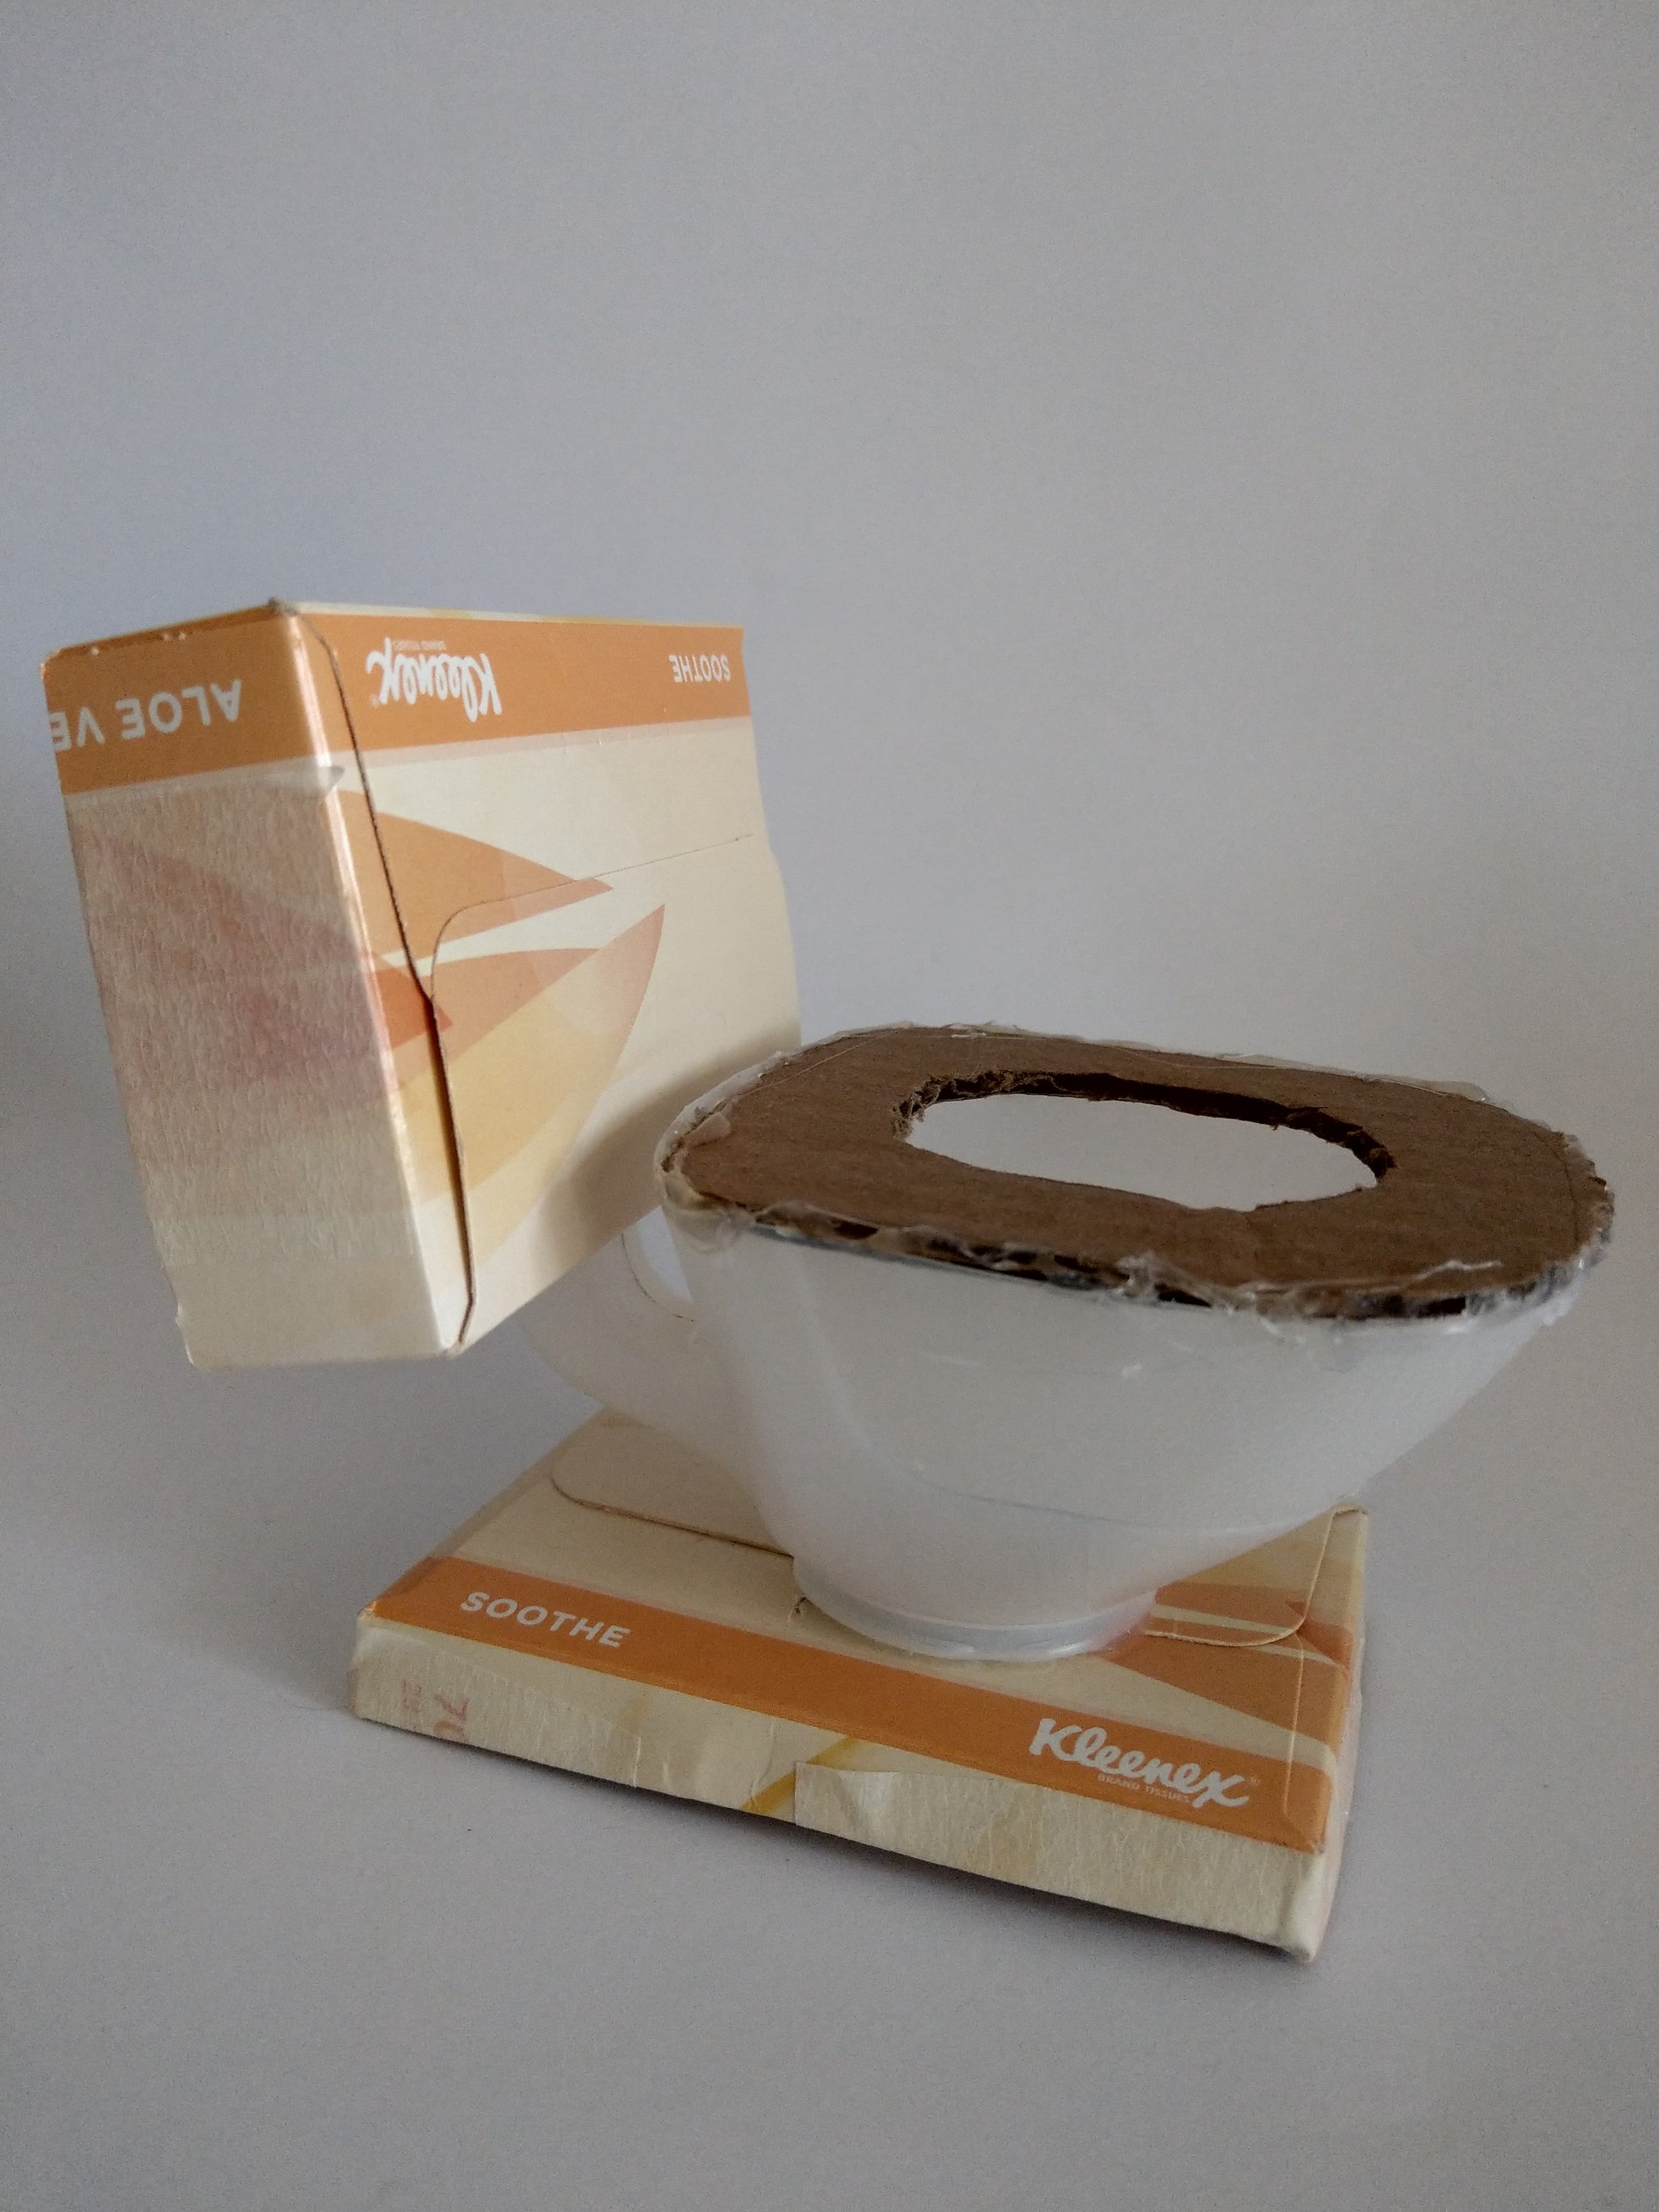
After I made the sofas, the top half of the 3L milk bottle was sitting around. It was such a cool shape that I didn't want to put it in recycling just yet. It took me a couple of days to turn it upside down, put it in a cardboard base to keep it stable, add a water tank to the back and glue gun on a toilet seat. I spray painted it white and painted the seat black, old school style.
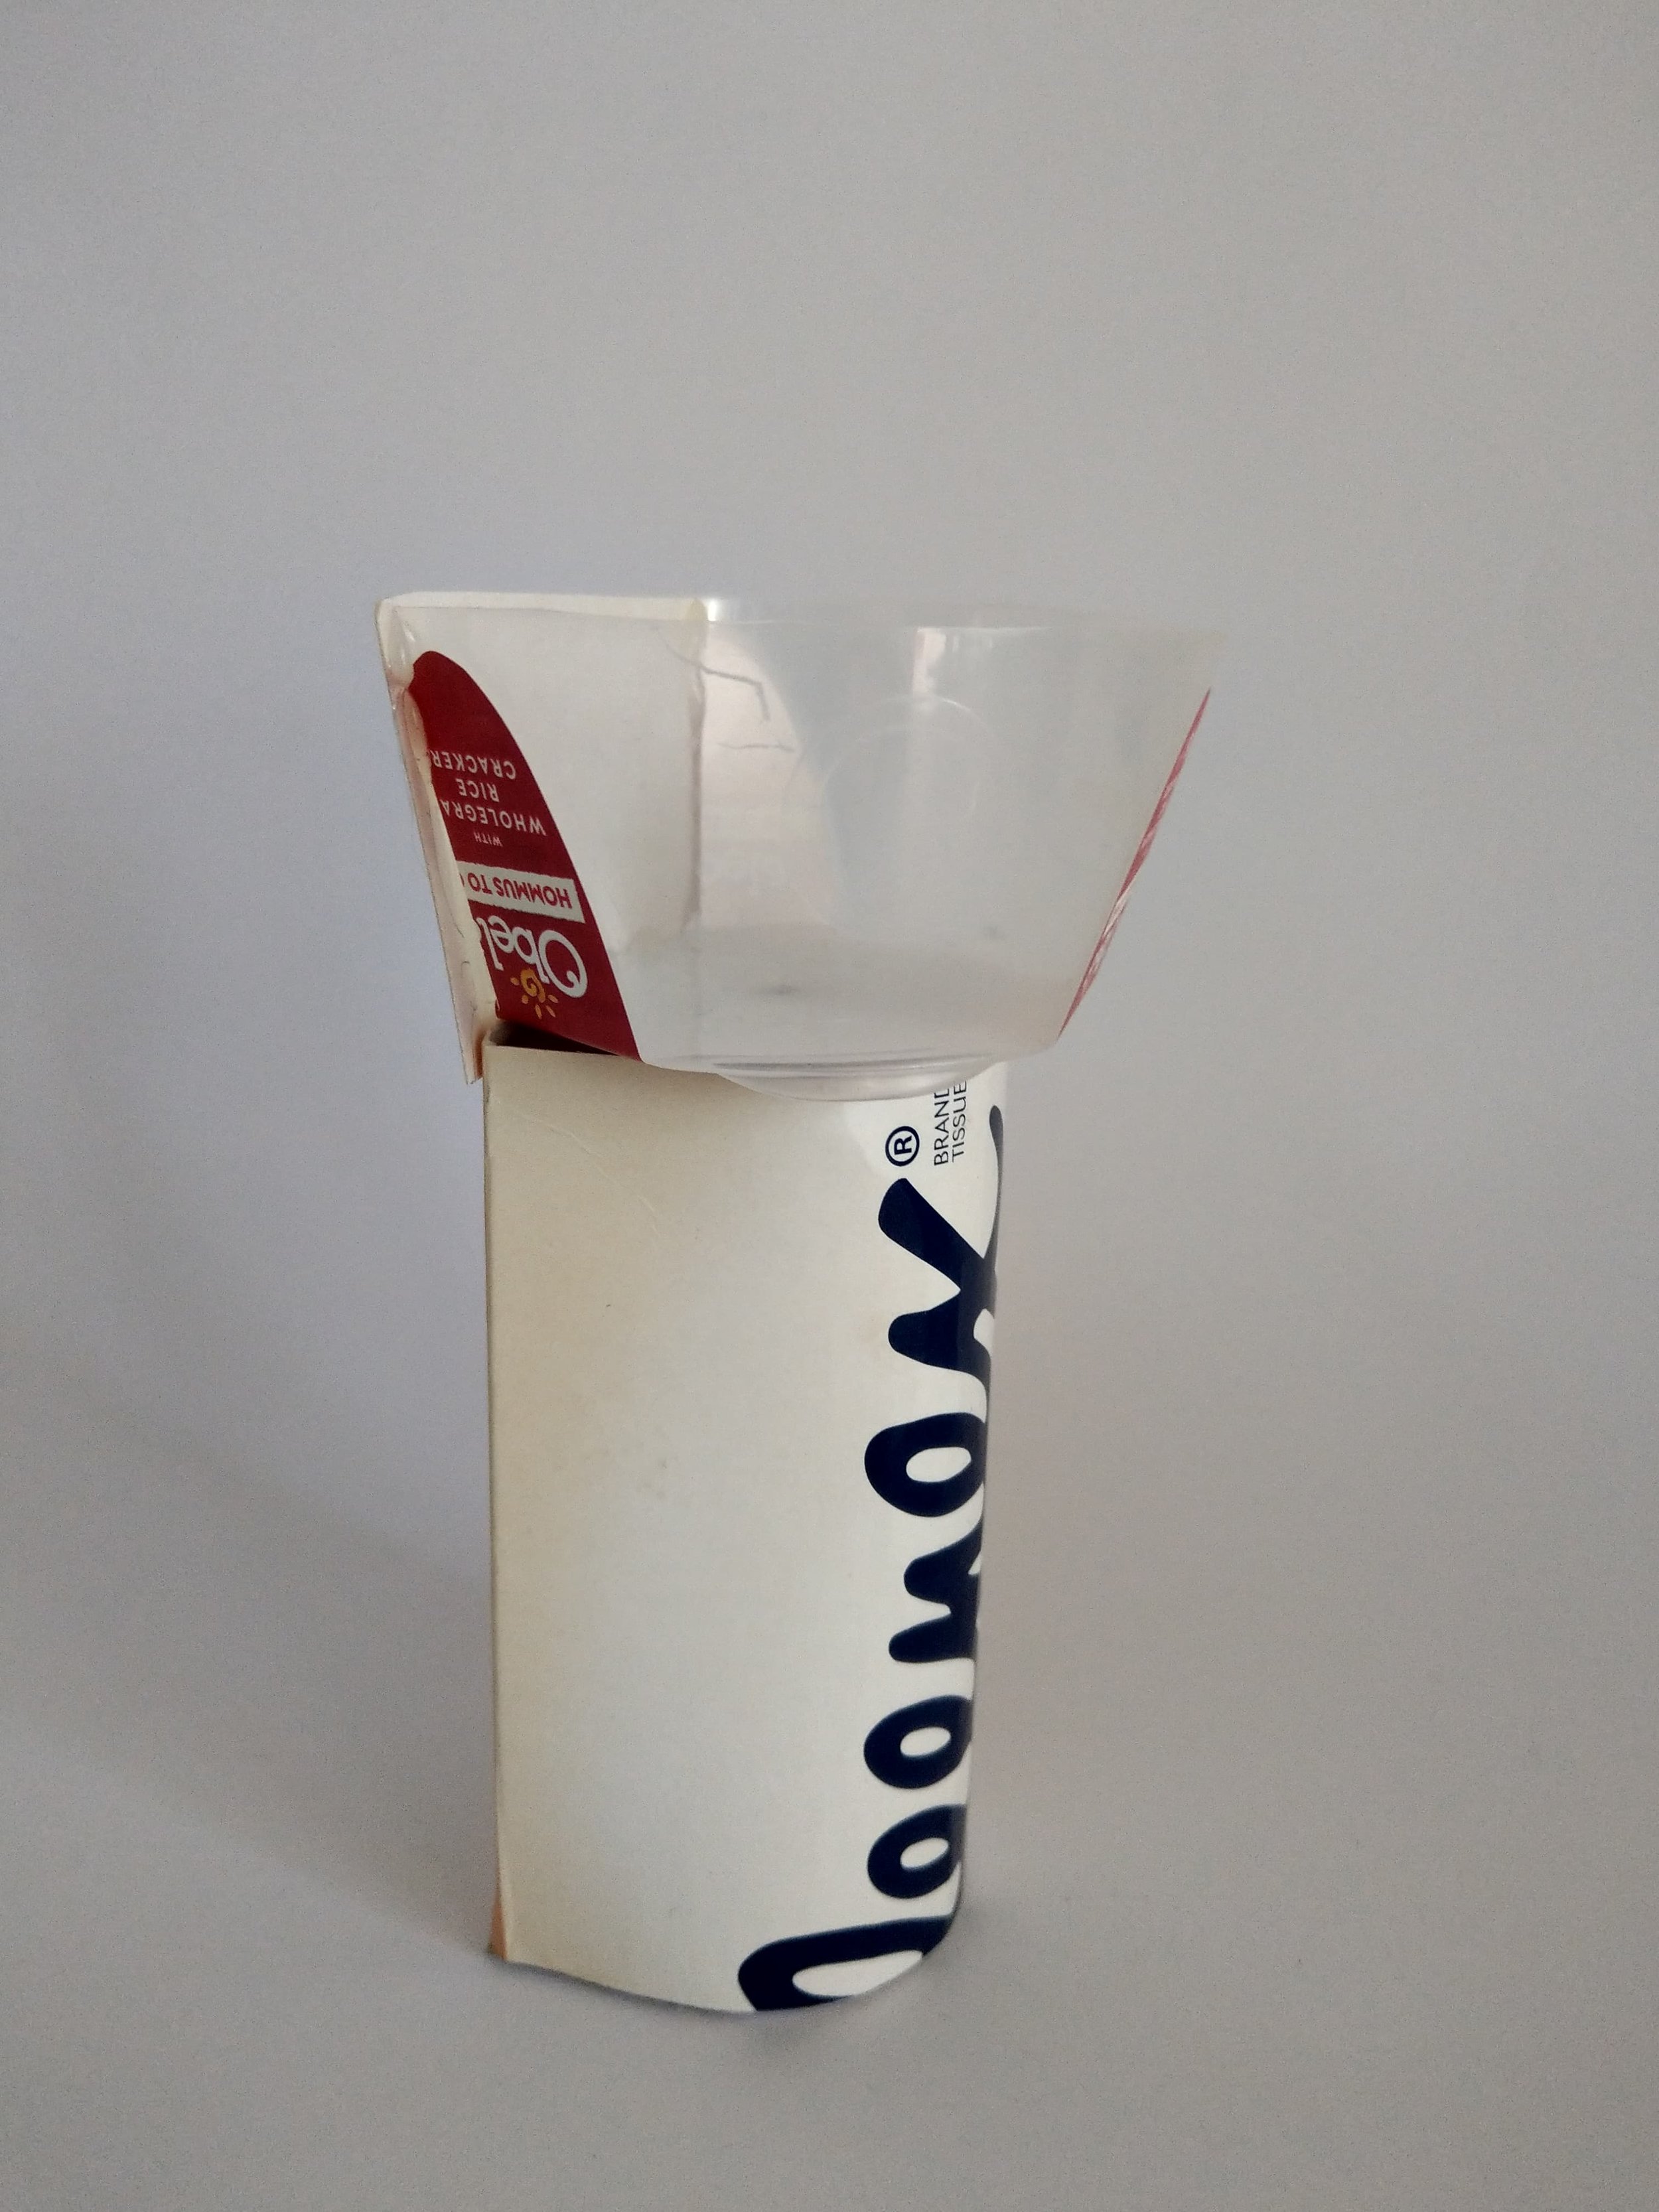
The sink was a plastic container from a dip my son had for a snack, glued to a base made from a Kleenex box, spray painted white. Look carefully and you'll see I added some taps - they are those metal bits from wooden pegs.
Sadly there was no room for a shower or bath, but there was enough for a pot plant, and some vintage printable Barbie posters on the wall. (Not my taste of decor, but the child had to make some choices after all...)


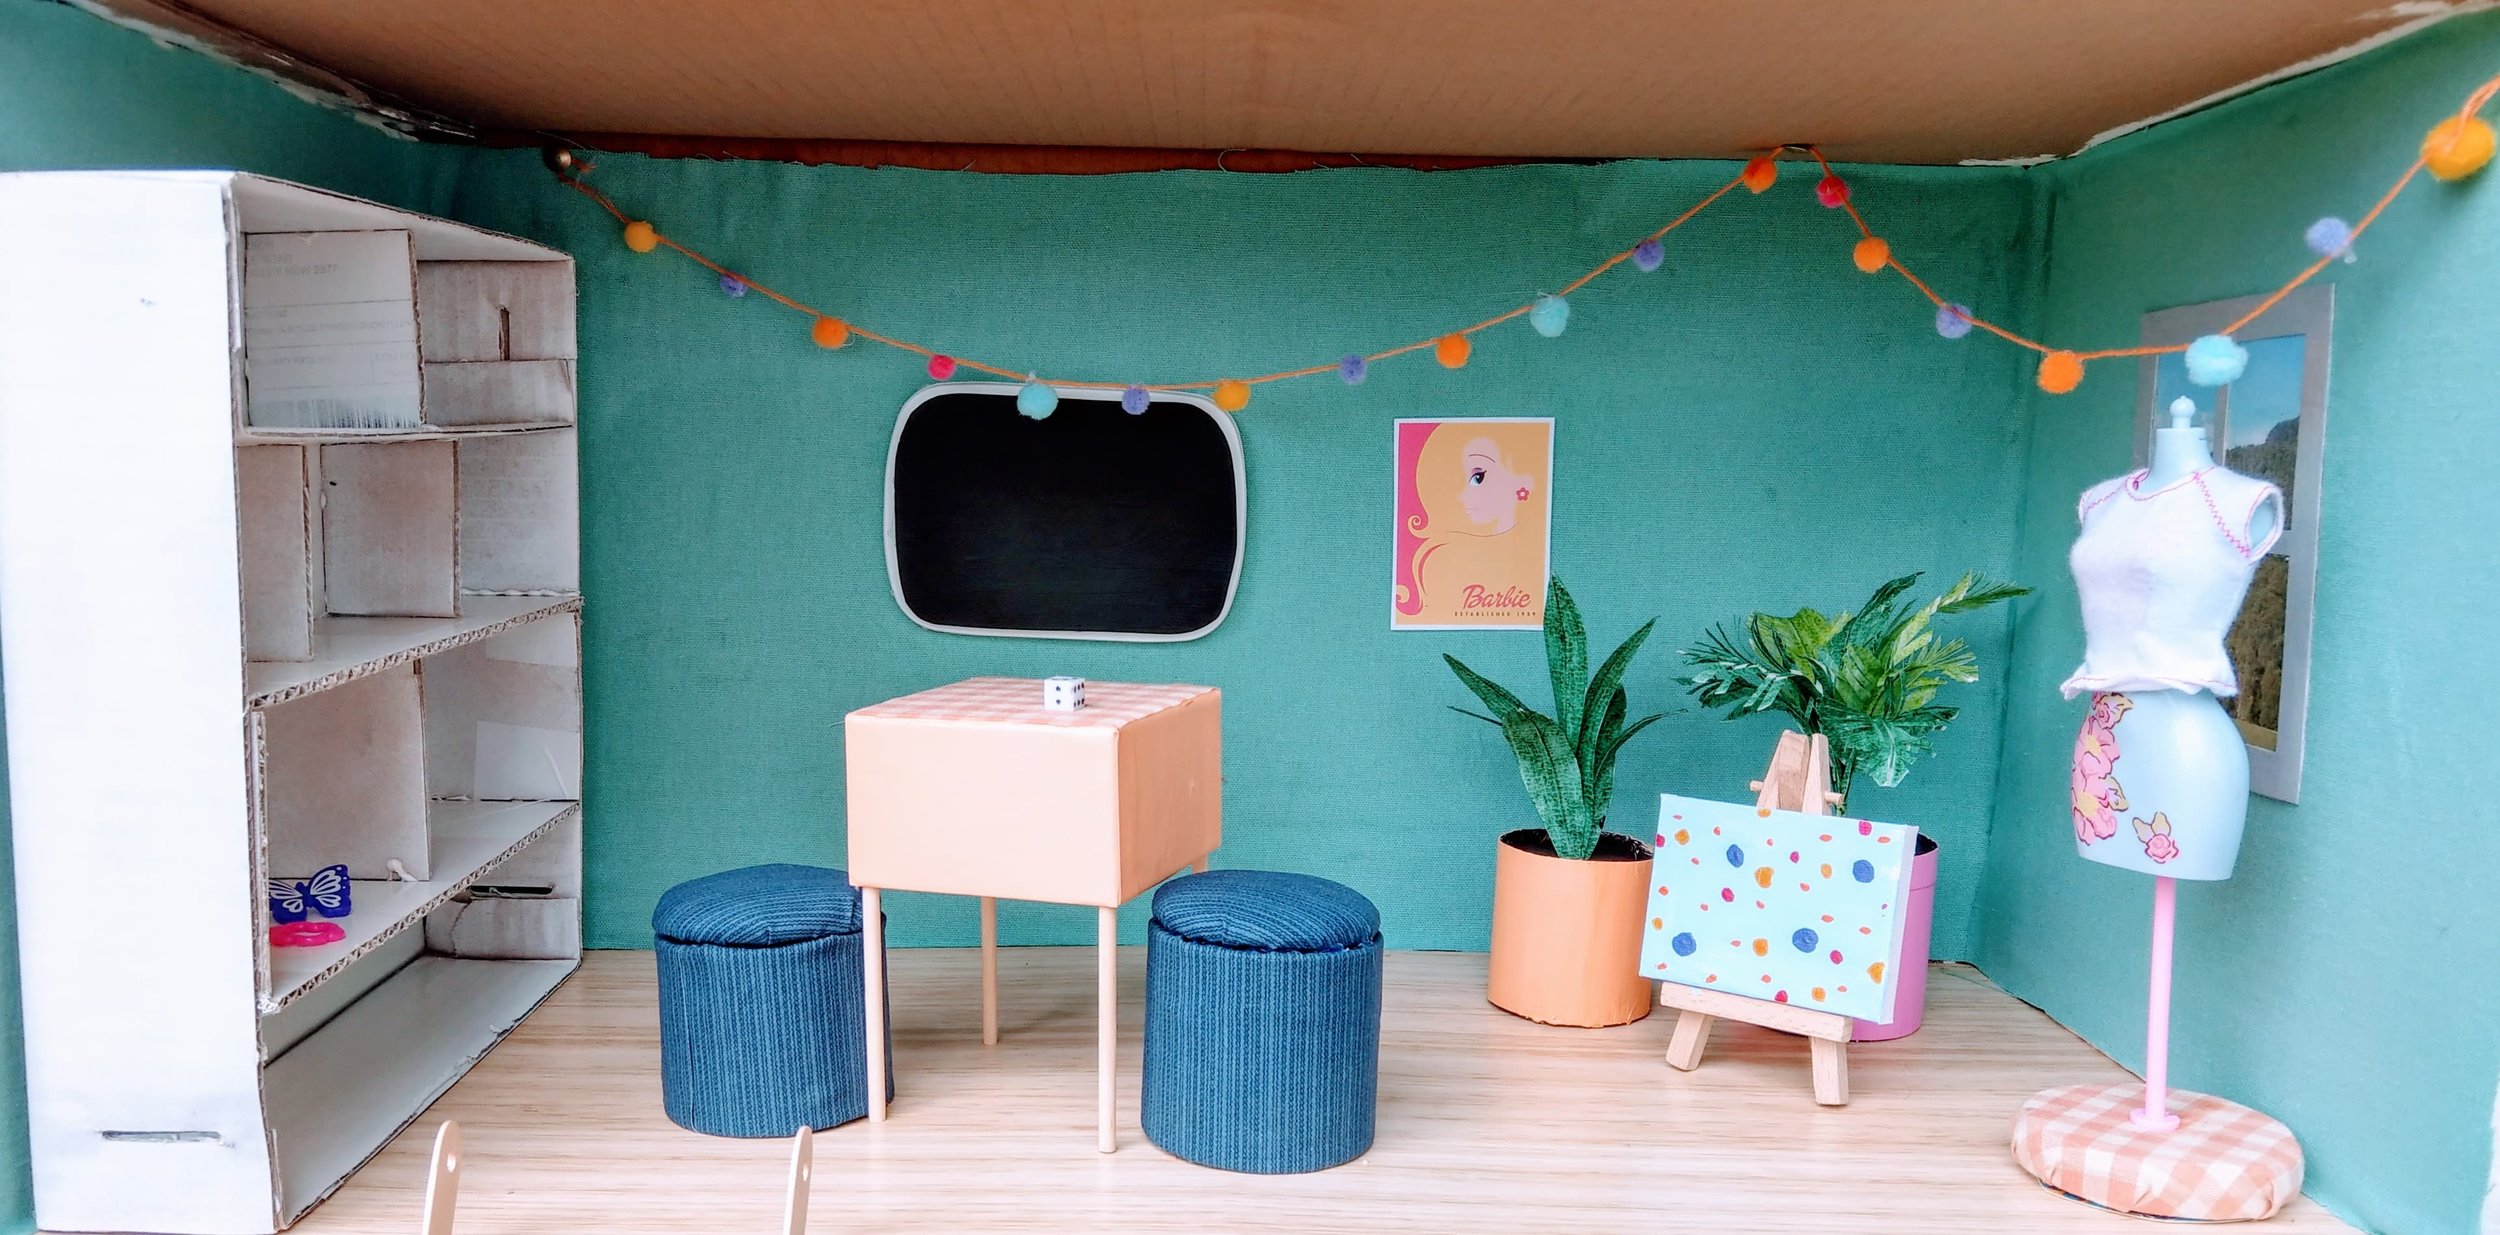
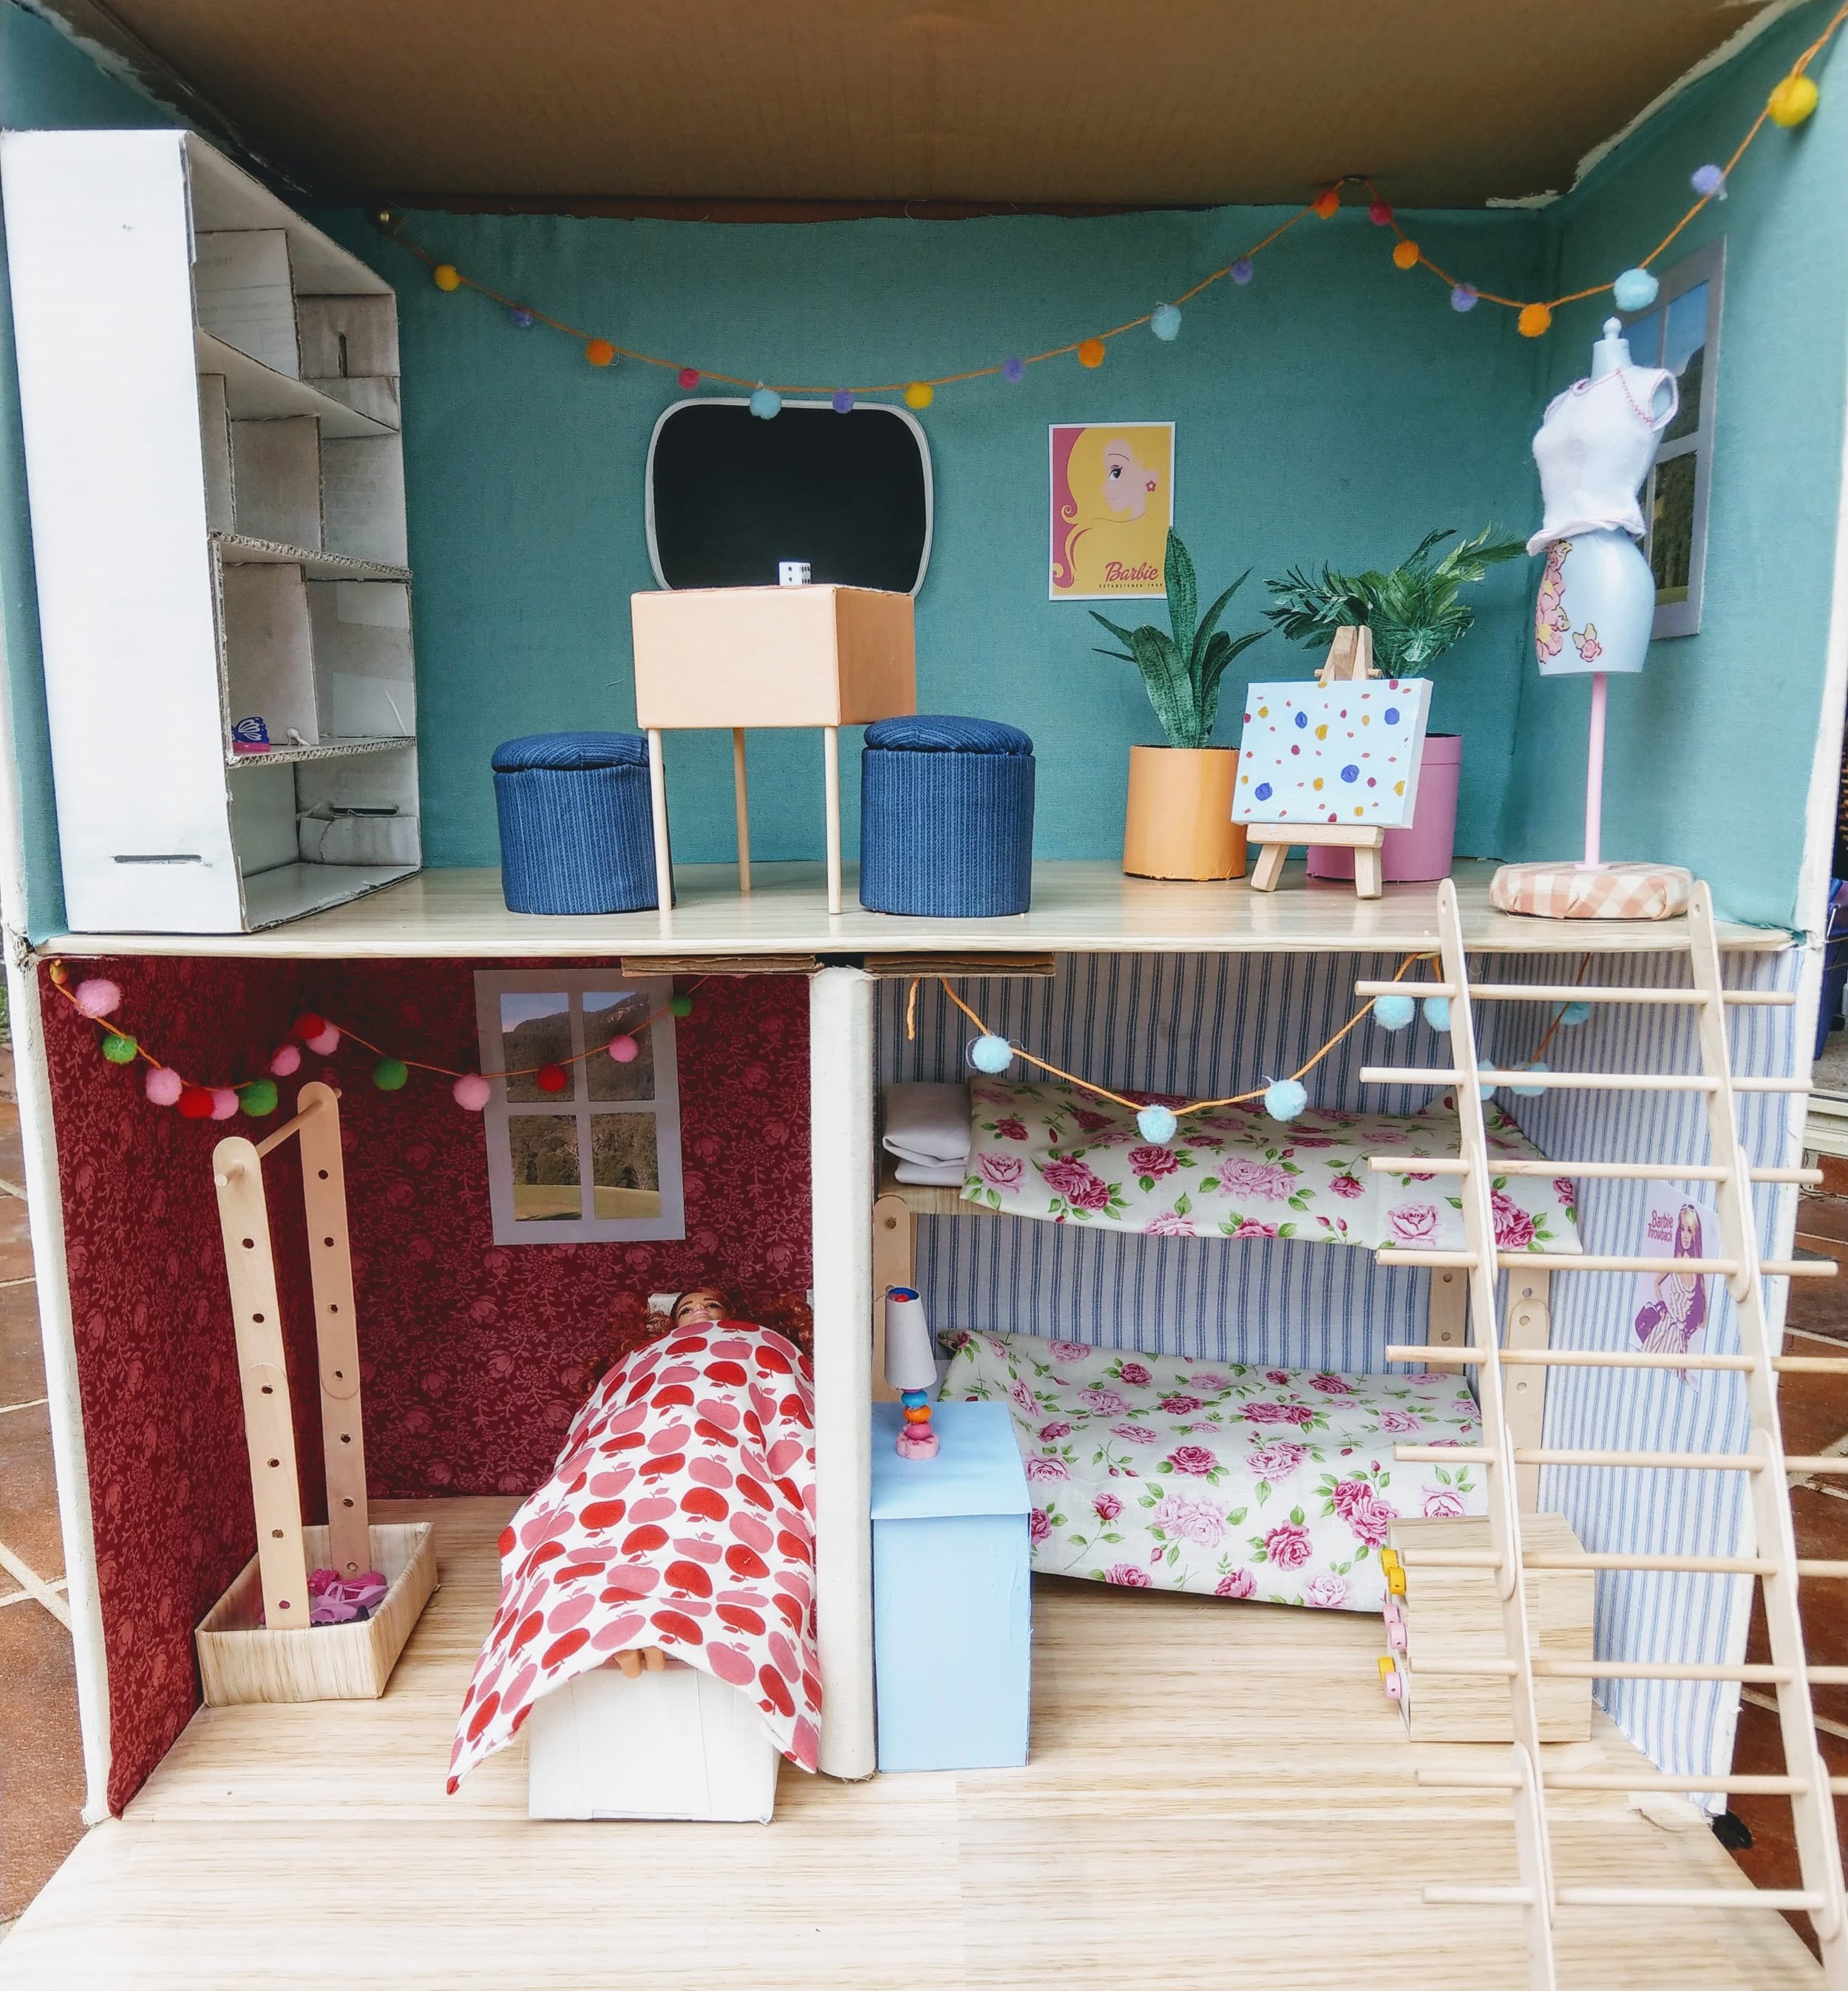
Creative room
This room features blue fabric on the walls, and a full wall sized white shelf unit, made out of cardboard and spray painted white. The blue stools are just cylinders covered with fabric, and a fabric-covered cushion glued on top.
I made the pompom banner for this room first. It was tricky to get the hot glue on the pom poms and then somehow stick them to the right part of the string without getting it all over my fingers. Works better if you have a helper holding the string taut... hot tip.
The eight year old had a barbie clothes mannequin already in her barbie box, so we gave it a sturdy base, added a full screen TV, some art and plants, and the room is complete.
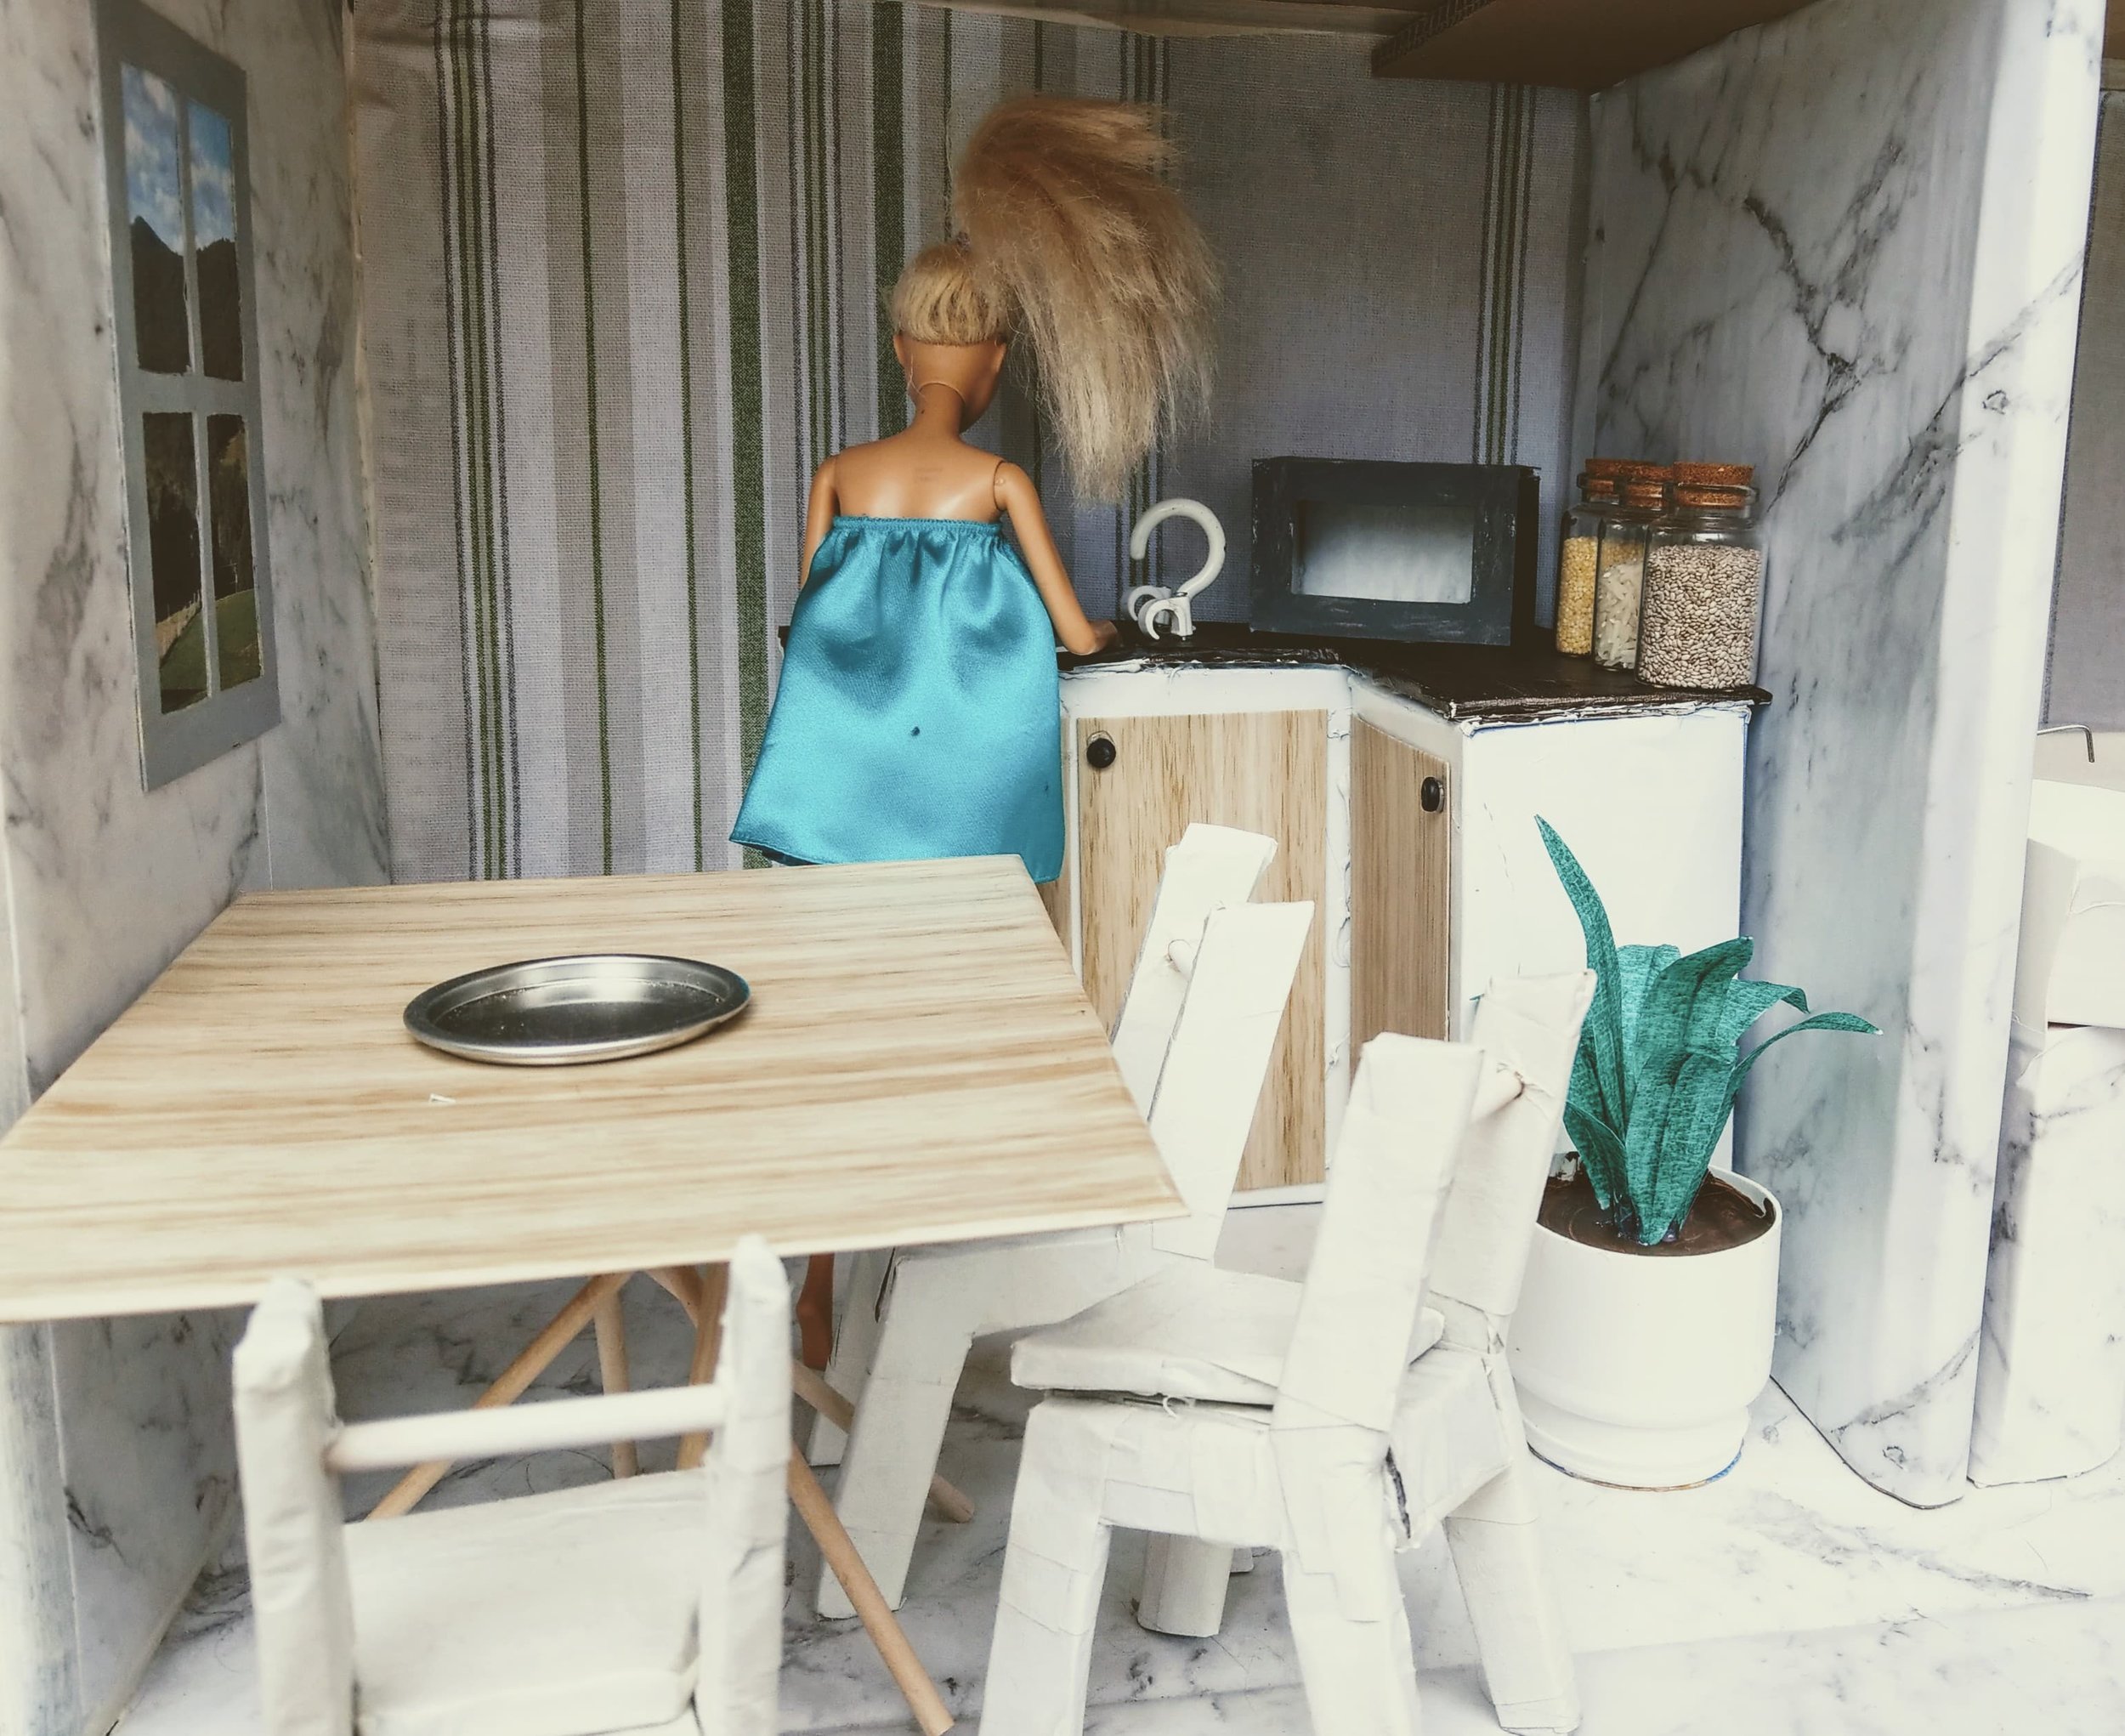
Kitchen
This is only a little room so it was a challenge to fit everything in.
The kitchen bench unit was made from a cereal box and a cracker box, cut down and glued together, with a separate bench piece on top. I strengthened both boxes with heavier cardboard pieces inside to keep it sturdy, and added a sink unit which was simply the bottom of a UHT milk container. We spray painted the whole thing white, painted the bench brown and added some fake cupboard doors covered in wood-look contact.
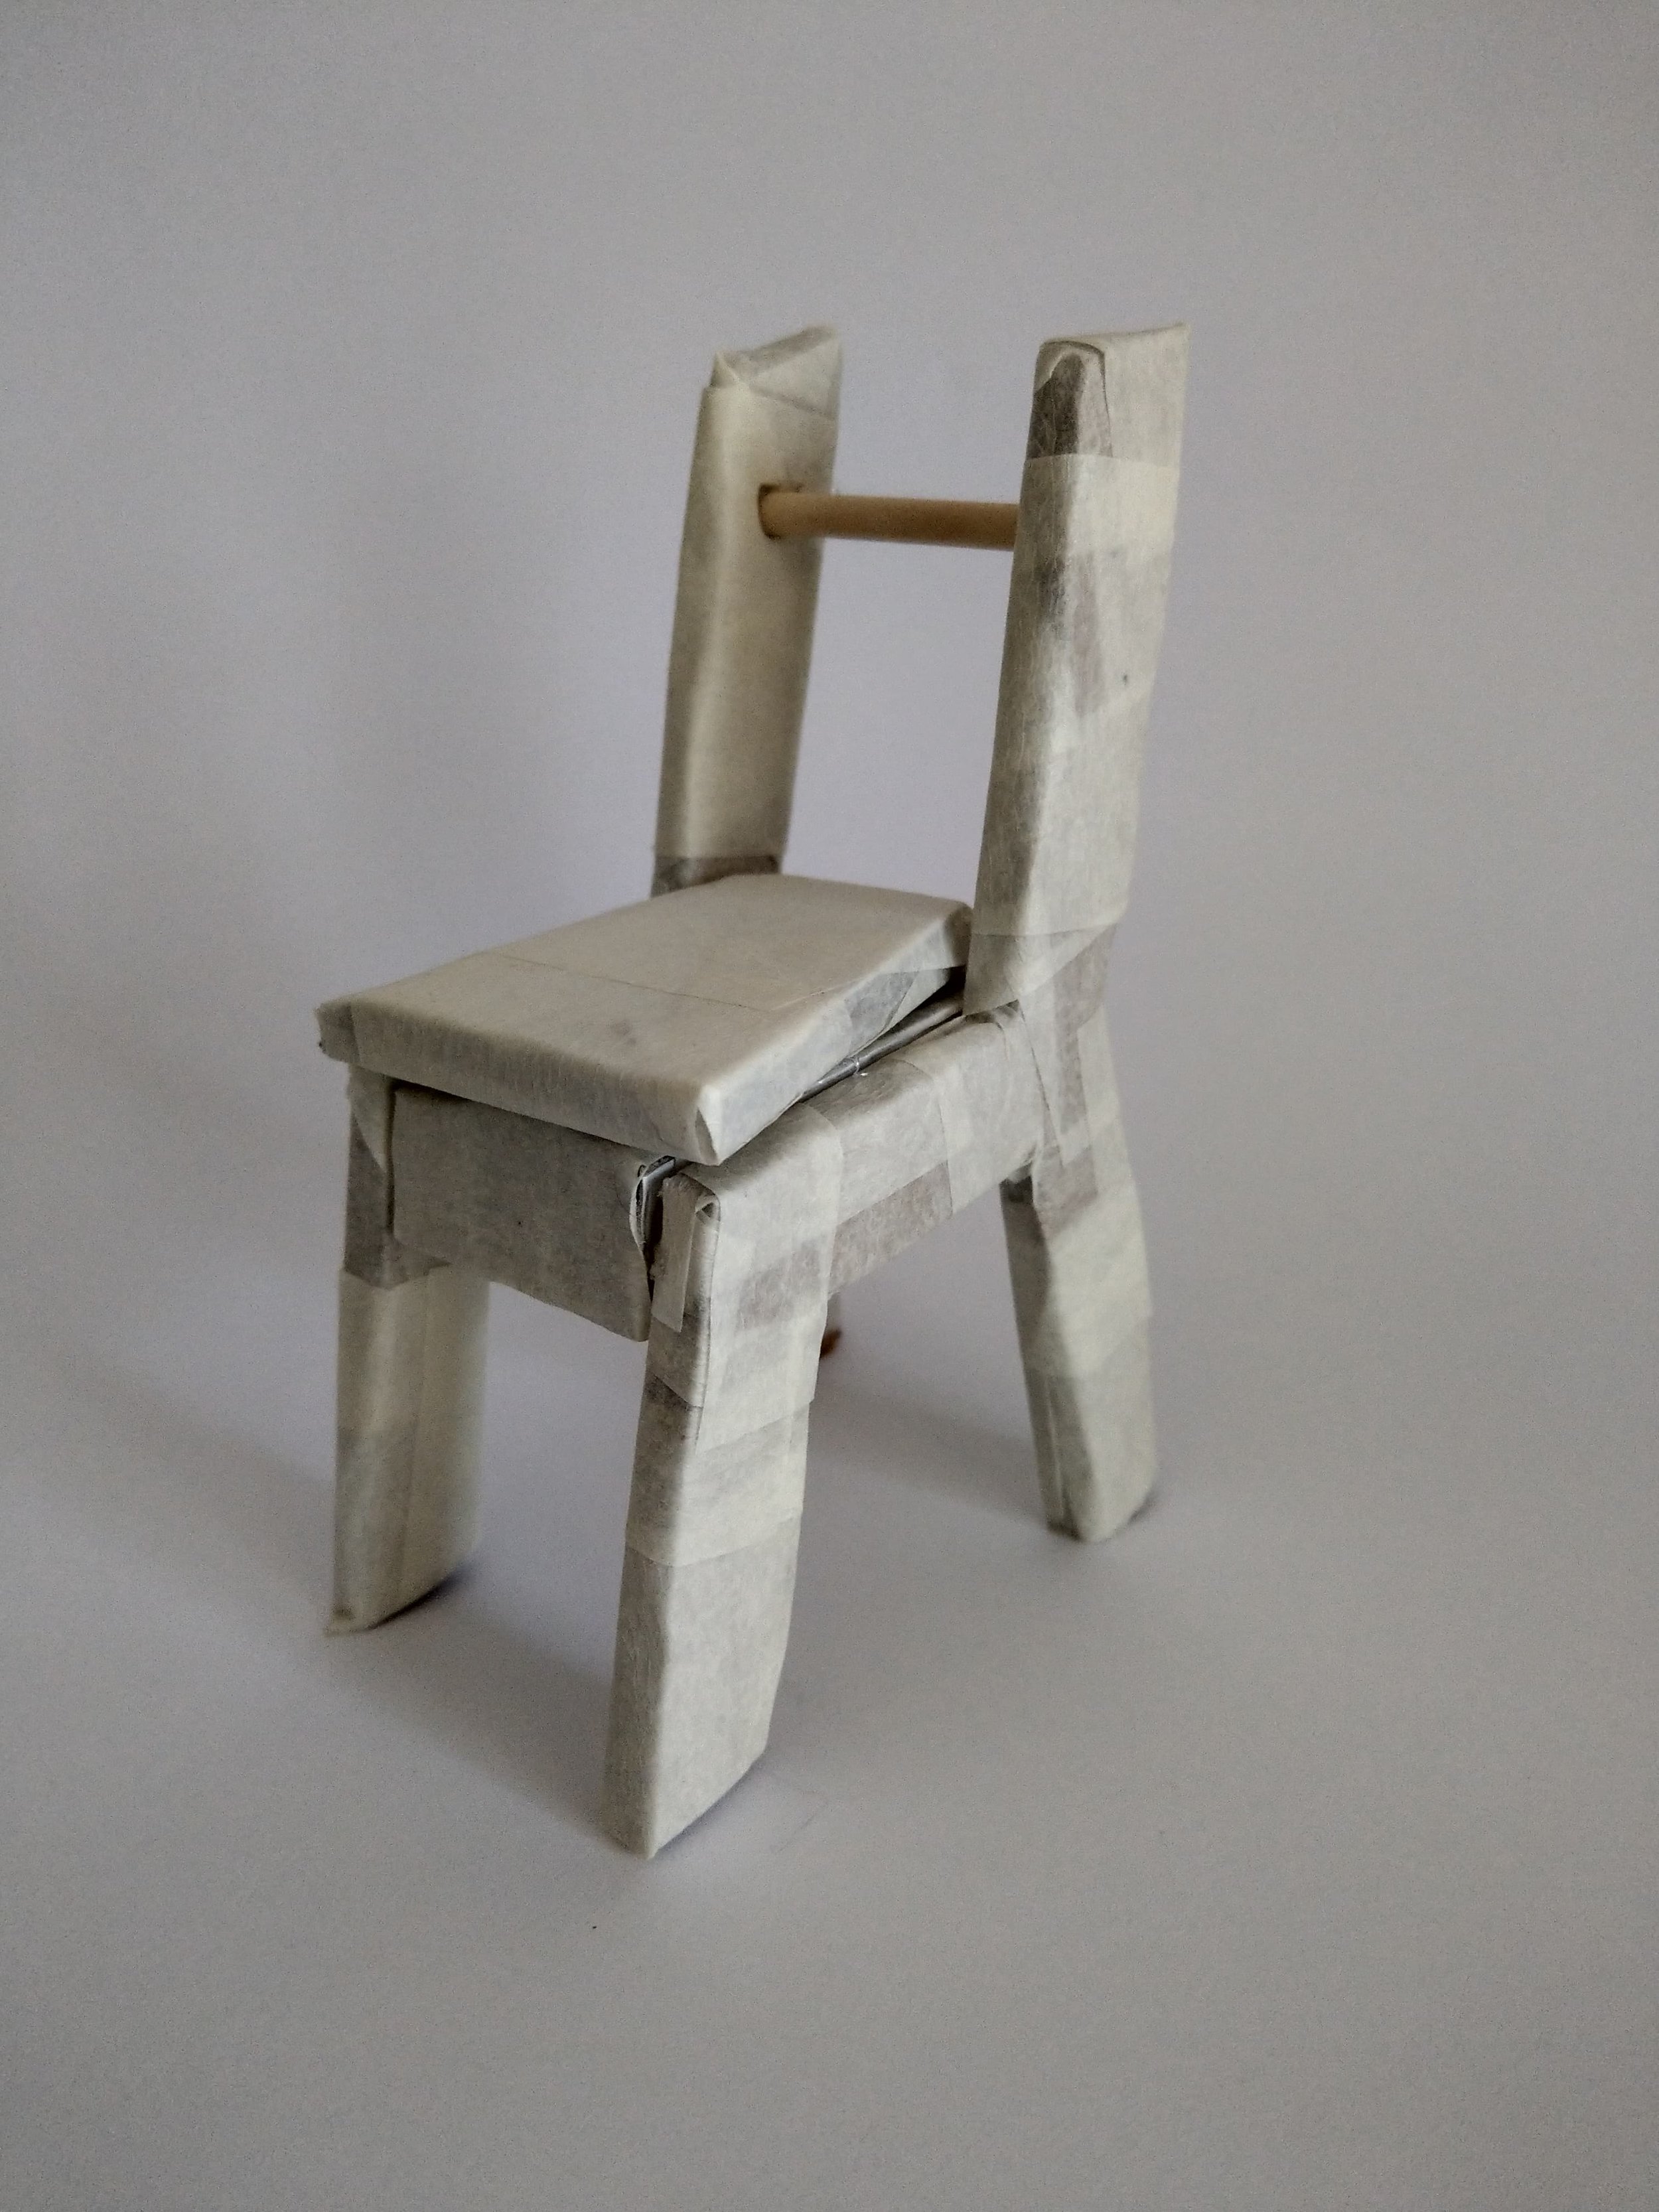
The kitchen chairs are made from several layers of heavy cardboard, glue-gunned together and covered in masking tape. I sprayed them white. I don't love them, but they are sturdy, and I've never had much success previously with chairs, so this was a win for me, even so.
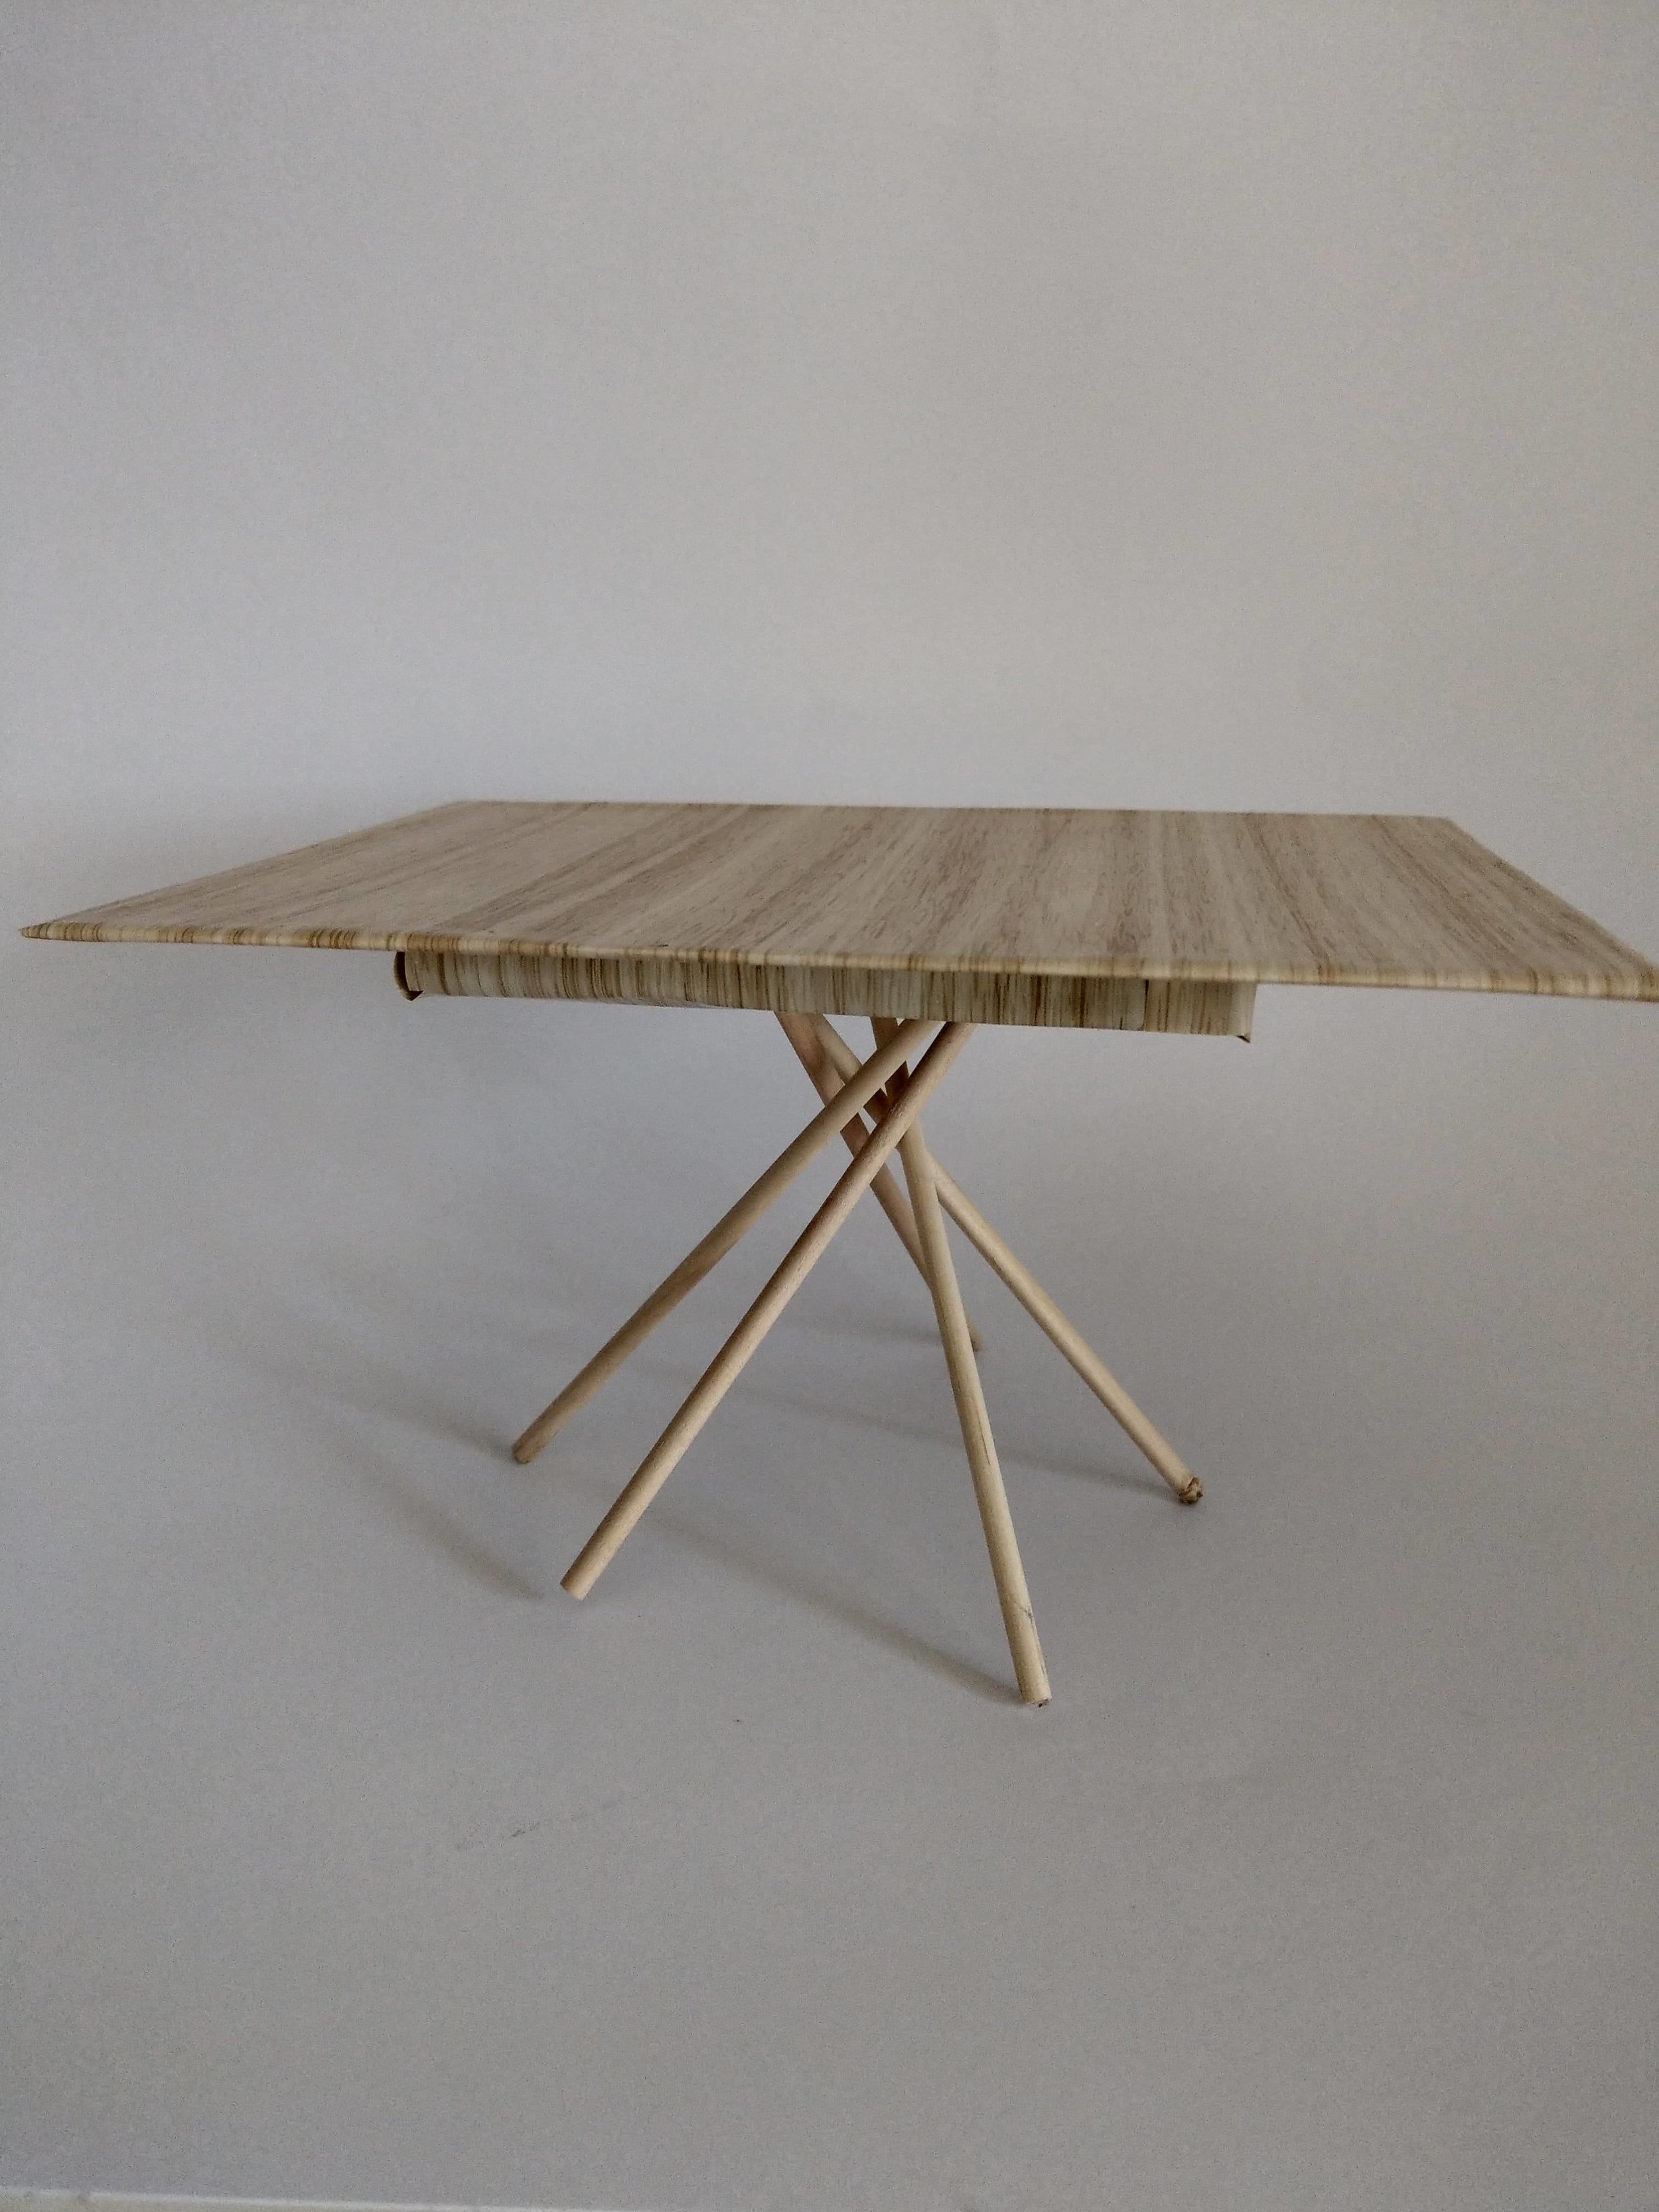
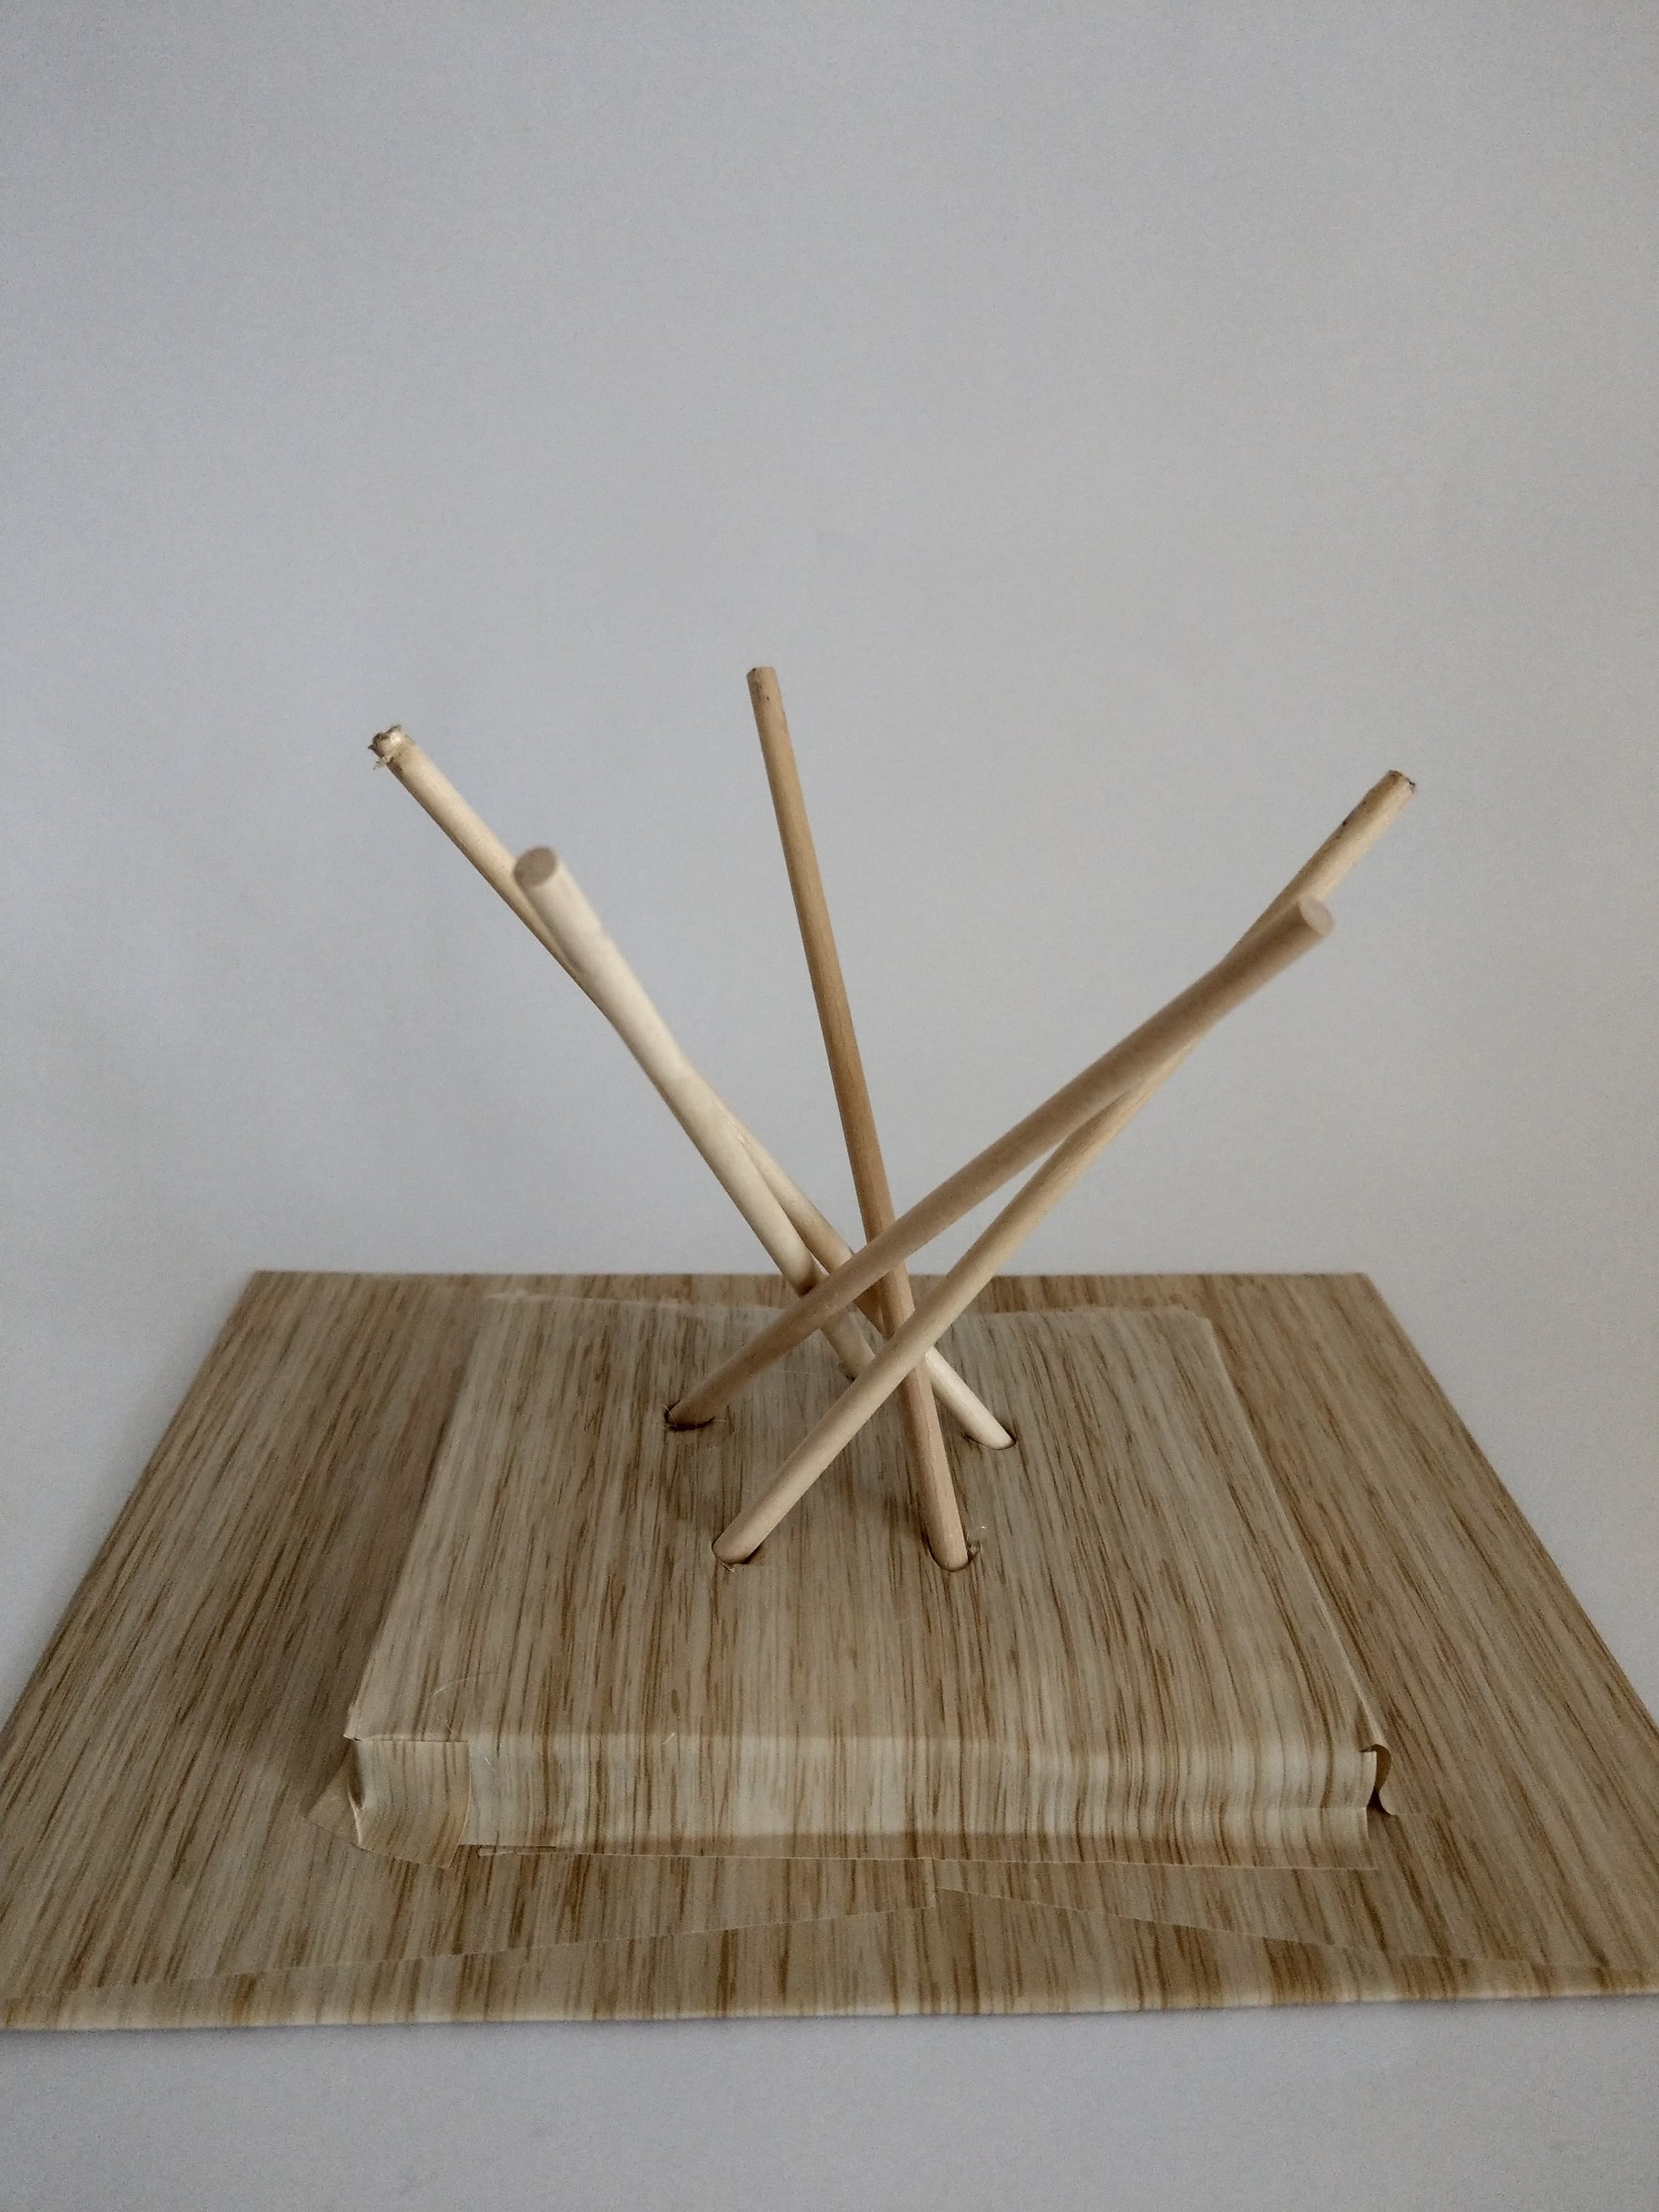
The table is two pieces of study cardboard covered in wood-look contact. The legs are wood dowel from the $2 shop pushed into the thicker layer of the table and glue gunned to stay stable. It was tricky to get the angle right. I wouldn't say it's the sturdiest piece of furniture in the house, but it works.
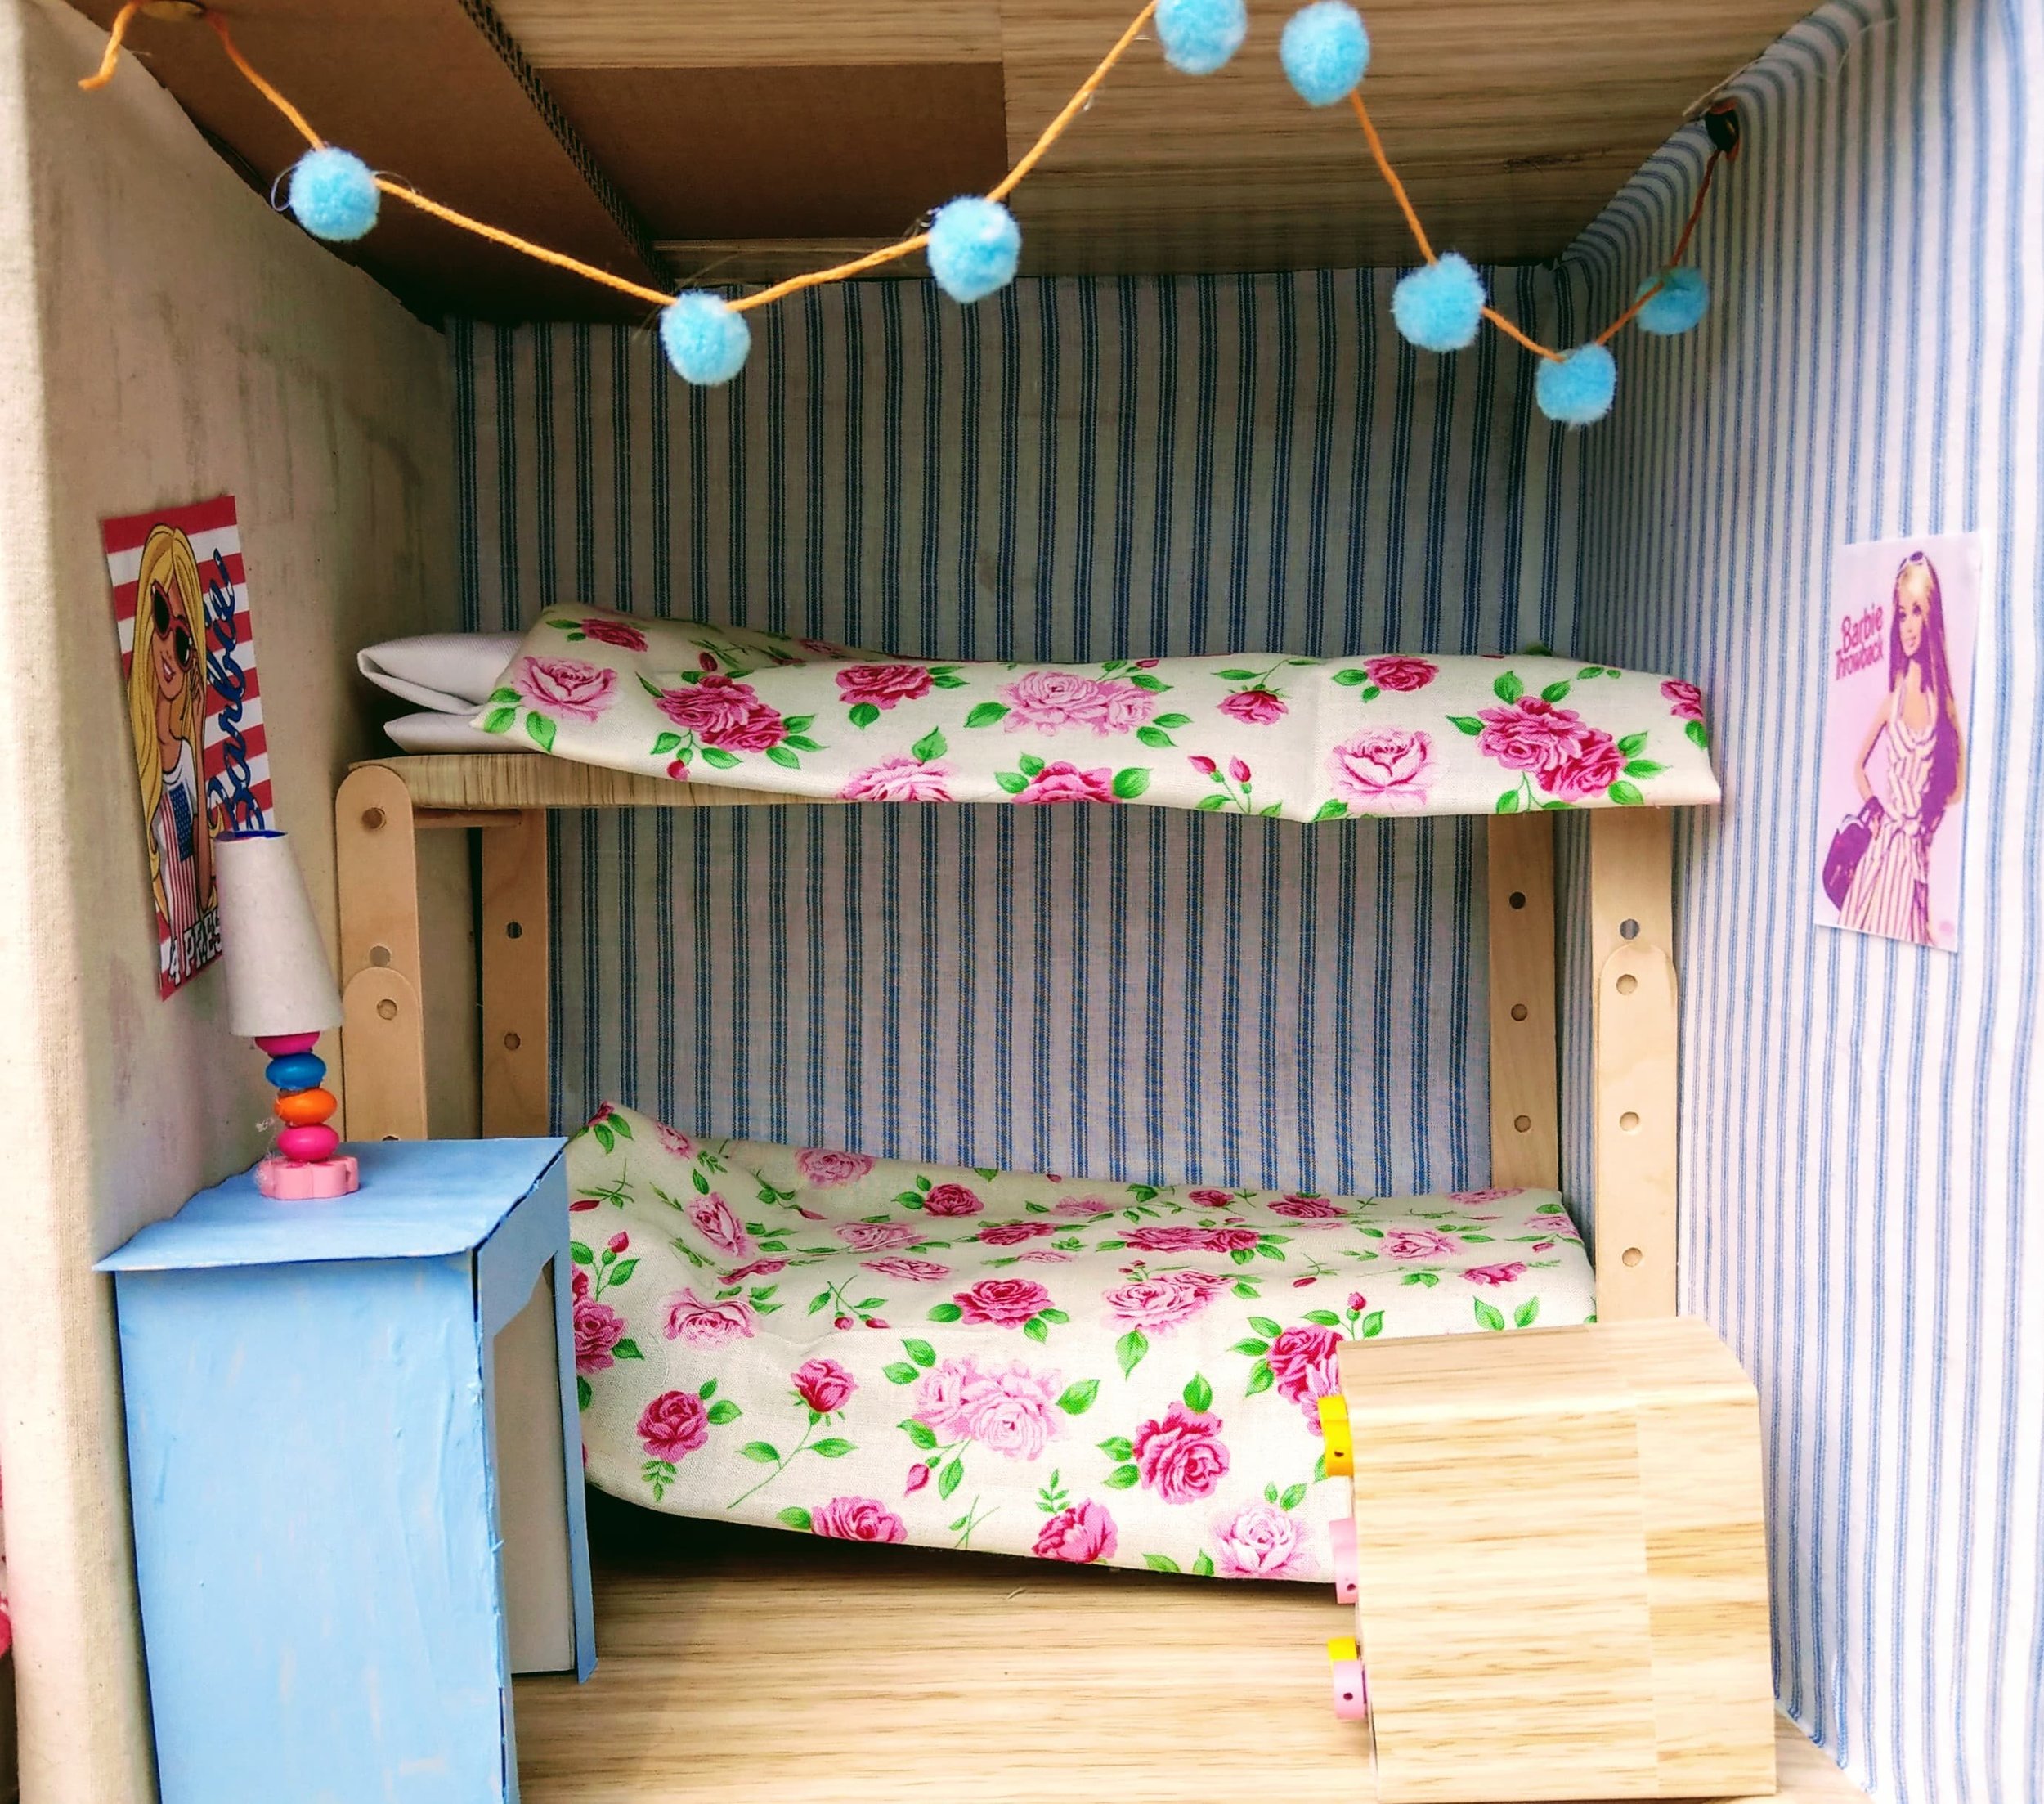
Bedrooms
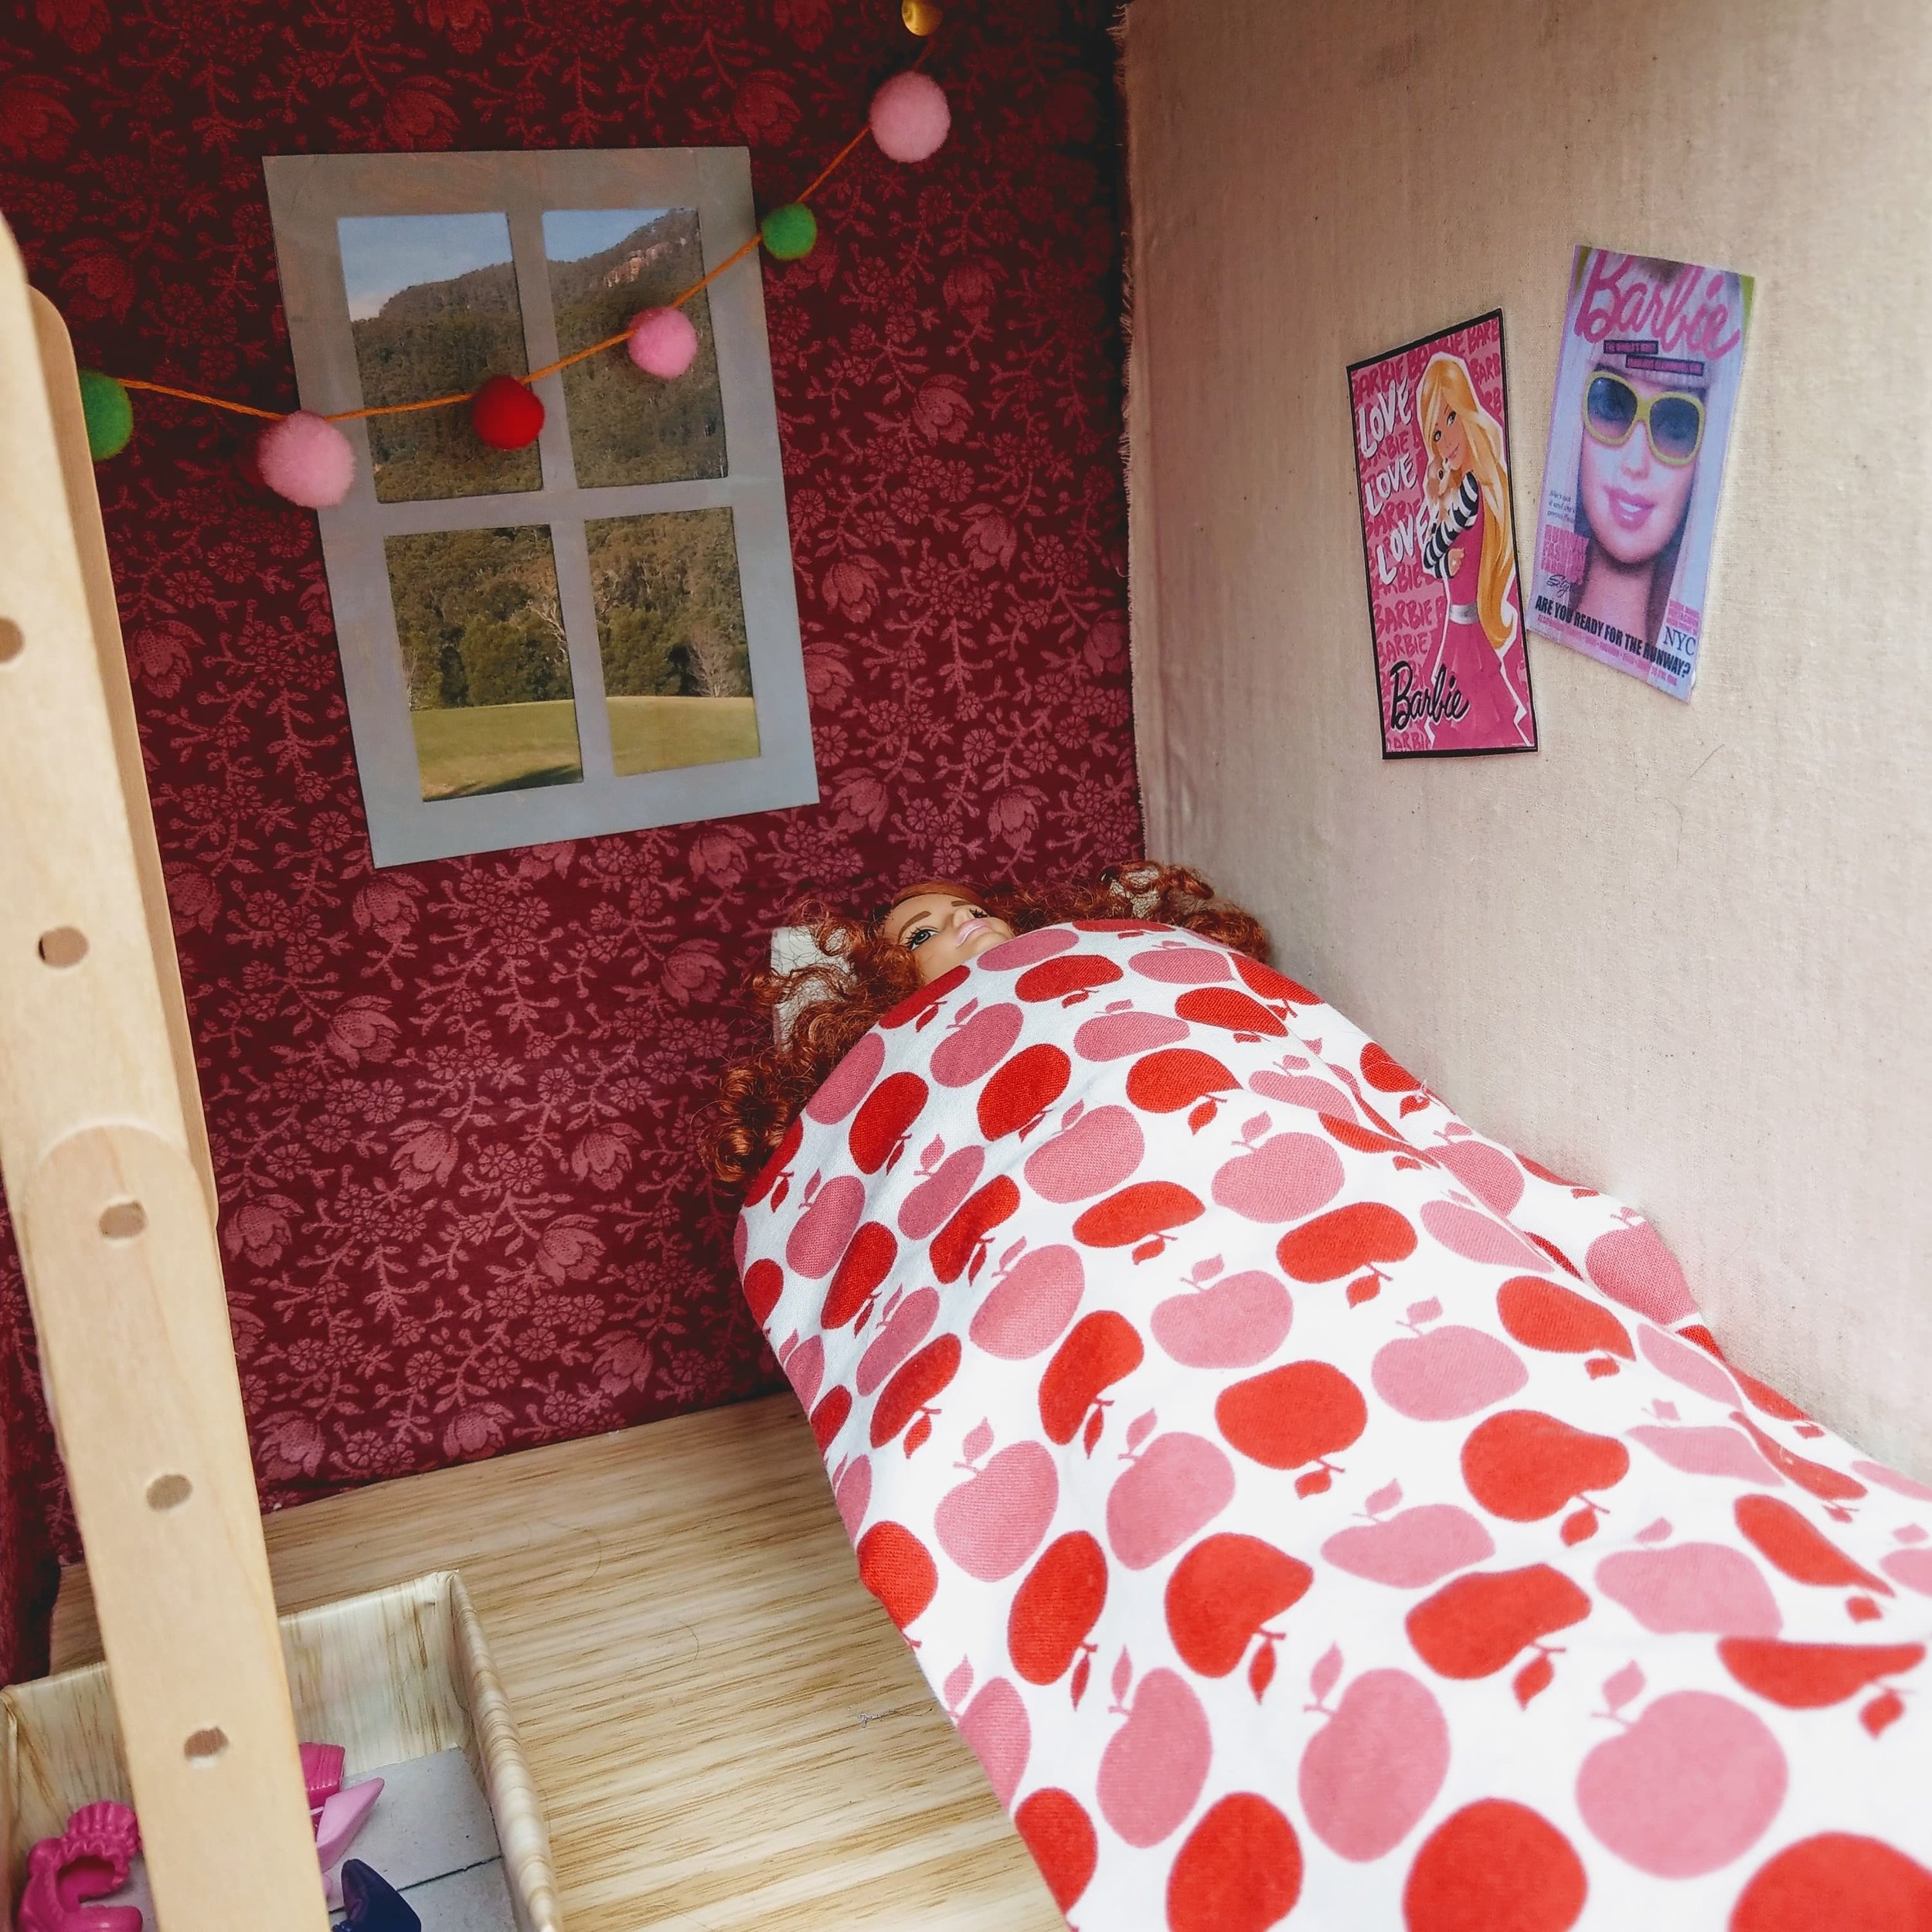
The first bed I made was far too big for the house, so these are beds 2, 3 and 4. the single bed is made from two 1L UHT milk containers, taped together, with a bed head and end glued on. I sprayed the whole bed white, and then added bedding - a small mattress, pillow and doona.
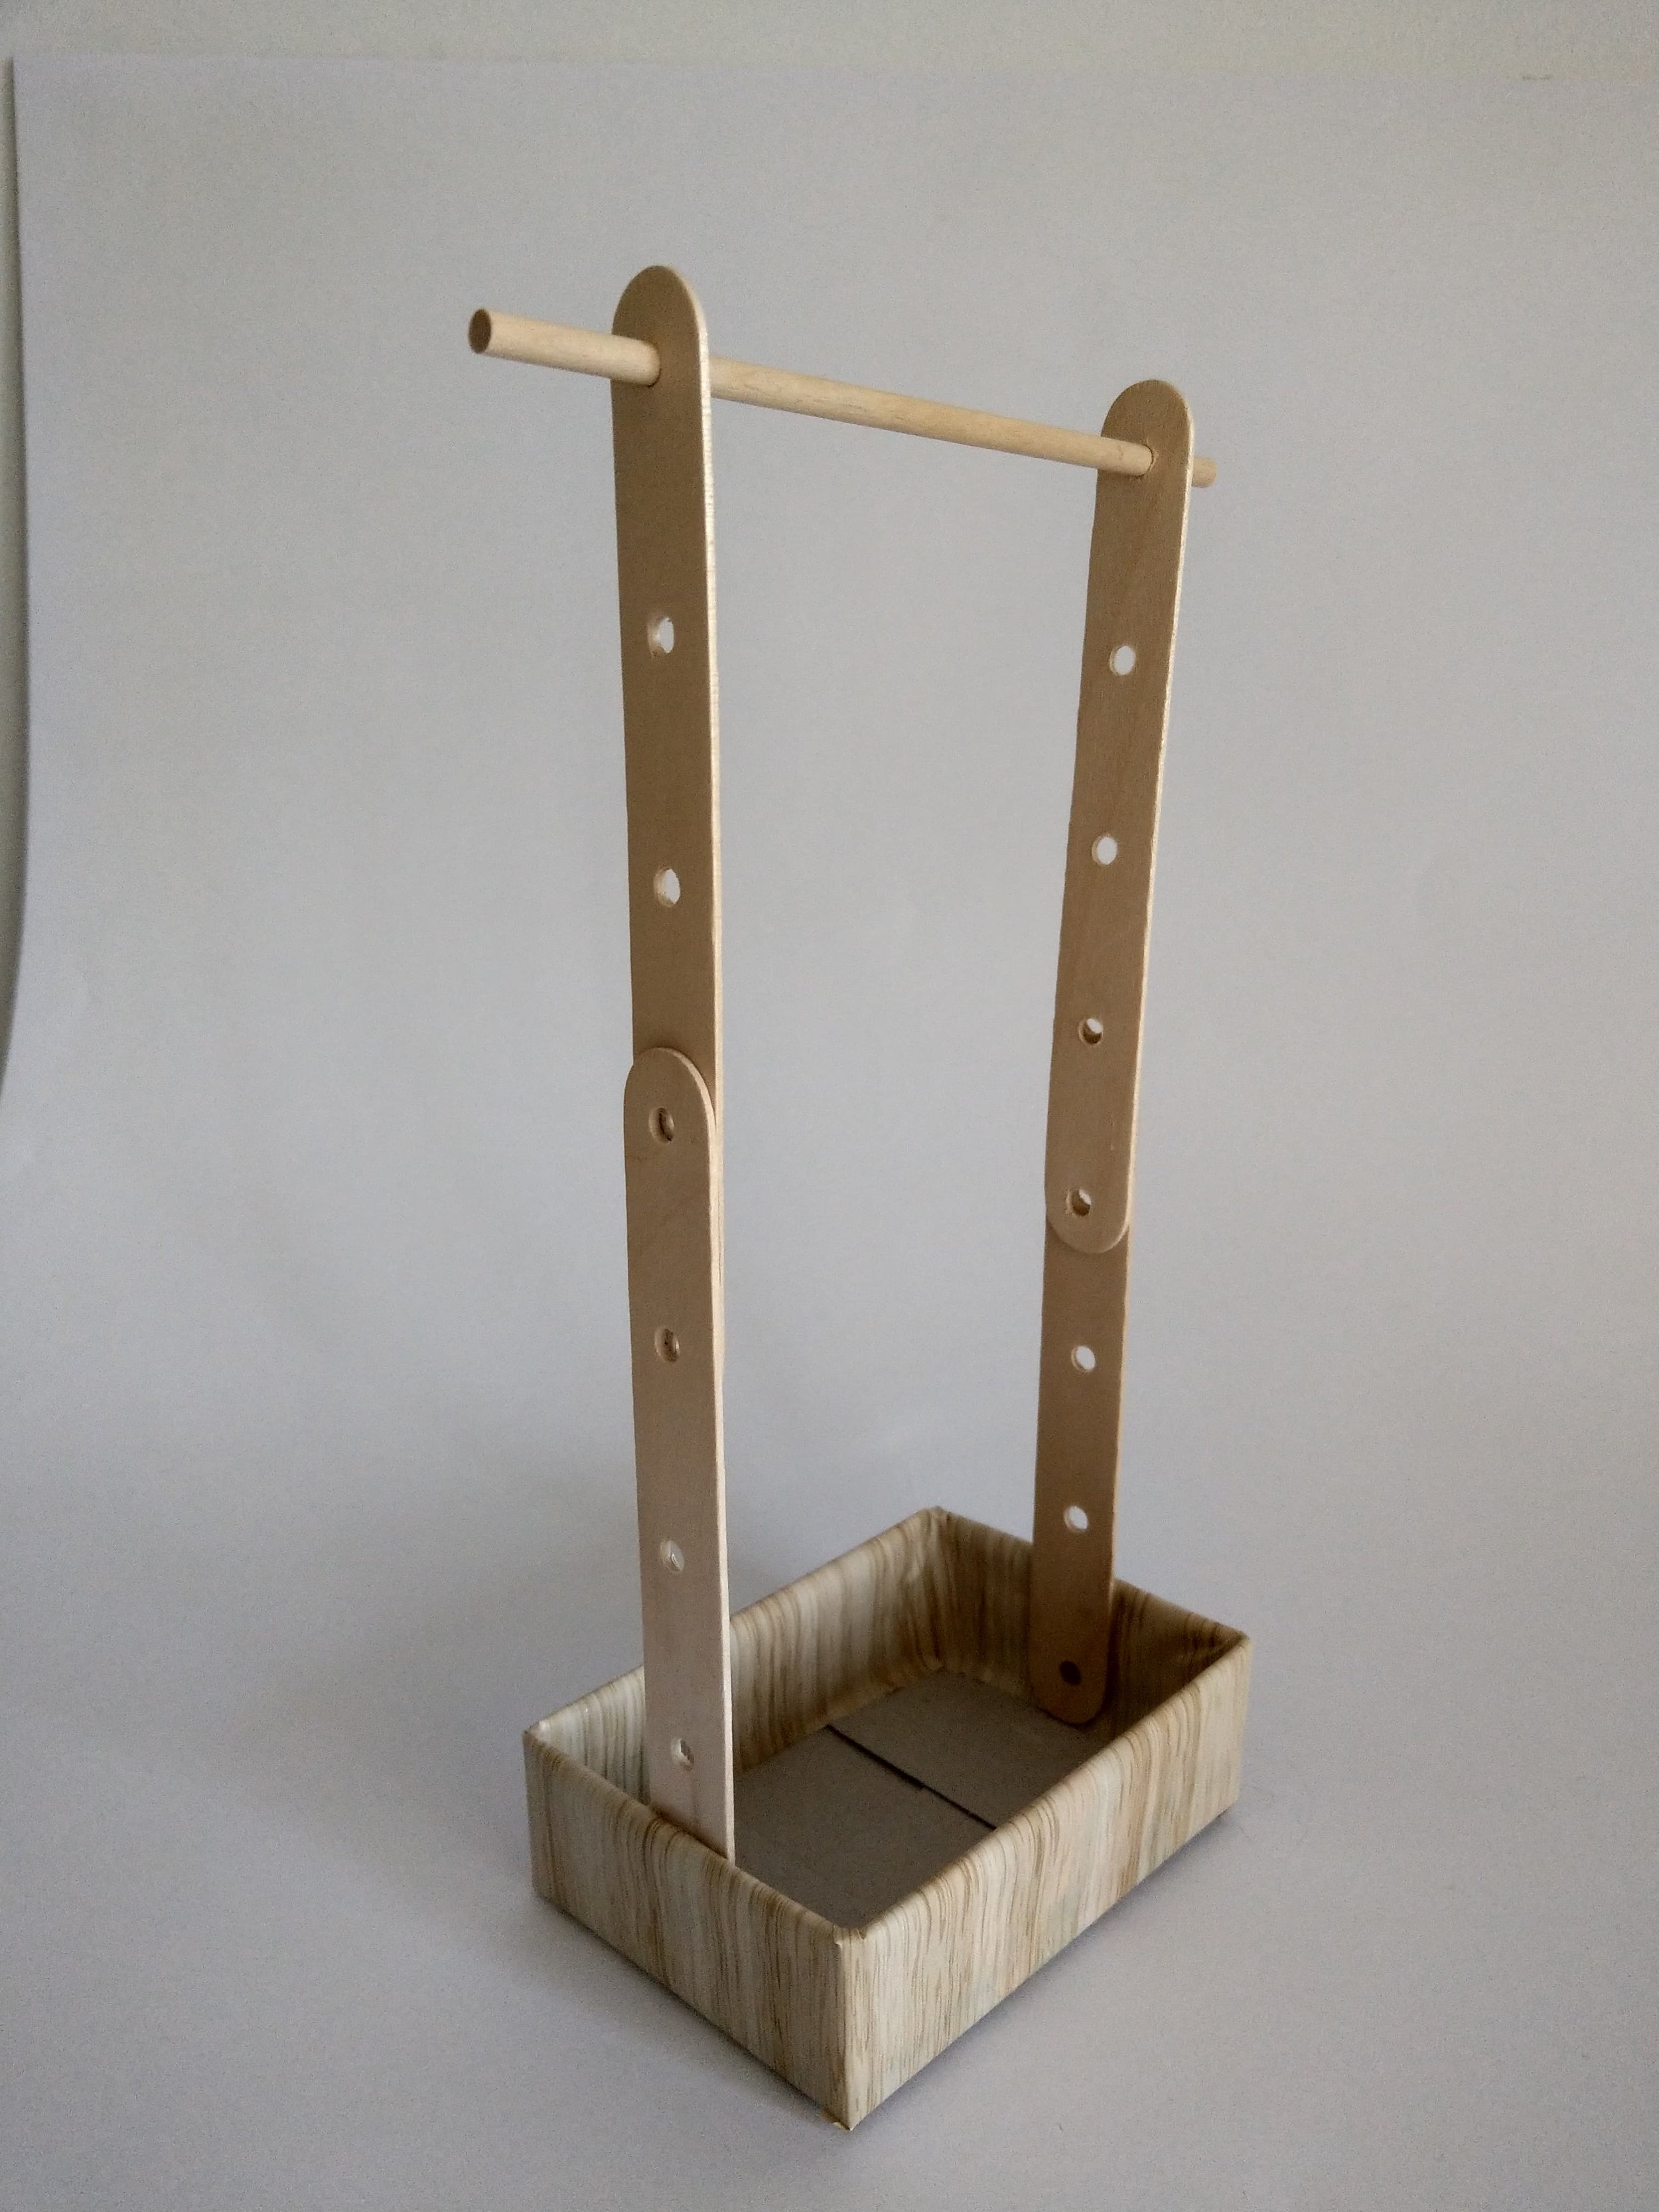
I added in a portable closet, made out of a small box and a hanging rod. Next on my list is to make a few wire coat hangers.
The bunks were fun, but tricky, made from the paddle pop stick set I got at the $2 shop, and cardboard. They fit snugly into the back of the room which adds to their stability. I hope she's not going to move them around too much...
The chest of drawers are large matchboxes, glued and covered with wood-look contact, and the small blue table is based on the shape of a 1L UHT milk container, reinforced with heavier cardboard inside, and with a separate top glued on. You can see a wobbly looking lamp in the picture. It's from beads and cardboard, with hot glue.
Finishing touches are a window in the single room, pom pom strings and some fun Barbie posters.

I love it. The kid loves it. I'm pretty sure the Barbies will love it too. We worked together on it, creating not only a house, but memories too. And the best part is, it was so fun to make. I had the biggest smile on my face the whole time..