
Making. How to make a cardboard grecian urn
One might ask why one would actually want to make a cardboard grecian urn. That is beside the point. The point is that one can. And this is how one does it.
Materials you need:
large sheets of cardboard. We made these with castoff packaging from solar panels, so they were pretty big. Craft knife, pen, ruler, tape measure, calculator and a whole lot of packing tape - preferably on a tape dispenser.
 This one is fairly simple, although I wouldn't make the bottom part. Find something to stand it on if you want that.1. Decide what you want your urn to look like. Something without extreme ins and outs is going to be easiest. Then draw it on a piece of paper to scale. 1:10 is an easy scale to use. So if your urn is going to be 180cm tall and 100cm in diameter, you draw its height at 18cm and width at 10cm.
 This is what your pattern pieces will look like eventually. See the six faces?
2. The urn will not be round. Instead, it is built on a hexagon, so it has six sides. (It's good to think ahead at this point. If you are using one piece of cardboard for the entire urn, you need to make sure you will get six sides to fit on the one piece. If you're using multiple pieces, make sure that each of the six sides are complete on their own piece of cardboard and do not have joins in them.)
From the picture of your urn, you can work out what the dimensions of each side will be. This is the maths bit. It's not hard. Just follow the formula.
 This is the first set of measurements.
Measure the width of your scale drawing at regular intervals - say 1 or 2 cm. Write down the measurements.
 This shows the second set of measurements
For each measurement, multiply by pi or 3.14 and then divide by 6. Write these measurements next to the first measurements. These are what your pattern will follow.

3. Draw a scale pattern for each face of the urn using the second set of measurements. It will look a little bit different from your original drawing.
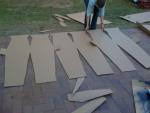
4. Transfer the scale pattern to a full-size pattern and cut it out with your craft knife (watch for carpet or floor underneath you - do it on grass or a mat that can get ripped up). Then trace around the pattern to make each face. It's easier later on if you join as many faces together as you can now - think of continuous paper dolls, all joined at the same point and see the picture above. Cut out the urn with your knife.
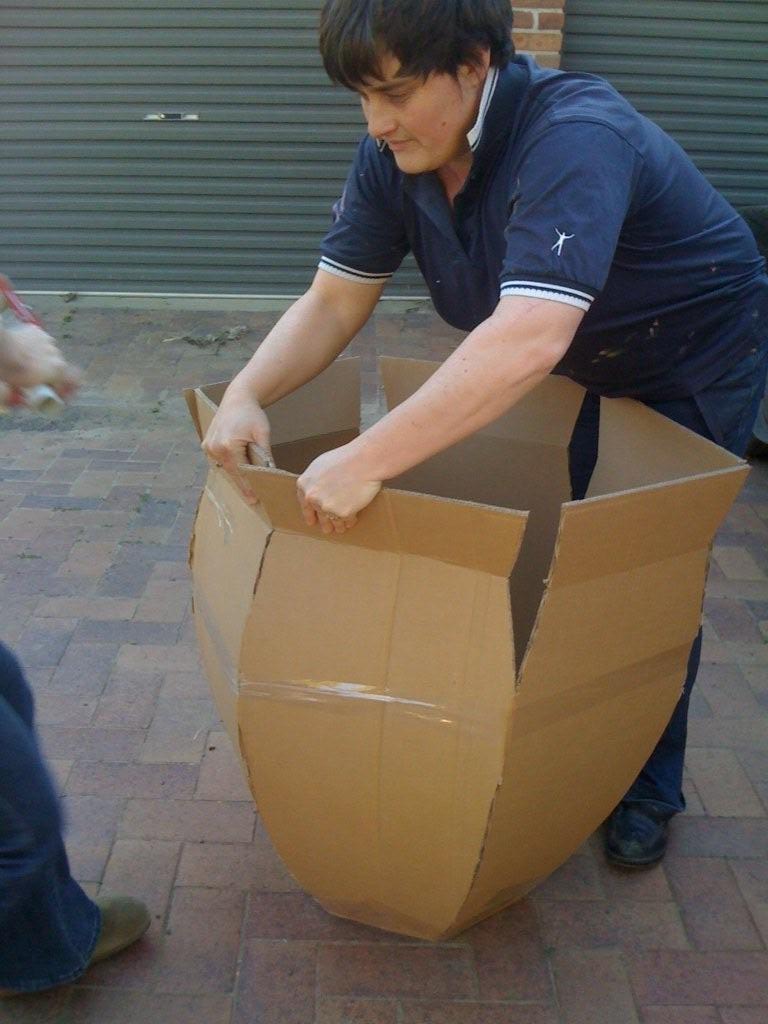 We've taped the middle and the bottom, and now I'm holding the top parts together as we tape around the lip5. Get a friend to help you tape.First, tape around the urn at its widest point where all the faces join and make it into a round shape.
6. Hold the bottom pieces together and tape around firmly.
7. Tape the top neck, holding the pieces together firmly. Then tape the rim sections together. You may find it easier to score these first and fold them outwards. Score on the OUTSIDE of the urn.
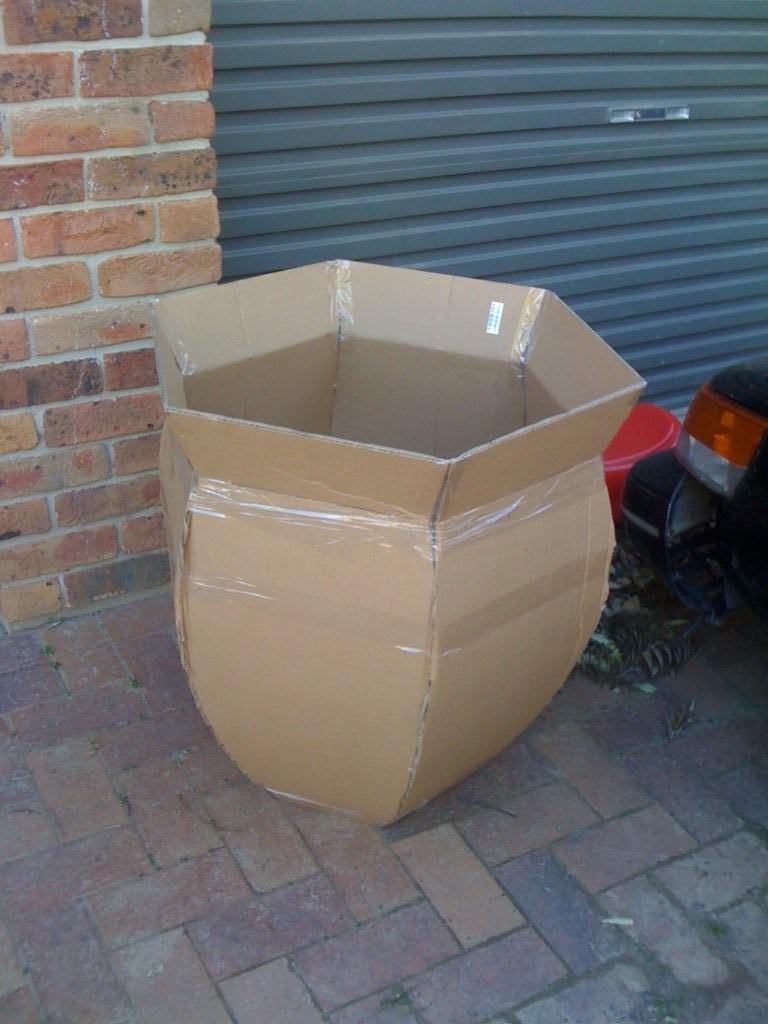
8. Tah dah. A cardboard grecian urn. It's ready to paint now. House paint would go over the tape, or you could try spray paint for a good effect too.
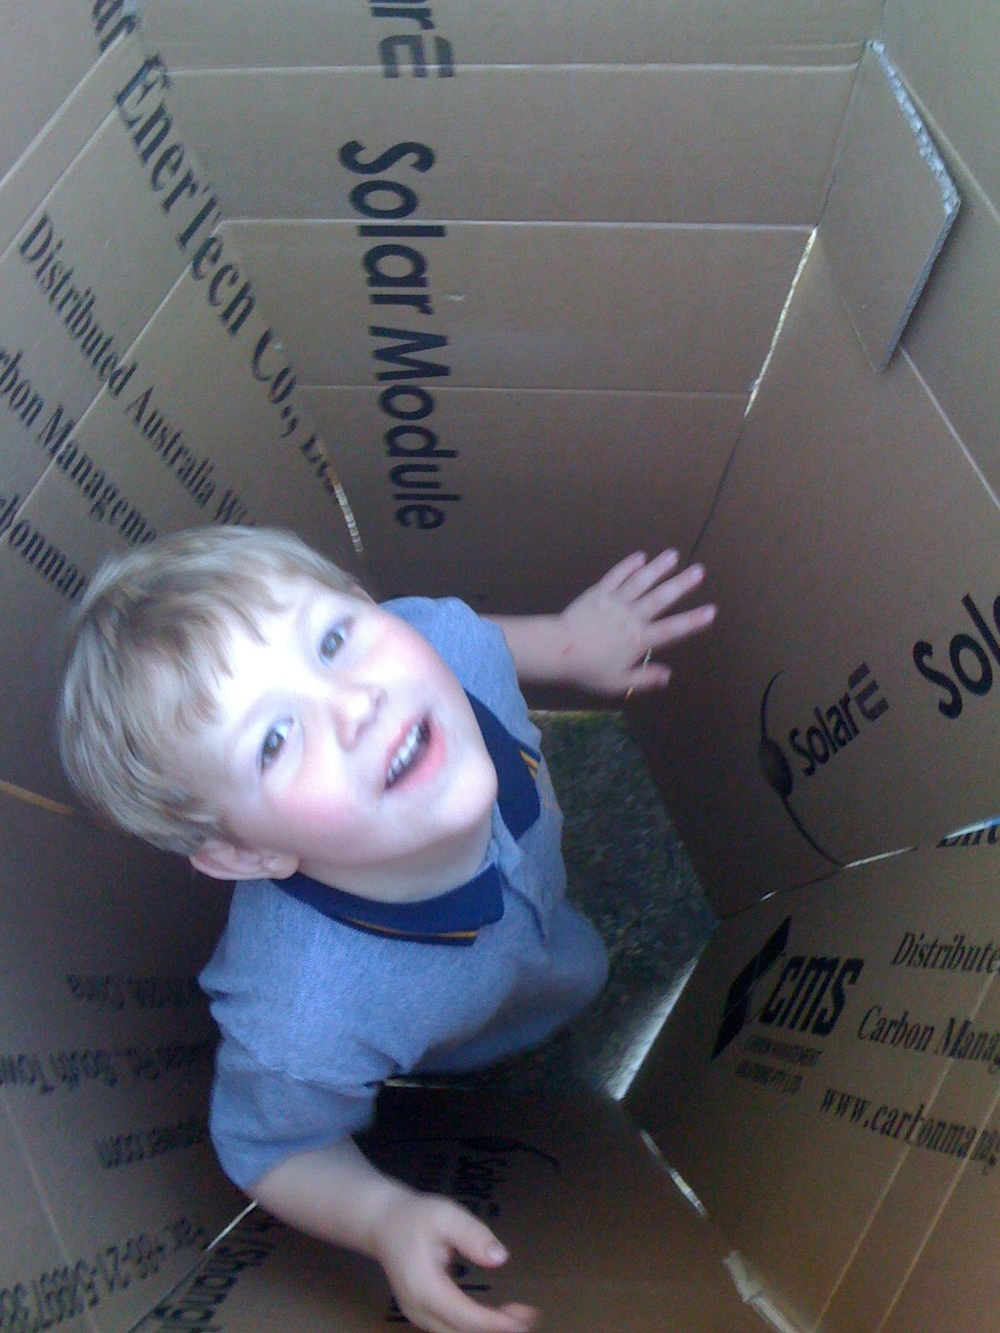
And of course, it's a great game of hide and seek, especially if you do a really big one.